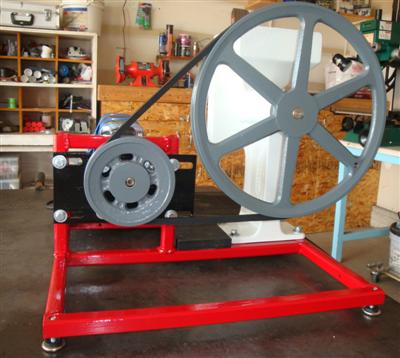
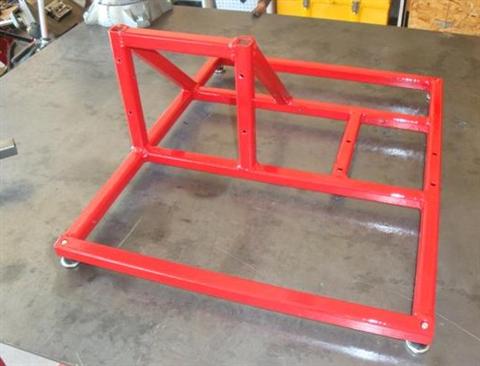
Steel Frame
The main frame is made of 0.75" square steel tube with 0.125" wall thickness. It was galvanized surplus steel, so need to be careful not breathing in welding fumes. I bought 4 lengths of 39" of this steel tube for $5. Sounds good but the catch is that the steel is attached to a cargo net with about 30 rivets. So I had to drill out all those rivets but hey, that's all fun too. The frame was cut to size with horizontal metal cutting bandsaw and MIG welded together. I drilled and tapped the four corners of the base for height adjustment 'feet'. The feet were $2 at the hardware store. Here's the picture of the roughed out frame before and after welding/painting. I like the tractor enamel from Van Sickle but it takes a long time to dry.
Gear-head AC motor
Country Living website recomends a maximum speed of 60 RPM for the motorization of the mill to avoid overheating of the grain/flour. I found a used gear-head AC motor of approximate 1/9 H.P. at the surplus center with an output of 180 RPM at 40 inch-lbs torque. The motor came supplied with the electrical drawing and motor start capacitor for $40. The output shaft is 1/2" diameter with a face-mount 1/4-28 stud bolt pattern. I did have to wait until the motor was in my hand in order to take additional measurements before I could complete the design. I purchased a 4" effective diameter cast iron pully for $10 to bring the final grain mill speed down to the
suggested 60 RPM. It uses a standard 1/2"x48" belt ($5 at surplus center) for power transmission. The 1/9 H.P. motor seems a bit weak for grinding (motor stalls out) so I'm changing pulley diameter for lower RPM and higher torque. I would go for a 1/4 H.P. gear head motor next time. With the lower power motor you can still grind but you have to send it through 2-3 times to get the finest grind.
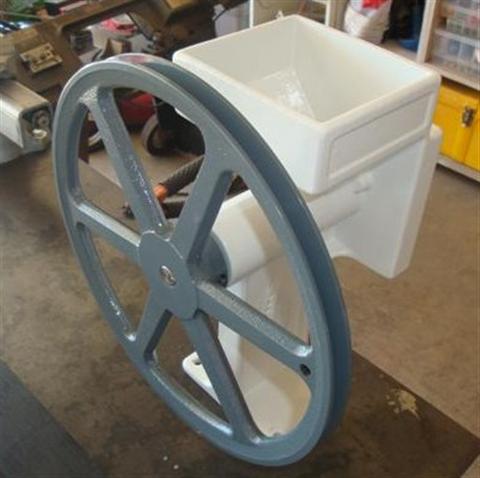
Country Living Grain Mill
The Country Living Grain Mill was pretty expensive but I got a deal on a blemished one. They threw in the blemished mill, a corn auger and power handle for $350 plus shipping. I haven't figured out what
is blemished about it but it could be paint bubbles. Overall the grain mill seems to be quite solidly built and mounts with four 1/4x20" bolts at the base. The holes in the base might fit 5/16" diameter but I never
use that size. The color is white and again I had to wait until the mill was in my hand in order to take measurements to finalize the design.
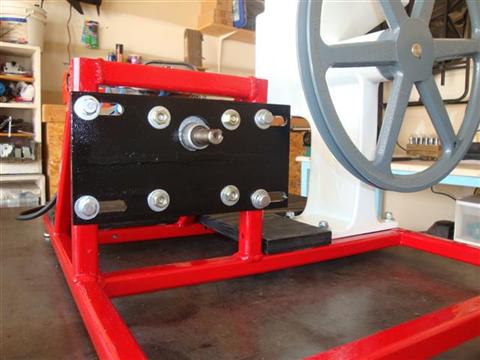
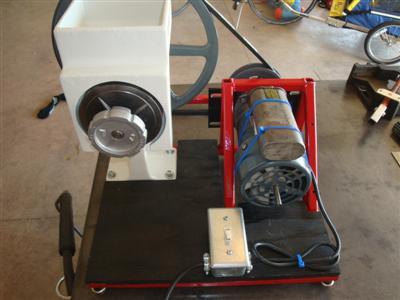
Motor Mounting Bracket
In order to mount the motor and be able to adjust belt tension, I had to build a motor mounting bracket. I used 2 peices of 3/16" thick by 2" wide mild steel; cost about $5 at the hardware store. I didn't have any wider
plate so I welded the 2 pieces of this together to make a plate that is 4" by 8". After getting the bolt pattern and shaft dimensions from the motor, I drilled out the plate to accomodate the motor. Then I milled 3/8" wide by 1" long slots for belt tension adjustment bolts (these attach the motor and bracket to the frame).
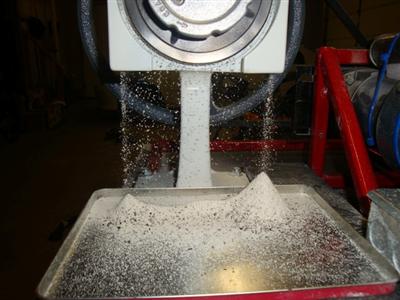
Grindn' Grain
The motor seems to be adequate for grinding so far. I ground up a bag of
white northern beans without any issues. The plates do get hot after a lot
of grinding. After seeing how long it takes to grind a bag of beans, I am
very glad I motorized the grinder. I tried a bag of pinto beans but either
the beans were more wet or pinto's don't grind well in this thing because
the grinding plates got clogged up quickly. Grinding sure makes a big mess!
After using the mill for a couple of months I've seen the motor stall out unless making sucessivly finer grinds on wheat and corn. I'm reducing RPM for higher torque to emliminate the stalling of the motor. It grinds well for extremely dry grains like wheat, peas and black beans. Softer materials (even pinto and garbanzo beans) it has trouble with. The wheat flour is excellent!
Link to the initial design of the motorization.
Update 4/13/11
After about 9 months' use of the grinder on wheat, corn and beans, I continue to have issues with the motor stalling out. I'd like to turn it on and walk away but with the motor at the edge of it's power output, I have to babysit the thing. This motor has 40 inch-lbs of torque at 180 RPM. I feel that running a gear ratio of
6 provides adequate torque and the torque would be 40*6 = 240 inch-pounds. With this gear ratio, my mill runs at 30 RPM, which is painfully slow. To meet the 60 RPM maximum recommended speed level and maintain the 240 inch-pounds of torque, I'd like to upgrade from a 1/9HP motor to a 1/4 HP. Due to the low RPM requirement, it is difficult to run a regular AC motor at 1700 RPM and gear it down without multiple gear stages. Also it is very expensive to purchase a gear-head motor that is not surplus. So I've decided to keep the 1/9HP motor I have and add an additional 1/9HP motor so that both motors are active simultaneously with a combined power of near 1/4HP. If available at reasonable cost I would go for a single gear-head motor at 1/4HP or larger at 60 RPM to avoid any stalling due to difficult grinding materials.


Design01
Design02
Design03
Design04
Design05

Copyright 2010, Greg Miller
https://www.angelfire.com/80s/sixmhz/grainmill.html