Jackson Gamers' Russian Civil War Game
Capturing the Dragon
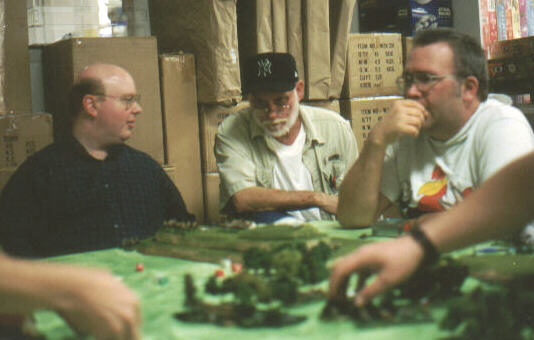
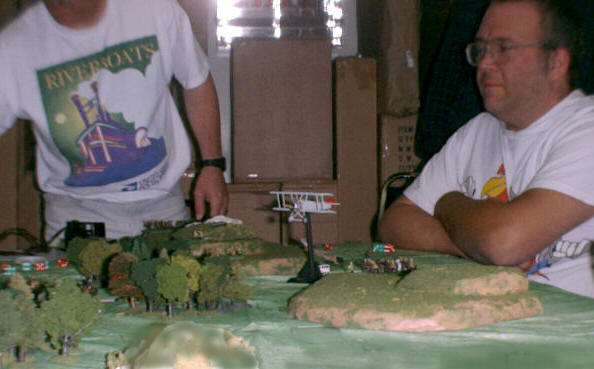
'Red' Bill Estes (on left) and 'White' Fred Diamond (on right) chat with Jack Bertram.
Jack is a photographer and reporter for our local newspaper, The Clarion Ledger which ran a nice article about the game and our group. Jack stayed with us for the entire game - a very thorough chap!
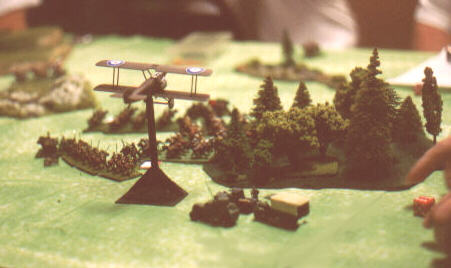
The white aircraft overflies cavalry and the white armored car section
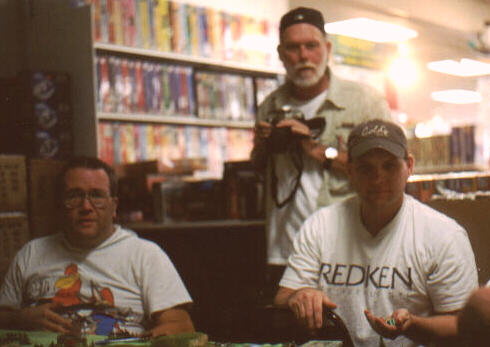
Whites Fred Diamond and Larry Reeves (seated)
The whites are telling the usual lies to the foreign journalist (Jack Bertram - standing). If only he would come to Moscow where he could read Pravda to learn the truth of the inevitable Bolshevik triumph!
RED BRIEFING - Attention Heroes of the Workers' and Peasants' Red Army MISSION - The start of our victorious offensive is at hand! You are in command of the Soviet Armored train "Hammer of the Proletariat". Unfortunately deferred maintenance has resulted in the train becoming immobilized in a small valley near the village of Dodelbein. You must guard the train until you can have it repaired. An engine has been dispatched with a carload of repair parts and additional troops. The engine of the repair train is too light to pull "Hammer of the Proletariat" to safety.
FORCES - You have two brigades of mounted forces and one of infantry, plus the train's own infantry unit.
The Battalion of Infantry which accompanies the "Hammer of the Proletariat" consists of two units of infantry each with an attached machine gun. It may be dismounted from the train or it may remain mounted. All the other weapons of the train must remain mounted on the cars.
The "Todelbein revolutionary guards and agricultural workers' Brigade " consists of two units of infantry and one machine gun. This unit is not exactly of the best quality. It always is +1 to the die when testing morale, and rolls one D6 less than normal when firing rifles or it's machine gun.
The 8th Cavalry Brigade has been dispatched from the First Cavalry Army to aid you. This consists of 3 units of Cavalry and one machine-gun Tchanka. This is an elite formation and always rolls -1 to the die when testing morale and one extra D6 when fighting hand-to-hand. It may enter the table from the north on any die roll except a 5 or 6 on a D6 during turn 1. If it fails to enter, it may try again on turn 2, then 3 etc.
The 11th Cavalry Brigade dispatched from the First Cavalry Army has reached the field and may be set up in any location, mounted or dismounted.. This consists of 3 units of Cavalry and one machine-gun Tchanka.
The Train itself has a field gun mounted at the rear, and a heavy gun mounted in the turret forward. There is one machine gun for each side of each rail car (not counting the locomotive).
The trainload of spare parts also contains two units of infantry and a machine gun mounted on a flatcar. It will start from the third station up the line on turn one, if you roll a 3+ on a D6. If it fails this die roll it may test again on the next turn, etc. The trip to the next station will take one turn.
After reaching the second station up the line, it may start on a die roll of 3+ on a D6. If it fails this die roll it may test again as above. The trip will take one turn.
One turn after it reaches the next station up the line it may start for your location, die rolls as above. Once successfully "started" it may enter the table on the next turn.
In addition, the aviation department attached to the 10th army will provide an airplane to fly cover over your forces and attack the enemy. It will be armed with machine guns and two bombs.
One aircraft will arrive on turn 2 if you roll 3+ on a D6, otherwise roll again on the next turn. Fuel constraints will only allow the aircraft to stay over the board one turn.
After bombing and strafing the enemy, it may fly to the rear and land to refuel/rearm and will return to the skies over your forces two turns later if you roll 4+ on a D6. Failure on this die roll means the airplane will not return.
VICTORY CONDITIONS - Points will be given for:
If the White victory points exceed the Red, the Red commanders will be shot! All power to the Soviets!

Tough decisions for the White commander
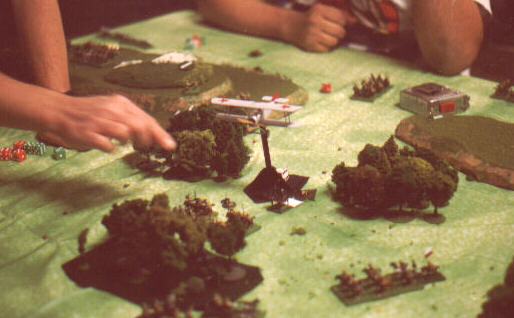
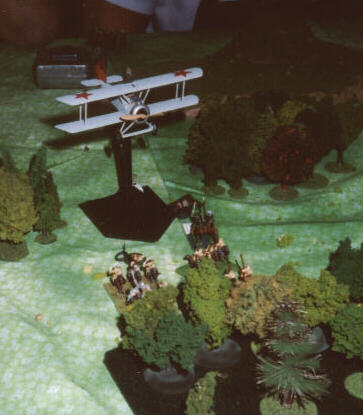
The red aircraft (shown) was much more effective than the white plane, dropping bombs and machine-gunning the white cavalry. Neither aircraft came back for a second mission once it had left the front. The red plane showed up early, and the white aircraft did not show up till after the red flier had left the field.

The "red eagle" overflies a white cavalry unit

Another white commander - Tim Latham
WHITE BRIEFING
MISSION - Our intelligence says that the engine of the Bolshevik armored train "Hammer of the Proletariat" has broken down. The train lurks in a small valley, awaiting repair or a replacement locomotive. Now is the time for a victorious stroke! Your cavalry division has been assigned to capture this beast in it's lair.
FORCES - You have three brigades of cavalry, two of infantry, a battery of field guns, and an armored-car section of two cars.
Arrivals & Set-On The cavalry, the artillery battery and the 4th Infantry Brigade may set up on the table, within 2 feet of the east edge.
The 5th infantry Brigade and the armored car section will enter from the south edge of the table on turn 1.
In addition, the aviation department attached to the 1st Cossack army will provide an airplane to fly cover over your army and attack the enemy. It will be armed with machine guns but no bombs. You may roll a D6 for the pilot's quality. 1,2,3,4 = Russian pilot, average quality. 4,6 = British pilot (Interventionist) who may add +1 to all die rolls.
The aircraft will arrive on turn 2 if you roll 2+ on a D6, otherwise roll again on the next turn. Fuel constraints will only allow the aircraft to stay over the board for three turns. At the start of each White turn after the first turn of the aircraft over the table, roll a D10 and if the result is "0" then the pilot must immediately fly back to the airdrome.
VICTORY CONDITIONS - Points will be given for:
May God save Russia and the Czar!
Another attack by the Red aircraft!
This plane stayed over the field long enough to make three attacks, and all were damaging to the white forces. The White aircraft was not so effective, leaving soon after it's arrival.
White commander Fred Diamond bemoans the lack of anti-aircraft guns.
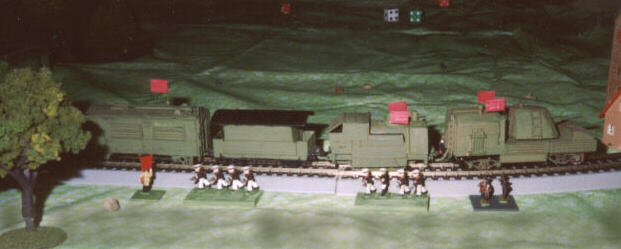
The immobile Hammer of the Proletariat
Although the train could not move, it still had it's two cannon, and numerous machine guns, along with it's integral infantry component. The Reds were cunning in that they positioned the train (probably by pulling it with teams of horses impressed from the local peasants) at their extreme left, thus forcing a good part of the white forces to spend the entire game marching the length of the table.
The game-master must admit that he had not thought of this and it was most effective.
The white aircraft in action
Dispatch - From the game master: Notes: The Red armored train Hammer of the Proletariat was NOT ever even seriously threatened. The RED positioning it at very nearly the extreme norther end of the battlefield had removed two White units from the battle. They just could not move fast enough to help as the Red artillery and machine guns shot up the remaining reds. Perhaps there is a red spy in the game-master's computer!
The victory point imbalance at the end of the game was obscene. The Reds were glutted with aproximately 29 VPs while the Whites had less than 10. God save the Czar indeed. It appears that the Reds have been victorious in 3 of the last 4 RCW games. All power to the Soviets!
Go to the Newspaper account of this game in The Clarion Ledger
Go to our Russian Civil War Period Page
Return to the Master Index of Photos and Games
Return to the Jackson Gamers' Homepage
Angelfire - Free Home Pages
Free Web Building Help
Angelfire HTML Library
htmlGEAR - free polls, guestbooks, and more!
Thank you for visiting The Jackson Gamers' pages at Angelfire. Please come back and visit again!