The Battle of Springfield
Page 2
Photos by:
Ed Sansing
Bryan Thompson
Robert Whitfield

Photo by Ed Sansing
The continuous pressure of the British in the north forces the stream. The American Light Division was only able to slow the advance and could never really halt it.
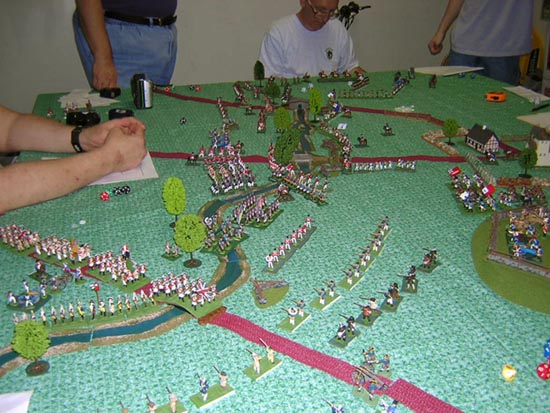
Photo by Ed Sansing
Looking from north to south you can see the British crossing the stream in the foreground. In the center Robert Whitfield's British units have put very much pressure on Sean Pitts who commanded the "trip wire" defenders on the stream. Phil Young is bringing one of his hidden American brigades forward just south of the gun hill. On the extreme southern part of the field, the British dragoons still hold the attention of Bill Estes's Continental brigade.
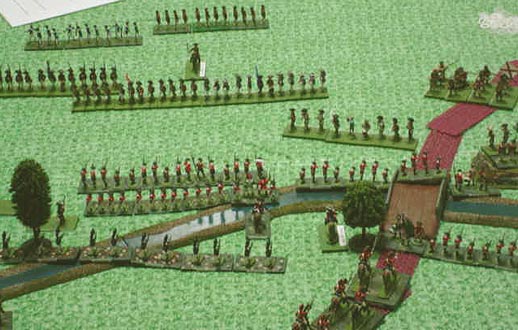
Photo by Bryan Thompson
Linear tactics! A view from behind the British lines after the southern bridge was taken by them. The British dragoons have withdrawn from the constricted battlefield edge (pinned between the "edge of the world" and Bill Estes' sturdy Continentals, and are trying to find some maneuver room.
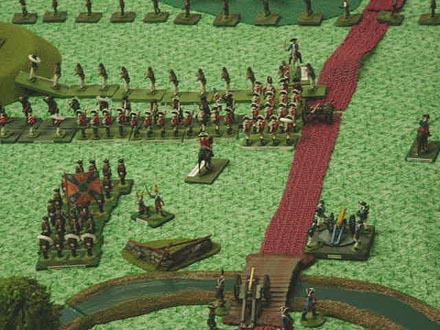
Photo by Bryan Thompson
The Northern bridge seized by Fred Diamond and Jay Ainsworth's British and Hessians. Two British guns are moving across and prepare to blast the Americans with cannister. A column of British is in melee with an American line, in a hand to hand struggle that lasted for 3 or 4 turns.
|
AMERICAN ARMY General Washington (Command +2)
Light Division - Col Morgan (Command +0)
1st Division - MGen Lafayette (Command +1)
|
BRITISH ARMY General Clinton (Command +1)
Advance Guard - BGen Leslie (Command +0)
1st Division - MGen Cornwallis (Command +1)
2nd Division - MGen Grant (Command +0)
3nd Division - LGen von Knyphausen (Command +0)
|
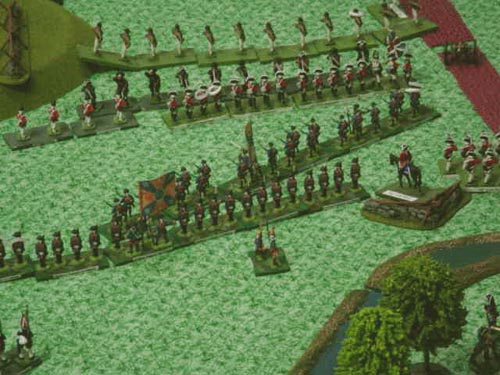
Photo by Bryan Thompson
In the north, the Hessians and British have over-run one Patriot gun on the road, and the British are locked in melee with stubborn American unit. The Hessians are plodding forward in a Germanic way. The small revetment on the right was not seriously defended by the Patriots.
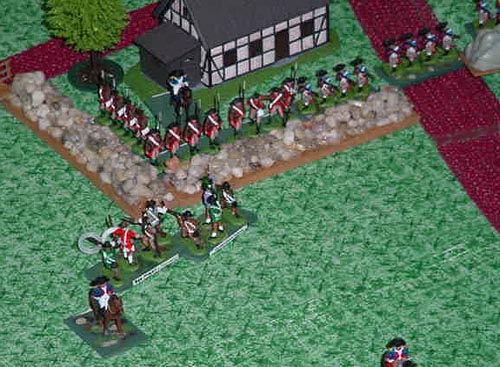
Photo by Bryan Thompson
The town of Springfield with it's defenders lining the stone wall, facing the east, the direction from which the King's forces were advancing. A routed Patriot unit cowers near the corner of the town. Two officers are facing to the front, trying to energize the defenders by their presence.

Photo by Ed Sansing
The British skirmishers reach the base of the hill with the guns. Cannon are not terribly effective against units in this rules set, and particularly not against skirmishers.
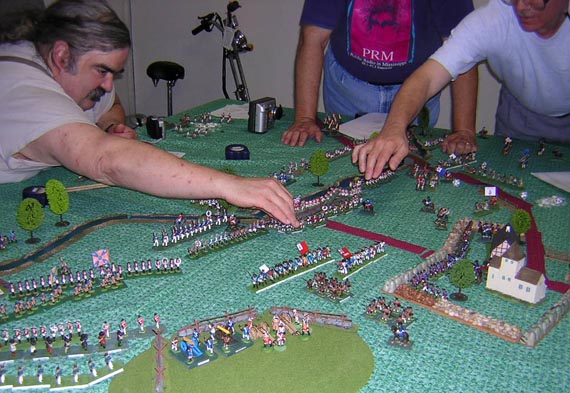
Photo by Ed Sansing
More British and Hessian units cross the stream and spread out into line. In the south the Americans are barely holding their line of works. Robert Whitfield is reaching out, from the left of the image, to deliver orders to one of his British Guards units. Jim Pitts (game master) reached down from the right helps keep Patriot units correctly positioned. Jay Stribling (in shirt with "PRM" on front) oversees.

Photo by Ed Sansing
The rifle armed troops on the Patriot's northern flank fail morale and fall back to the woods. The brigade of infantry behind the gun hill would help shore this up for a time.
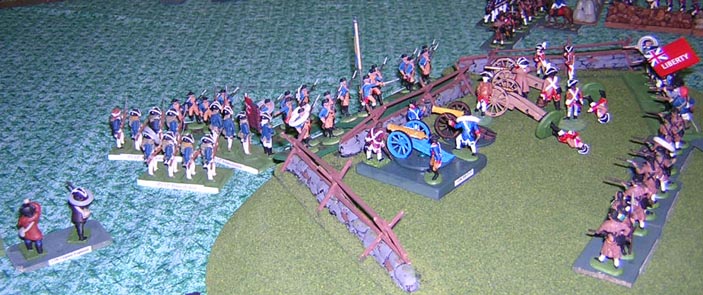
Photo by Ed Sansing
The Hessians charge (and eventually will take) two of the Patriot guns on "gun hill". The Patriot unit with the red "Liberty" flag supported the guns, but it was not enough! This is probablyon turn 9 out of the 11 turns that we played. Towards the end of the game, so many units were locked in melees that the turns went quite quickly!
SO - Who won the game?
Under pressure from both sides, the game-master vacillated. The British Players believed that they had won the game. They were about to bring overwhelming force against the town of Springfield, having pushed aside or destroyed all of the Patriot forces in their way.
However the British had not yet entered the town, so the Patriots claimed that they would fall back and burn the supplies (and probably the entire town - blaming it on the British!).
It was not yet dark (in game time) but it was after 3:00pm in the players' time and people had other things to do on a Saturday, so the game was terminated, with victory claimed by both sides.
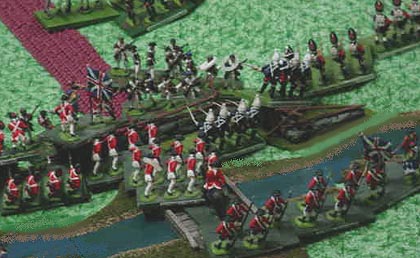
Photo by Bryan Thompson
Close work with the bayonet as British and Hessian grenadiers, commanded by General Whitfield sieze the center bridge.
Return to Page 1 of the Battle of Springfield
Go to the Master Index of Photos and Games
Return to the Jackson Gamers' Homepage
Angelfire - Free Home Pages
Free Web Building Help
Angelfire HTML Library
htmlGEAR - free polls, guestbooks, and more!
Thank you for visiting The Jackson Gamers' pages at Angelfire. Please come back and visit again!