Scout Pistol Blaster TutorialHere are some drawings of the parts I used for my hardware store pistol.
|
 The Base
I cut this with a scroll saw (?) or jig saw (?) from a block of wood (I think it was a 2x6).
|
 The Plumbing Parts
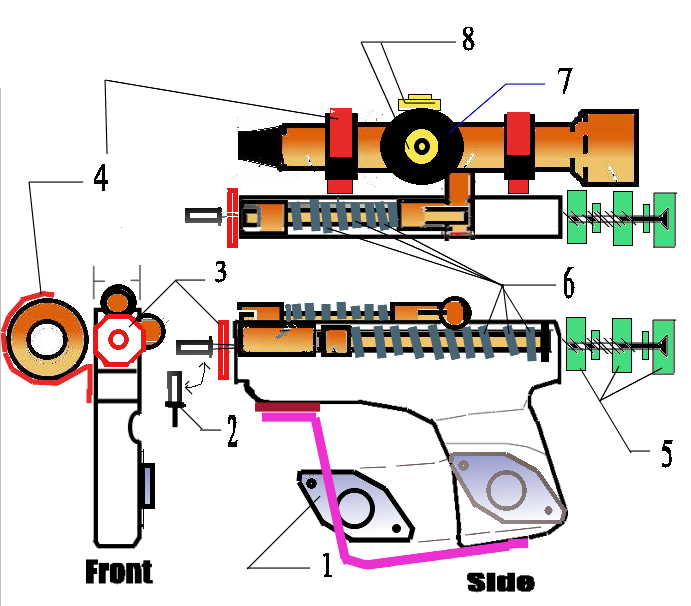
Various plumbing parts: 1-6.Copper pipe fittings 7. Rubber Washer 8-9. Wooden dowels. Dia to fit inside copper pipe fittings.
Below, notice black lines on "scope". This is black electrical tape. The copper "T" was cut on one side. I would also cut the other side, but not as short. I glued the rubber washer to the back of the dowel with superglue.
Below: 1. Solder wire, wound around. Other ideas include telephone cord (coil), or possibly rubber washers (which would inhibit using the wooden dowel. 2. Electrical tape, though I believe there is a better solution. Please tell me what it is! 3. Bondo. I do not recommend this. It turned out pretty ugly. I had to cover it with more electrical tape. I later thought of using the putty epoxy (it comes in a kind of moldable "clay" form. This is what I will be trying next. 4. This was a part I found at the hardware store. I think it was part for a light fixture. It had a knurled edge and it was threaded. I found a metal part that fit into it and it looked like the sight adjustment knobs on the singlepoint scope. I don't know what the metal part was, but it looked like a "nipple" (for lack of a better term). 5. Again I am at a loss for what this part is called, but I found it in the plumbing section. It is white plastic. I cut off the threaded part. The part I used was 8-sided, though I believe the scout pistol had this part with 6-sides. There are 6-sided ones out there, I just couldn't find one at this particular store.
|
|
The Assembly
Here are all the parts and their assembly spots. They were held in place by either screws, bondo, or superglue. 1. Transistor from Radio Shack. $1-2 2. Some kind of wire adapter from Radio Shack. They come 2 in a pack; one red, one black. 3. The white plastic piece from above. 4. Copper pipe holder (?). I recommend another method as this copper piece bands too easily. 5. Rubber washers from plumbing section. Staggered sizes. I secured them with a drywall screw. 6. the Solder wire. (see above). 7. electrical tape over the Bondo (yuk!).Try the moldable epoxy. 8. The custom knobs (explained above). Other Parts (unnumbered): Purple "Handguard". 1/2" wide Aluminum strip. Cut and bent to shape. Red Line (near nose of gun, between finger guard and body) 1/2" by 1" (or so) aluminum. -->The finger guard was secured with sheet metal screws. Though rivets would probably look more finished. -->I painted it silver (platinum), then black. Weathered by drybrushing the platinum in "high use" areas.
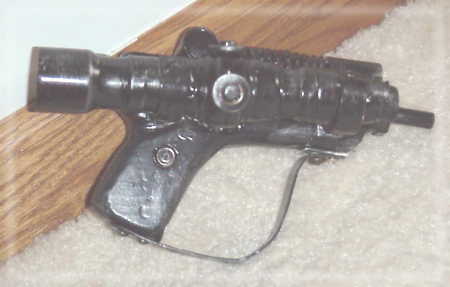
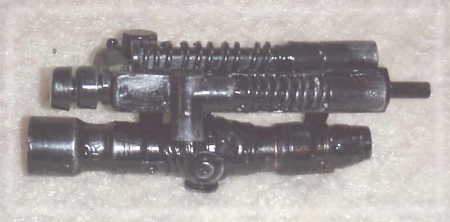
Here is the finished prototype.
|