
 Forget
the Java and the HTML!*
Forget
the Java and the HTML!*
 Just
Click and Type to Create a
Just
Click and Type to Create a
Really
Cool Web Page Using
 Netscape Composer:
A Tutorial
 "Composer
helps you create and edit your own web pages and place (or "post")
them on the web. Composer looks and acts like a word processing program,
and is just as easy to use. Behind the scenes of each page on the web is
code called HTML, which stands for Hypertext Markup Language. This name
means that HTML is is the computer language used for marking up documents
with links in them. The code, called HTML source code, tells the web browser
how a page should look and act. You don't need to know how to write HTML
code to make a web page. Composer enables you to work in a WYSIWIG (what
you see is what you get) environment - just like a word processor - and
it automatically generates the HTML code you need to make your page do
what you want it to do. The basic elements of a web page are
text, pictures, and links. You can put all of these and more on your
own pages, and then publish those pages on the web."
"Composer
helps you create and edit your own web pages and place (or "post")
them on the web. Composer looks and acts like a word processing program,
and is just as easy to use. Behind the scenes of each page on the web is
code called HTML, which stands for Hypertext Markup Language. This name
means that HTML is is the computer language used for marking up documents
with links in them. The code, called HTML source code, tells the web browser
how a page should look and act. You don't need to know how to write HTML
code to make a web page. Composer enables you to work in a WYSIWIG (what
you see is what you get) environment - just like a word processor - and
it automatically generates the HTML code you need to make your page do
what you want it to do. The basic elements of a web page are
text, pictures, and links. You can put all of these and more on your
own pages, and then publish those pages on the web."
Sounds pretty good, huh?
2 Very Important Tips before you start:
Saving, collecting, and organizing
bookmarks within Netscape Communicator is a whole lot of fun....Really!
I mean, have you ever found a really
*perfect* site only to go elsewhere and not be able to find your way back
again? doh!
The bookmark is your virtual bread
crumb to leave behind you so that you can go back again to a great site.
Well, here's how to organize and save
those bookmarks so that you can always find that perfect site for that
perfect lesson! And if you save them to a disk, you can share them
with a colleague, take them to a conference, or even create a quick web
page!
After you save several bookmarks (by
going up to Bookmarks and choosing Add Bookmark) of the same
topic you probably want to organize them and put them into a folder.
Believe me, this is very helpful, easy to use, and it looks great.
To do this go up to Bookmarks
on your toolbar and select Edit Bookmarks (or you can use the short
cut OpenApple and the letter "B"). This will open up your
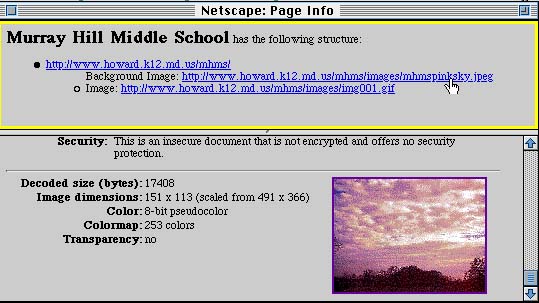
bookmarks file. (see bookmark screen capture)
How to Get rid of a
Bookmark:
How to Create a Folder to organize and store Bookmarks:
How to Add a Separator between Bookmark Folders:
How to Save Your Bookmarks to a Disk or the HD:
"Many of the pages you see when you browse the web were made by ordinary people like you. You don't have to be a computer whiz - you can use Netscape Composer, part of Netscape Communicator, to create, edit, and publish your own web pages."


"In the Composer window, click to place the insertion point on the page. (You have to start at the top left for now.) Now you can just start typing!"

OK, now you are like in Microsoft
Word you can change the size, font, colour, alignment and make this
page look how you want it to look (this is a definitely an improvement
over the Netscape Navigator Gold Editor!) *you* have the last word in Style!

Or you could just use the handy tool bar buttons for most of these style
choices!
don't forget the tool bar, make it your friend! We like short cuts,
right? Cool!

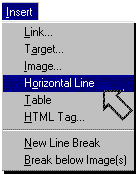
You can also add horizontal lines
to divide the space on your page.
like this!
Of course, you want to add cool pictures like this, right? Awww, cute kitty!
"You can put images on your pages to make them more visually interesting. Images are part of why the web is so popular. Before the development of browsers like Netscape Navigator that display images "inline," visitors to an Internet site had to download each image separately and open them with a special viewing program. Each image on a web page is a separate file, distinct from the HTML document that makes up a web page. The page contains not the images themselves, but a link to the image, which is displayed as part of the page. While you're making your pages, your images might reside on your hard drive or on the Internet. When you publish your pages on the Internet using Composer, it will post both the pages and the images to the server."
Huh? Sorry, I had to read that last
part a couple of times before I got it.. Ok, this is what it means. If
you want a picture on your page, you gotta snag it and save it to a disk
or your HD. And here's how to do it: find a picture on the Internet you
want to use (make sure it's from a free graphic site or a digital picture
or get permission from the site)
For MAC users (yea! go
iMac!) follow these steps:
How to save graphic images/Mac:
How to save graphic
images/WIN:
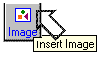
Insert Image: How to place the image on a page:
When you want to add a saved graphic to your page, place your cursor
where you wish the graphic to go and click on the tool bar button: Insert
Image
Now you will get a dialog box that looks like the one below. Choose
File to 
find the image saved in your folder on your disk/HD, click Open.
Now you have some choices about how that image should look. 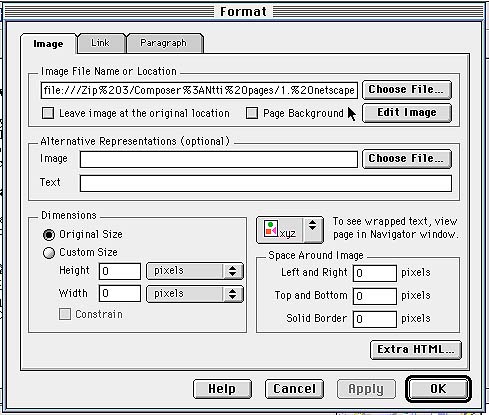
From this point you can add a solid border (1 or 2 pixels is nice) around
the image, or you can custom wrap the text (it will only show up in the
View in Navigator window) you can reduce the image by changing the height
and width in the custom size window.. all kinds of stuff! When you are
done, click Apply and then OK.
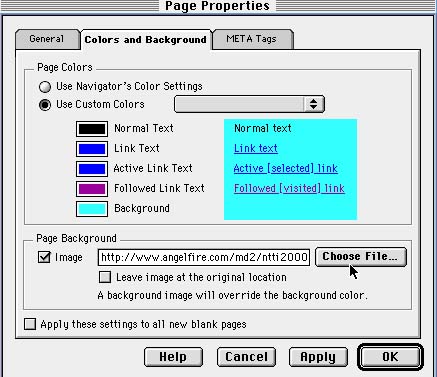
 If you find a background
on a web site that you really like , it is easy to borrow it and put
it on your page. However, you must get permission to do so first
if you plan to publish it online. The easiest way to do this is to Email
the web master of the site, explain that you are a teacher and wish to
use the background or graphic with a class, and assure that full credit
will be given on your page.
If you find a background
on a web site that you really like , it is easy to borrow it and put
it on your page. However, you must get permission to do so first
if you plan to publish it online. The easiest way to do this is to Email
the web master of the site, explain that you are a teacher and wish to
use the background or graphic with a class, and assure that full credit
will be given on your page.
9 times out of 10 they are thrilled to loan you what you want. Make
sure to thank them, give them the credit, and add their link to your page.
So when you see a background that you like do the following:
How to insert this background image onto your page:

How
to view/preview your page:
Before you can View your Page in Navigator (using the ship's wheel Preview
button) ![]()
you must save it first. click the disk button to save. Make sure to save
the page in the folder where you had stored all your graphic elements.
Now you can preview by clicking View in Navigator.
To title your page you need to go up to Format and choose Page Properties or Title
Now choose General and type in the name of your page where it
says Title. Click Apply and Ok
that's it!~
How to make a word or a line of text a hot link:
Sometimes, even though you started this page with hotlinks already active
(thanks to the old save bookmarks as a .html file trick!) you may want
to add more links or make a graphic image a link.
to do this:

How to make a graphic image a hot link:
Go up to Communicator main tool bar and select the second page you have open in Communicator on your desktop (remember, always double (or triple, etc.) browse when designing a web page) Go to a page that you want to link to Highlight the URL and copy it. (either by OpenApple and C/ or Control and C or by going up to Edit and Copy Go back up to Communicator and go back to your Netscape Composer page Highlight the image you wish to link to by clicking once to select then going up to the Insert Image When the dialog box opens, look for the file tab at the top that says link, click once on it Paste the url (http://www,etc.) in the box where it says Link To: URL (Page Location) or File Click OK
"If your page exists only on your local hard drive, you can browse the page, but no one else can. Once you have finished making your web page and have tested the links, you need to publish your page on the Internet.
Generally, you can publish your web page on the server run by the same Internet service provider (ISP), company, college, or school system that you use to access the Internet. When you publish your page on a server, you copy your page to a computer that lets other people see it.
Ask your systems administrator or ISP about publishing your web pages; you may need to pay a few more dollars a month to have a web publishing account".
In other words, with your saved .html document and your folder full
of supporting graphic images you can upload this page to any server. Follow
the directions of that server to do this (each one is a little different)
but basically you have most of the work done!
To read more about this visit the Netscape
Communicator Tutorial. 
Good Job!

last updated: 3.27.2000


 Graphic provided by Amado Narvaez author of the awesome page entitled: The Hyper-Powered Curriculum

