


The workstation came into being, because I was using a 2 lb cookie
tin for my work area and Lance decided I needed more room and built
the first one, because I was always losing something down the sides.
I also needed something that was kid and Bengal critter proof.
The workstation is 25 inches long and 11 inches wide with three inlaid
divided sections covered with felt work surface. The lid has a brass
plated draw down latch on each end. The materials used for the frame
are lodge pole pine; masonite hardboard for the lid top and table top
and the felt squares are cut to size but not glued in place in case you
would prefer the smooth table top. Beadwork is for display purposes only
and not included.
We are happy to announce the 2nd generation beadwork station. The work
surfaces lift off for storage about an inch deep and 9 1/2 by 7 1/4 inches
under each work surface and holds a lot of stuff. There are also handles
as well as the lockdown latches!!
He taught me how to sand, sand, sand and run his cordless screwdriver!!
If you are interested in having us build one for you, either a standard
size like the ones Kristi and I are using or with an elevated 6 inch
extension of the legs like the one Michelle is using because she can't
bend her knees. The price is $69.95 for the standard w/ storagesize
or add $8.00 for the elevated extension legs for a total of $77.95.
Workstation w/ all wood lid is $79.95. Shipping and insurance
is approx. $13.50 for the standard model and $14.50 for the extensions
model. For exact shipping charges, please include your zipcode with
your inquiry. They are shipped within a week to ten days of receiving
payment. You can e-mail me if you have other questions
or would like to order one.
PLEASE NOTE: Postage has increased to allow for the new increased first
class rates and insurance as of January 07, 2001. We ship via first class
and insured. Postage is figured by zones and average shipping weight
is 10 and 11 pounds. There is no handling charge figured in the postage
charges, only our best guesstimates for a happy medium.
I used it starting last night and I LOVE it!! so comfy, and the
extentions are perfect for me on the sofa. I used to bead out of a
tray balanced on my knees!! It holds an unbelieveable amount of stuff,
and even fits perfectly under my coffee table. No more beads all over
the place! My SO is grateful of that :)"
~~~~~~~~~~~~
9/28/97 Lynne says
"I got a Bead Workstation today in the mail from Red Ventling and
I've never seen anything more convenient for doing beadwork! It's
sturdy enough that a very rambunctious Border Collie can't knock it
over, but it is still light enough to carry around. It's ideal for
doing beadwork in bed if I'm in a lupus flare. The lid comes completely
off and I can put stuff in there that I don'tneed immediately when working,
plus the whole thing is deep enough to hold silamide spools, wire, tons of
beads, bead dishes, wire tools, anything you can think of, even knitting
and crochet supplies. This is what I've been looking for Thanks, Red!"
~~~~~~~~~~~~
10/12/98 Mary says
"I got my Bead Station from Red on Friday!!
This is absolutely the best
thing ever! I used it all weekend and didn't spill beads once
and it
was so-o-o comfortable. If anybody is "thinking" about getting one I
strongly urge you to go ahead & get a Bead Station of your very own. I
promise you will not be sorry.
My hubby has a bad back and has to lie down a lot and gets all whine-y
(did I say that?) if I stay in the den/beadroom all night. I've tried
beading in bed with a cookie sheet on my lap but the height is
uncomfortable. With the Bead Station I can bead comfortably all evening
while dh can get happily lost in the boob tube! And they lived happily
ever after! Thanks Red...Thanks Lance!!!"
~~~~~~~~~~~~


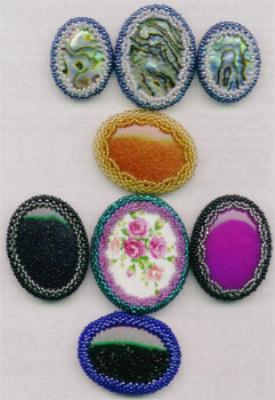
Cab Tutorial
My interpretation of several beaded bezel cabachon recipes I have
read and studied.
1. For a 30x40 oval cab, use tubular peyote stitch; first string 78
size 11 seed beads; then go through 6 or 8 beginning beads to
form a circle which is row 1 and 2. You must always have an
even number of beads. This circle should go around the outside
of the cab. Now do 1 or 2 more rows of peyote with the size 11
beads.
2. Now go to smaller (Mill Hill or 14's) beads and do 2 or 3 more
rows of peyote snugging the thread, these rows should be pulling
in toward the center. Now lay the cab inside with the flat side
touching the rows of smaller beads. Work needle and thread to the
other side of the 11's and put in another 2 or 3 rows of the smaller
beads with the cab in place.
3. The key to doing a beaded bezel cabachon is to use the fewest
number of rows that you can to secure the cabachon in place
4. You can also do a picot/netting stitch to scallop the edges of
cab and provide more security for the cab. If you are using 78
beads, a picot of 5 beads skipping 2 spaces comes out evenly and
adds a nice finishing touch.
You can e-mail me if you have any questions. Again, I have
seen many different recipes for this technique. I think this
is the simplest and easiest and is a compilation of everything
I have seen. Enjoy!!
For another version of beading a bezel around a cabachon using a
netting technique that Sarah aka Beadnik worked out and is really
nice also.

 Home
Home Next
Next