|
Netscape users may 'right click' on any image and select
"View Image" to view the image larger. Then click on
your "Back" button to return.
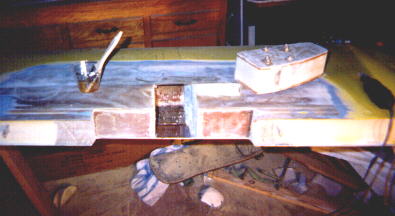
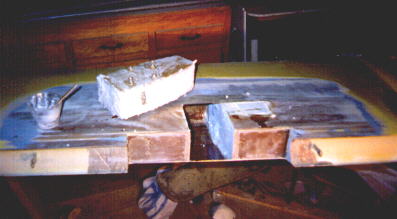
With the area to be reinforced properly sanded, I was ready to install the gear box. Since the bottom skin had to be cut through, the 3 plies of glass need to be replaced.
|
So about 18" each side of the cut was belt sanded, to taper the glass from it's full thickness, to almost all the way through the first ply, at the cut. This allowed me to make a 'scarf' joint, joining the new glass to the old glass. |
There is a bit of a problem in getting the gear box installed into the cavity which has been cut into the canard. There has to be a structural bond between the plywood spars and the newly exposed fiberglass and carbon fiber. The problem comes when we try to apply the flox to the ribs and insert it into the cavity, with out rubbing it all off. I had already anticipated this, so the ribs were made undersized. This allowed me to flox the front and upper curved surface of the ribs. While inserting the gear box into the cavity, I held it up tight to the spar cap.
|
|

The glass parts inside the cavity were roughed up once again, then painted quite wet with epoxy.
|

Next, the peal ply was removed from the prepared gear box, and the 2 surfaces were liberally buttered with flox. |
This drawing shows the insertion of the gear box into the cavity. The box needs to be held up as high as possible to keep from rubbing off the freshly applied flox. |
With the gear box pushed as far forward as possible (against the shear web) a clamp was used to force out the excess flox.
|
After cure, the clamp was removed. |
With the clamp removed, flox is forced into the upper gap, to complete the structural bond between the ribs and the glass skins. I did this with a popcycle stick.
|
Test fit |
The gap between the gear box and canard core is filled with pieces of blue foam and wet micro. The idea is to get micro and foam into every nook and cranny, with no voids.
|
To keep the micro from running out, I taped pieces of thinly cut scrap foam around the exterior.
|
After cure, the excess foam and micro was belt sanded smooth.
|
After all filling and sanding is complete, I was ready to apply the glass.
|
|
Esse site foi ideia de Patrick Panzera de Hanford California EUA.