Building the "Barn".
Where have I been? I've been building the barn. (Witness starring Harrison Ford) I didn't have as much help as he did but my barn isn't nearly as big. It's a kit from a company called Heritage Barns. It's 10 by 10 feet and its purpose is to keep our new riding lawn mower safe and dry. It has been a lot of work. Although it's called a kit it's a long way from being a carpenter's Heathkit. It's like if you were building a DX100 you would have to wind the coils, drill and punch the holes in the chassis, paint the entire cabinet and label the front panel. I've been taking pictures and here they are.
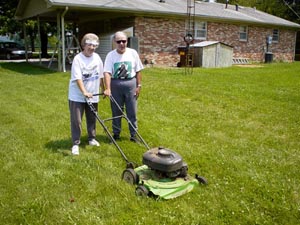
My wife Sue and I have been mowing our 225 by 175 foot lot using a gas powered push (not self propelled) mower for many years. Until this summer we felt it was just good exercise. But now we find that the aging process has placed this effort beyond our capability. We decided to purchase a riding mower and so we needed a larger storage building to keep it safe and dry. The result is "The Barn" which was constructed from a 10 by 10 building kit. The following photographs and commentary show the various stages of construction. We did it, just the two of us. There are no pictures of us actually working together because there was no extra person to take pictures. We took pictures at each milestone along the way. |
|

|
The first step was to construct the floor frame. The 4 by 4s which rest on the ground are treated as are the 2 by 4s on the outside of the frame. It took us about a day to level the 4 by 4s and build the frame. |
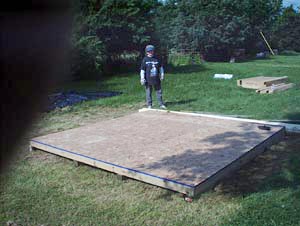
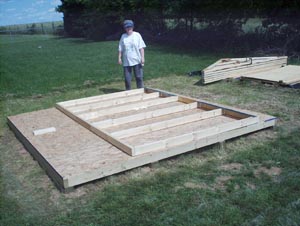
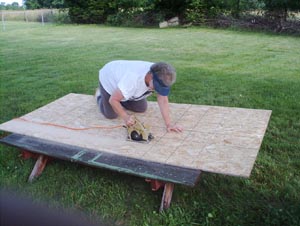
The next step was the floor itself. The frame was covered with low grade plywood. Because the building is 10 by 10 feet and plywood comes in 4 by 8 foot sheets some cutting was necessary. A handheld circular saw is a must for constructing this project. The floor is optional at extra cost and not included in the kit. The boxes containing the precut wood and the white plastic wrapped roof shingles can be seen in the background. |
|
|
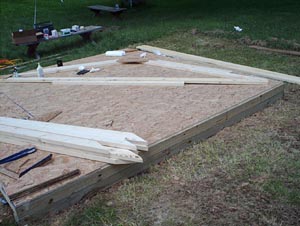
After its completion the floor became a work area. Here the trusses are being constructed. These are the triangular frames that hold up the roof. Using boards temporarily nailed to the floor as guides ensures that all trusses will be identical. The 2 by 4s that have angle cuts were precut by the manufacturer. |
Here are all six trusses stacked up. Also visible are the stacks of roof decking (sheathing) and siding. |

|

|
Two of the trusses were destine to become gable ends. Some additional support members had to be added to increase their strength. |
Next were the wall frames. Some of the parts were pre assembled. A set of 3 studs came nailed to the floor plate (left). The top ends were held together by pieces of sheet metal which don't show up very well in the picture. Two of these assemblies were spliced together by a short section of floor plate held by short sections of 2 by 4 nailed to the studs. The reason behind this is that this kit can be used to construct a 10 by 10, 10 by 12, 10 by 14, or 10 by 16 foot shed. The piece of 2 by 4 which appears to be laying on the floor to the left is actually nailed there. It was used to prevent the frame sections from moving while being nailed. The top plate (right) is a single piece which had to be cut to length and nailed to the top of the studs. |
|

|
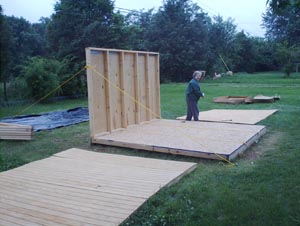
I suspect that a professional builder would have put up the wall frames and nailed them in place before hanging the siding. The siding came in 4 by 8 foot sheets which were quite heavy. The designers of the kit, based on experience no doubt, have decided to instruct the amateur builder to nail the siding to the wall frames while they are still laying flat on the floor. The back wall can be seen in back with the studs showing. The left and right walls are to the left and right respectively, siding side up. The partially constructed front wall is on the floor. |
Then we came to a seemingly insurmountable problem. A crew of 3 men would find it easy to set up the walls. But how could a woman and a not so large and strong man do it. We could not lift one of the fully assembled walls. Working together we could lift one side of a wall, stand it on edge and even walk it around but a dead lift might have left us in that condition. We decided to let Newton help us. (For every action there is an equal and opposite reaction.) Lifting one edge of a wall causes the other edge to slide away from the lifters. Ropes tied to screw eyes can be used to hold it in place. The second problem is who is going to hold up the first wall while we lift the second one into place. The answer is a couple of guys. Not two men ,but guy ropes. To get all of these ropes set to the proper length we used a dummy wall which is what you see in the picture. The guy ropes are anchored to steel dowel rods driven into the ground and clamps were used to keep the ropes from slipping off the ends of the rods. The ropes that run along the floor were fastened to the floor frame with screw hooks (open screw eyes). After all ropes were adjusted to the proper length the guy ropes were removed from the rods by removing the clamps and leaving the ropes knotted. The dummy wall was moved to give slack in the lower ropes permitting the ends to be slipped off of the screw hooks without being untied. |

|

|
Then the screw eyes were unscrewed from the dummy wall ropes and all. The dummy wall was laid on top of the real back wall and holes drilled and each eye screwed in to the corresponding position. Then the wall was moved onto the floor, the bottom ropes placed over the hooks and the front guy attached to the steel rod. When the wall was slid back until the bottom ropes were tight the wall was ready for lifting. Although you can't see it in any of the pictures the siding extends about half an inch below the floor plate. When the wall is in position the siding must extend below the floor while the floor plate rests on the floor. |
Leaving the two guys to hold up the back wall we repeated the process for the right wall. Dummy wall, ropes, yow ho ho, and all that jazz. We temporarily attached handles to the wall to make it easier to lift. |
|

|
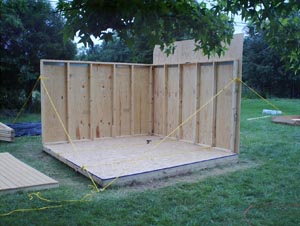
Sue is a woman who can drive a nail straight and I love her for it. And lots of other things too. Now with two walls nailed together at the corner and to the floor all ropes could be removed. |
Next step, you guessed it, put up the left wall. Sue said it was about time I got into the picture and let her take it. |

|

|
Most of the weight of the walls is the siding and so the front wall with it's large cutout for the door and the lesser height as compared to the side walls we assumed we could just lift it into place. We no longer had room to do the rope thing. Getting it upright was no problem but lifting it to place the floor plate on the floor with the siding hanging over the edge proved to be harder than we had thought. Instead we used a couple of boards as inclined plains, slid the bottom up them and then pulled them out. Once the wall fell into place I held it while Sue drove a couple of strategic nails and it was really up. |
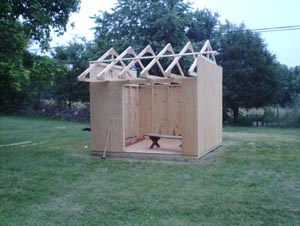
As we prepared to put up the trusses it was threatening rain and our next door neighbor Clinton McCallister and his adult son Marvin (there is no Billy Joe in the family) did the neighborly thing and helped us. Both had carpentry experience so it went very fast, easy, and accurately. We likely could have done it ourselves but it would have taken 4 or 5 times as long. |
|
|
The loft floor consists of two 4 by 8 foot sheets of plywood. One was left over from the floor and it has a 2 by 2 foot cutout which was the last piece required to finish the floor. The other was a piece of the roof sheathing. The instructions told us to use two pieces of the sheathing but I can calculate areas and cutouts and I knew if we did that we would run just a little short on that material. Later we would cover some of the gap with leftover cuttings of roof sheathing. I climbed up on an 8 foot stepladder to take this picture. |
Sue wields the hand held circular saw to cut the roof sheathing to the correct size. |
|
|
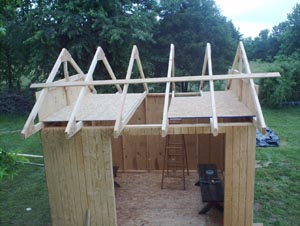
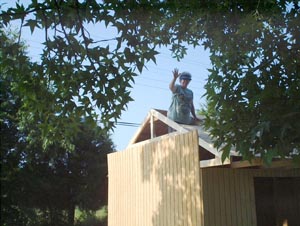
Installing the first few pieces of roof sheathing was easy. We could just stand on the loft floor between the trusses, place the sheet of plywood and nail it down. As the open space disappeared it got harder. Eventually I had to be on the roof on the outside to drive the nails. This roof is fairly steep as roofs go. In the picture Sue stands up through the last opening to wave at the camera. |
As you can see in earlier pictures the front and back siding is shorter than the sides. That meant that there were leftover pieces of siding. From these we could cut out the triangular pieces to cover the gable ends. |
|
|
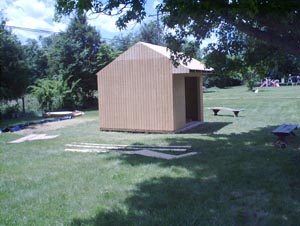
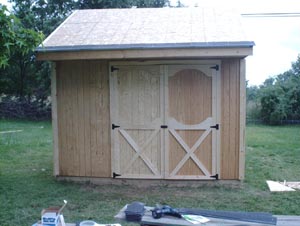
With the installation of trim strips on the corners and along the roof line the little building begins to take on a finished look. |
The next step was hanging the doors. The trim part was pre assembled but we had to cut the pieces of siding to size and fasten them to the trim with screws. |
|
|
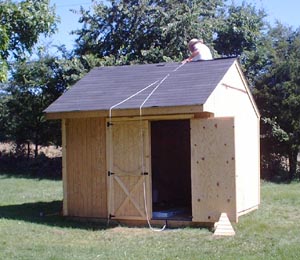
This roof is steeper than the usual house. To ensure that I wouldn't fall I used an old climbing belt, ran a single rope through two screw eyes mounted onto the foundation and run over the peak of the roof. Although the rope is slack it gave me the confidence I needed to work without fear of falling off. |
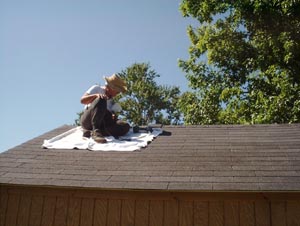
The roof was so hot that I burned the backs of my legs to the point of peeling. Using the towels fixed this problem as well as giving much improved traction on the roof. |
|
|
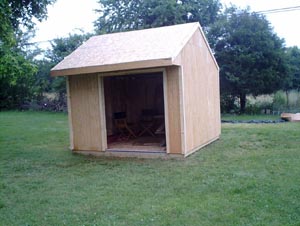
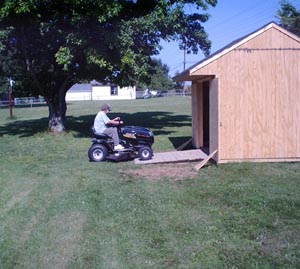
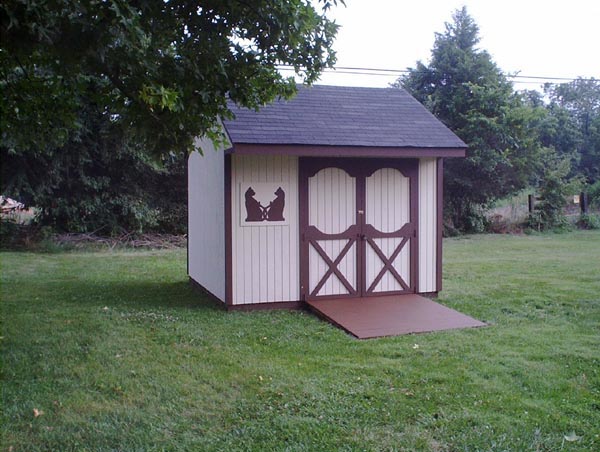
The shed was built to house the riding mower and so after installation of the roof shingles it was time to build the entrance ramp and then put the mower inside. |
We used twice as much primer as the guy at the paint store estimated. You could hold the can of paint up next to that wood siding, it would go "shlerp" and the can would be empty. |

|
|
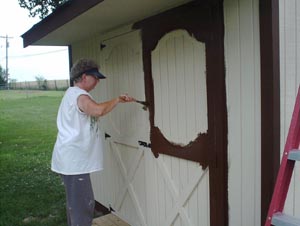
The final step was painting the trim brown. The entire project took us 8 weeks. |
A Sad Footnote.
In these pictures you can see that we had some really big old trees on our property. That's right I used the past tense. A wind which accompanied a thunder storm blew the entire top out of one of them and onto our roof. It meant a new roof and gutters. Then we had a tree expert come and look at the trees. He informed us that they were all diseased and rotten. They had to come down to protect our house from further damage. Reluctantly we had it done. Sure enough when they were cut it was clear that they were rotting from the inside out. They were a type of maple tree that grows quite fast and is popular with subdivision builders. The wood is soft and they outgrow their ability to support their own weight. We have lived here for 31 years and we will not live to see new trees grow as tall as these were.
Back to Construction Projects Page.
This page last updated September 4, 2003.