Site hosted by Angelfire.com: Build your free website today!

Converting a 65 Triumph Spitfire to a 67 Mk1 GT6

There is not a lot between the previous page, which was somewhere been '09 and '11. Needless to say I cleaned, derusted, and prepped a lot of the parts I could. A majority of these were suspension bits, but I also finished tearing apart at the seams the last bit of my 69 parts car, which at this point was not much more than the firewall. I had intended to use parts of it for repair.

Now fast forward to sometime in '11, if I am not mistaken.

I stumbled upon a 65 Spitfire tub with a rolling chassis, but there are no other parts beside steering wheel. The deeper I get into my GT6 the more I realize I am both in over head where the current progress is-I fear I have messed up the possibility of ever getting the doors square again. Also, the deeper I go the more sheetmetal that needs to be replaced. Up to now I have replaced the rockers and the floors, as well as 50% of the firewall, with the other 50% needing to be replaced. Fabrication of parts became a necessity as aftermarket of many pieces are not available. I also have been afraid that 100% of the heelboard, and trunk will need to be replaced. The rear valance and front valance also need work. The inner supports behind the quarter panels as well as the quarter panels themselves need replacing too...needless to say, nearly all of the tub needs to be replaced.
Back to the spit.
I got it for a price I cannot complain about. I originally bought it to tear the firewall out of, and possibly the trunk floor. The thing was very dirty, and after cleaning out 1 shopping bag full of dirt and dog hair, I discovered the floors to be fairly rust-free.
Further contemplation led me to the decision of converting the spit to a GT6...
The photos following show the spit and the GT6, and the subsequent conversion of the Spitfire to GT6...
Click here to view the next page-->

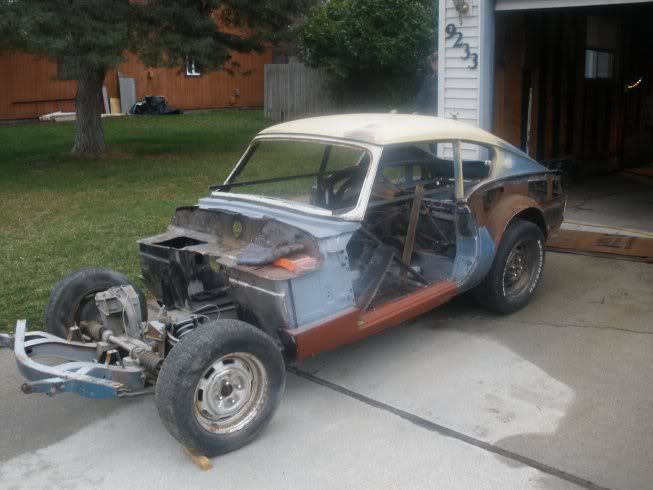
67 triumph GT6

Here is my GT6 at the start of this process. At this point I am in the process pf replacing most of the front end.
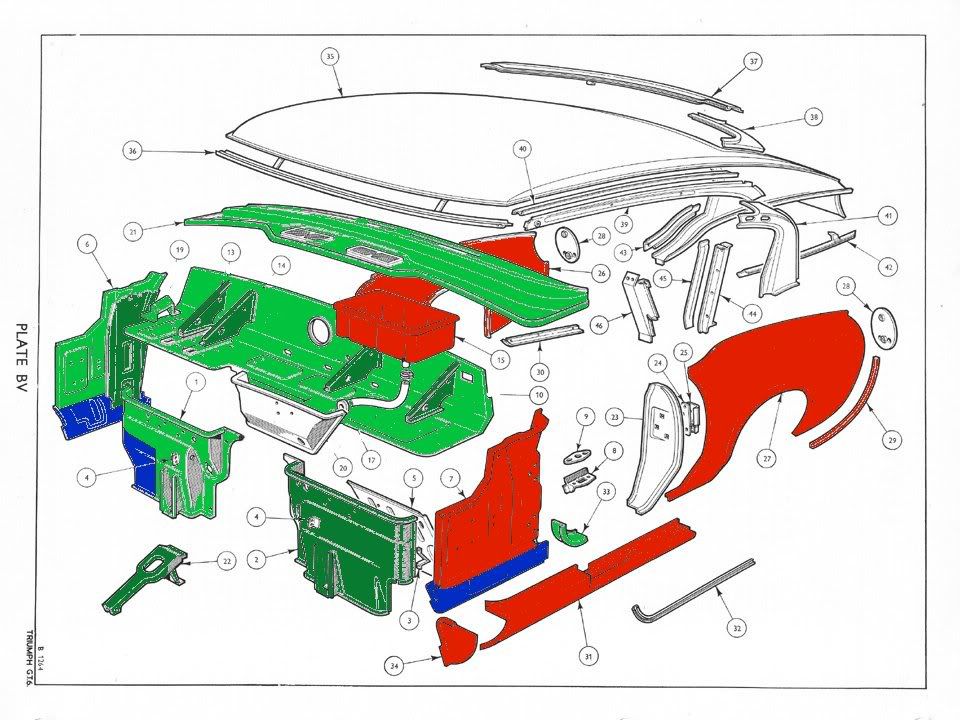
body parts to replace

This is a diagram of the firewall, rocker panels, and quarter panels that need to be replaced on my original tub. Light green items are parts from the original car that I have removed and refurbished. Dark green are removed and refurbished from a MkII donor car. Blue are pieces I have fabricated. Red are new sheet metal I have or will need to buy. At the time of doing this diagram I was not aware the entire firewall shelf required replacing.
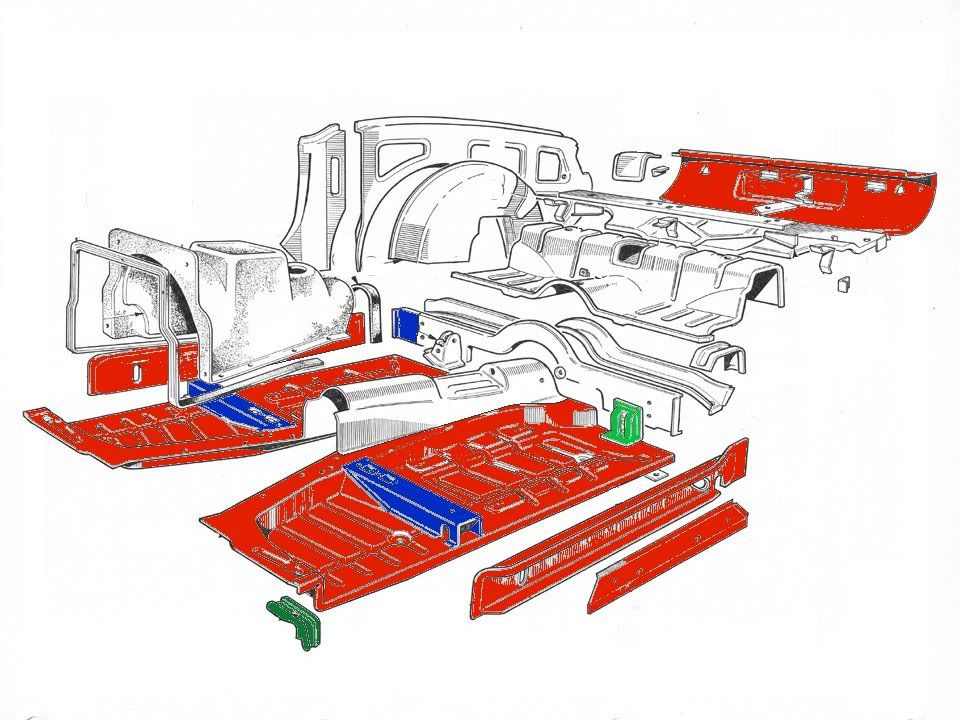
floor parts replaced
Floor pieces to replace

This is a diagram of floor pieces to replace. I have since discovered that the entire trunk floor, heelboard, and inner quarterpanel strengthener also need repair or replacement. Think everything in the diagram.
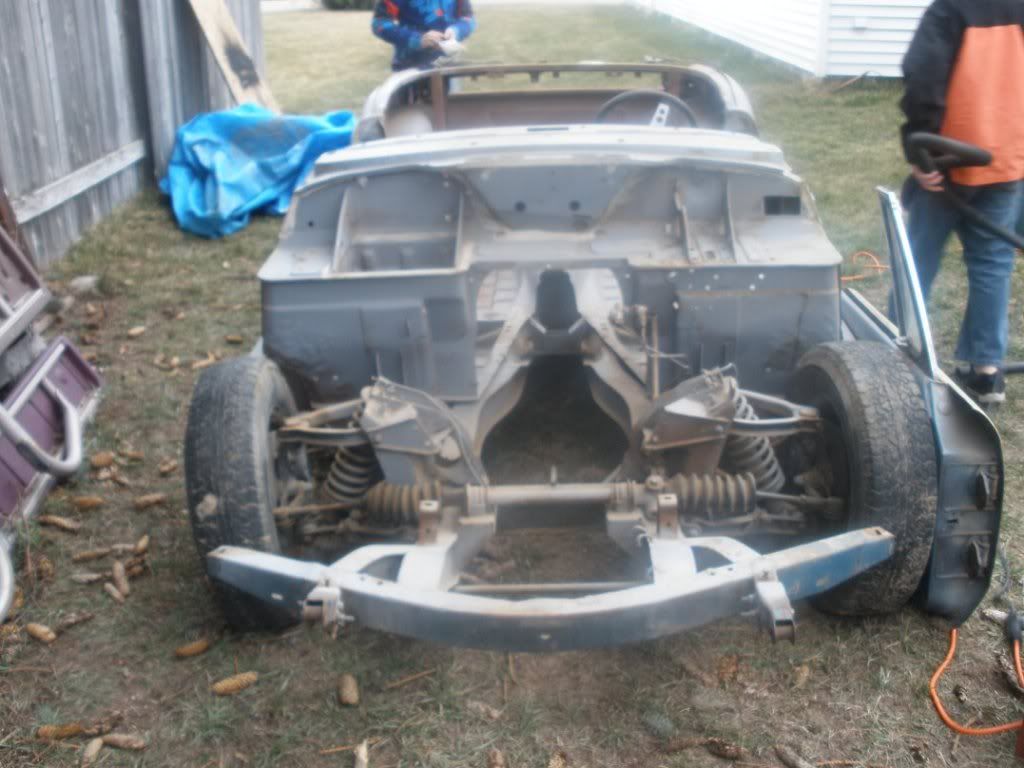
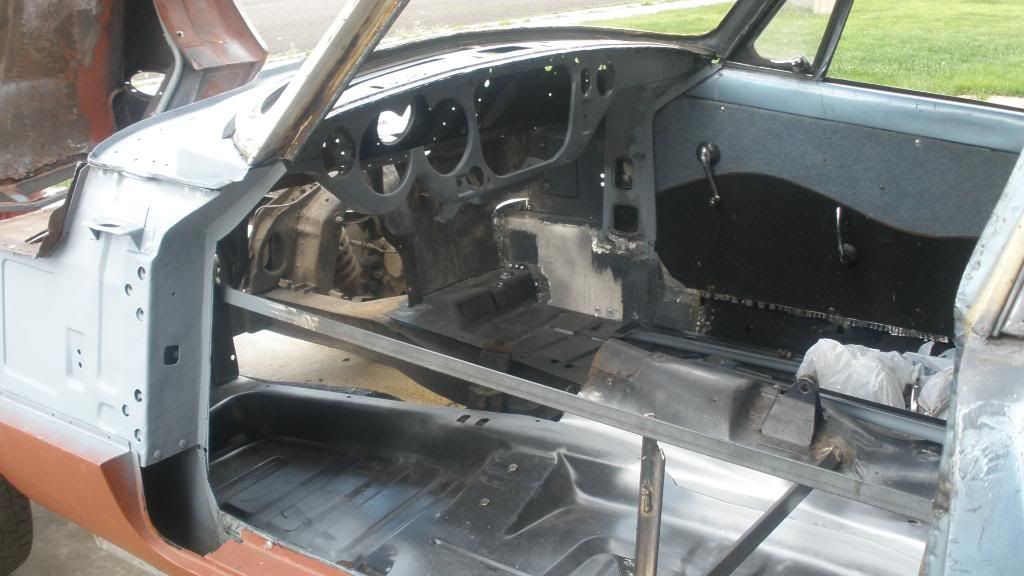

This is the '65 Spitfire I picked up.
My boys are helping me clean it out.
Click here to view more pics in my photobucket album
65 spit

Cleanup


Spit to GT6 conversion

A before shot of the interior.
It looks good but beleive me, there are a lot of unseen problems.
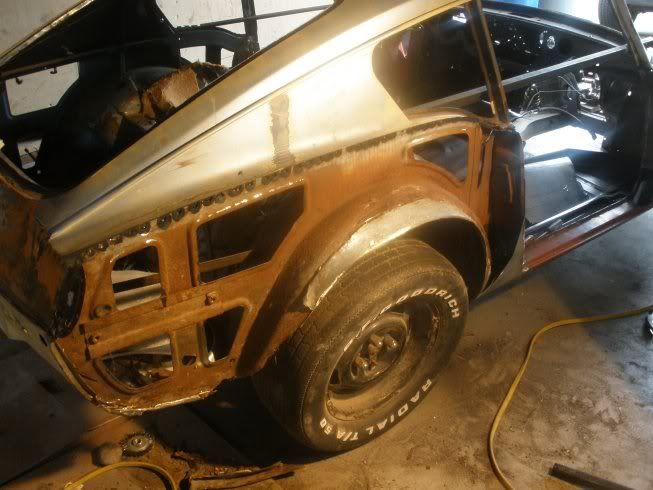

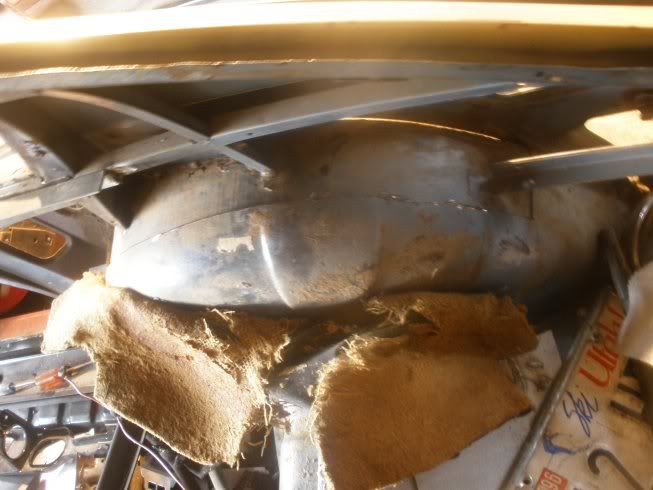
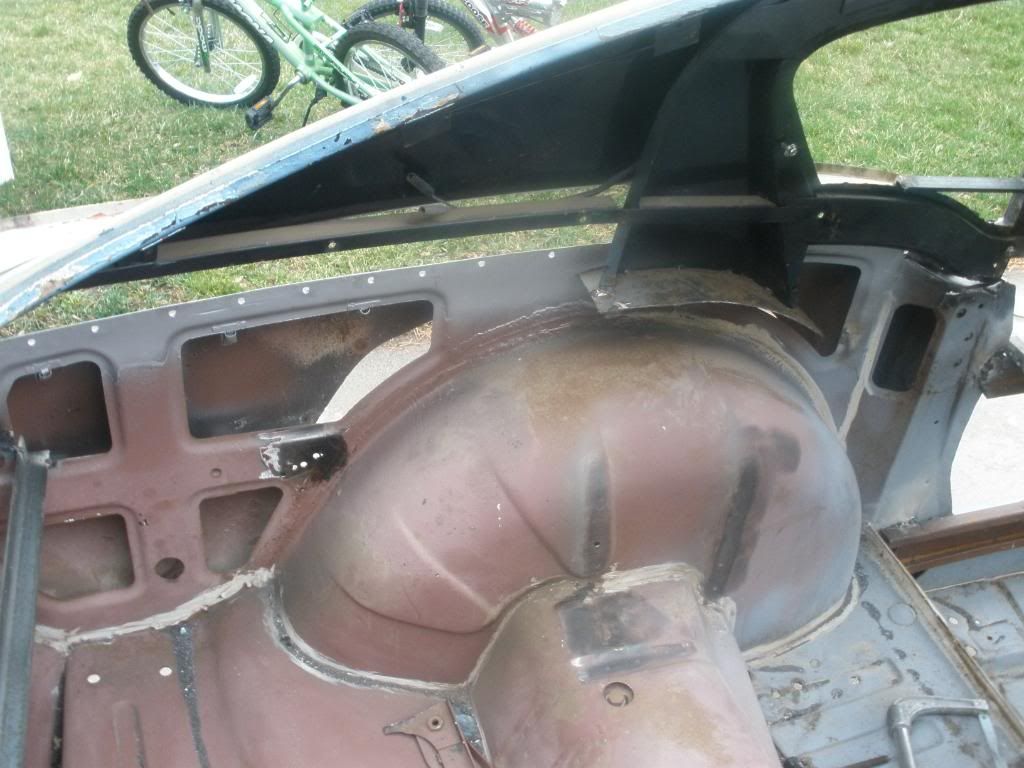
Passenger side quarter panel removed. As you can see in the following photos the inner strengthener has heavy rust, as does the wheelwell. You can see the pile of rust and crud that built up inside the panel just behind the wheel. Part of the 1/4 panel fell off without any help.
I drilled out the spotwelds with a 1/4" bit and ground through the remaining metal with an angle grinder (Harbor Freight 4 1/2" grinder! Works great and I have put the sucker through the ringer). Photobucket

Photobucket

Photobucket

Photobucket

Photobucket

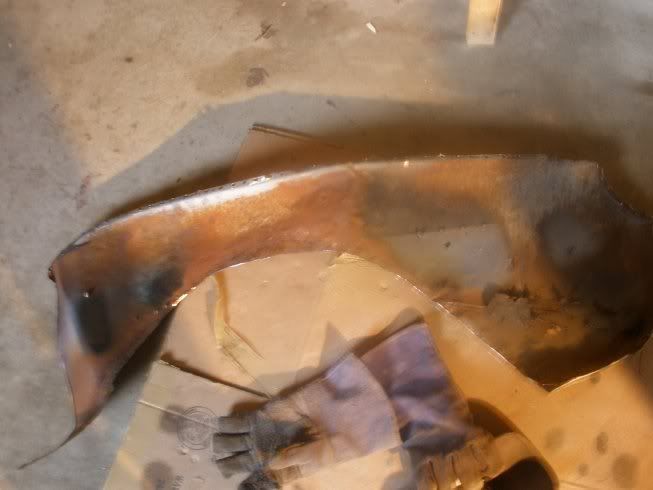
An inside shot of the removed 1/4 panel
Photobucket


I have an extra windsheild frame from an old parts car. With this correctly in place, I welded some cross beams to add strength when I remove the top. It may become neccesary to set it on the ground, but more than likely I will need to turn it on it's side to finish removing welds from the unwanted steel. I'll figure out a support system or build some sort of jig to hold it if I put it on it's side.

Photobucket


I had to cut the top supports out by cutting through the inner wheel wells. I will be able to remove the welds easier this way. I left the cross piece for the trunk floor boards intact as well in order to retain the proper measurement and location of this peice.
Photobucket

Photobucket


The GT6 just before I lifted the top, and just after.
After all of the hard work I have put into it I almost hate to see it this way. But, now I will be so much further ahead. Photobucket

The grey dash panel top as well as the drivers side rocker panel will be moved to the spit, as they are only being held on with screws at this point for fitting purposes. I want the GT6 dash instead of the spit center dash.
The Spit is in need of rocker panel replacement on at least the driver's side, as well as the floor crossmember and inner sill could stand to be replaced also. These I have. I may end up replacing the floor too, but the jury is still out on that.
Photobucket


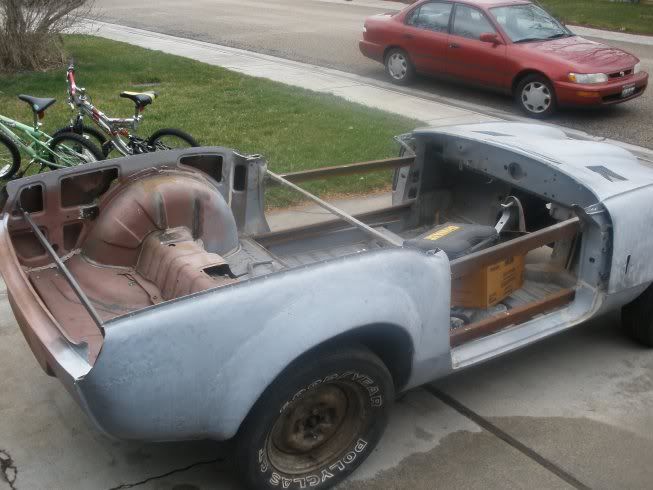
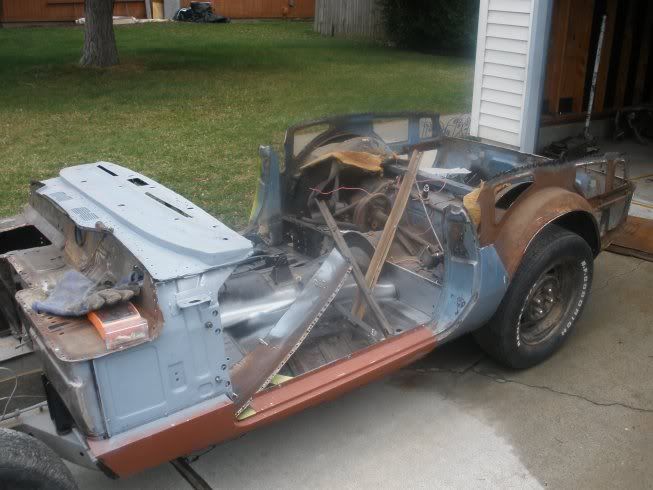
Before I started removing the trunk panels from the spit I swapped chassis the bodies were on and bolted the new tub onto the GT6 frame. Gotta keep things square from the start (a mistake I made too many times in round 1.) The spit now sits on the GT6 Chassis, and looks very much like I am going to build a CGT6 (or a spit6). At this point you may be wondering why I just don't build one as it will be easier. well, 2 reasons. 1, I have no spit parts except for this tub, and I don't want to spend another 15 years collecting parts. The other reason is the fact that I like the looks of the GT6.
Photobucket

Photobucket

Photobucket

Good thing I plan on replacing the 1/4 panels. This one is in bad shape, and it has an ugly flare to boot. Drivers side has been chopped to accomodate a flare, but no metal has been added yet-thank goodness. Photobucket
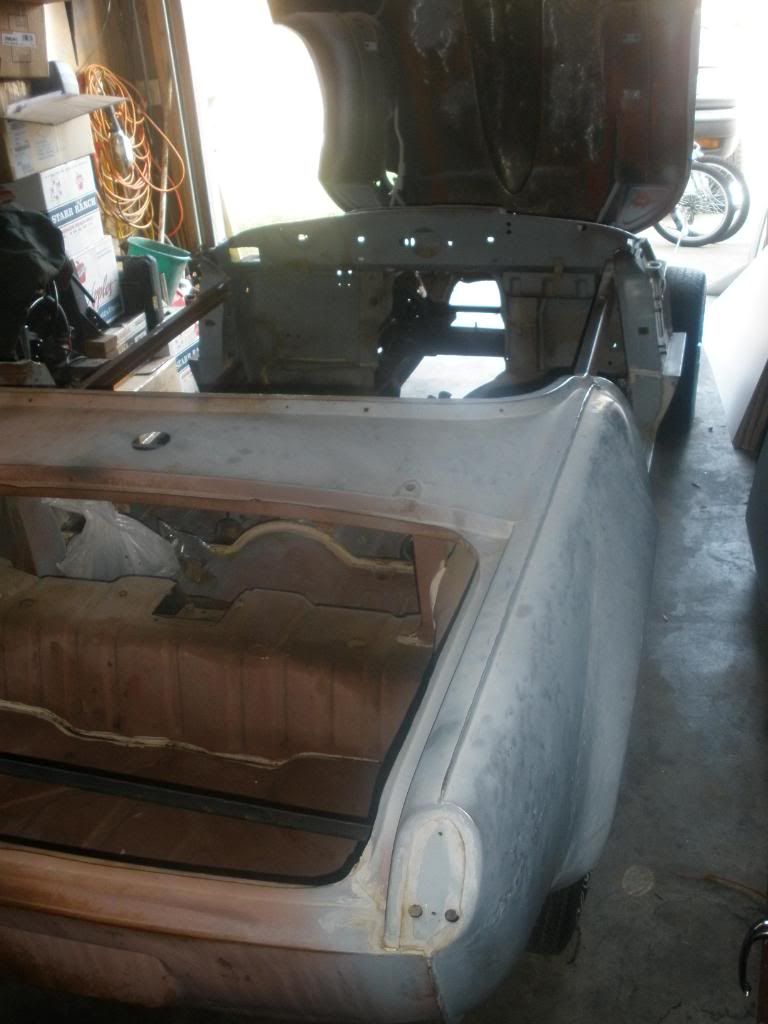

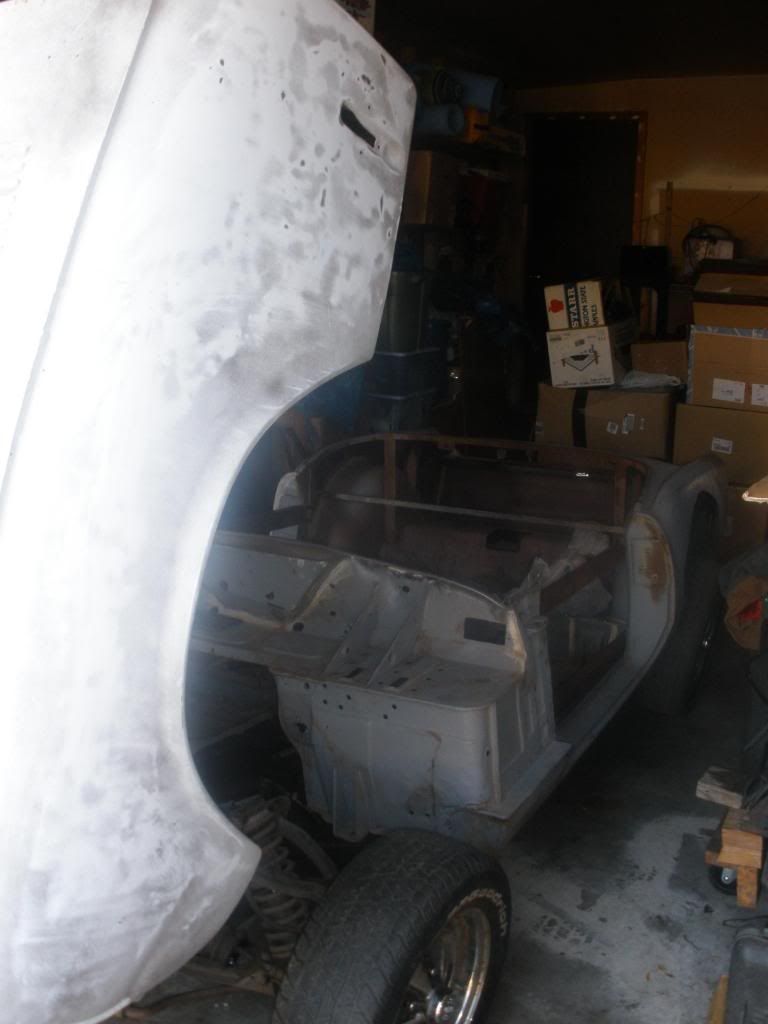
The spitfire with the trunk pieces removed and the welds cleaned up, primed with weldable primer.
Photobucket

Photobucket


As it sits today (Mar 25, 2011). The spit tub with the GT6 top added on top. It is not yet ready to weld in place as there is a bit of old metal I need to remove yet, but you get the idea.
Photobucket


Click here to view the next page-->