
 Pencil and paper ready (unless you're using pen for this, in which case, you should be beaten)? Okay good! Let's begin...
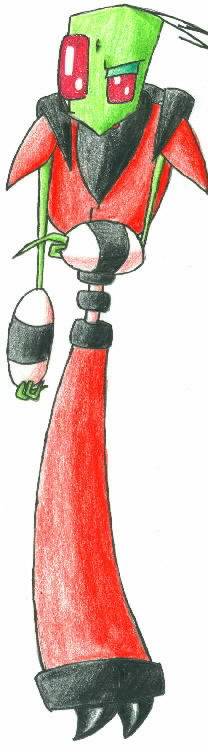
 Step 1: Beady eyes 2 vertical round-cornered rectangles. In this case, I'm gonna give him one of those "What do you want??" kinds of looks that I enjoy so much. :) So, just make that one eye kind of squinty.
 Step 2: Man, he looks ticked... Here, I've added the line that seperates the squinty eye into the actual eye and the eyelid, to make him look even more annoyed! Yay, I like annoyed!! I've also added the first part of that pouty upper lip (I recommend starting with that top lip line first, then doing the lower jawline) I've also added the line that shows the back of the head. Put it close to the squinty eye (I can't believe I'm actually calling it that) and it should go up just past the open eye. (Typically, the Tallest's heads are slightly taller and more narrow than Zim's)
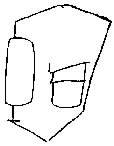 Step 3: The rest of the head Let's start with the lower jaw. Just take it from the end of the existing head-line and carry it over to the pouty-lip-line. Easy! As for the front of the head, just bring a line up through (yes, through) the eye and stop the line about the same height as the rear head line. Now for the nightmarish top-head line. I hate this. Start from the front and bring a slightly-diagonally-raised line back about 2/3 of the way to the rear head line. From that point, bring the line diagonally down to the rear line. Bingo!
 That little half-square thing near his lower jaw is the collar of his...er...shirt? From this angle, since it's a forward pose, the collar really won't show, but I wanted to show that it was there, so I added it. It just shows about where his neck meets the rest of him. ^_^ Anyways, I like to do those shoulder-panel things first (after the optional collar). No real reason, I just think it's easier. Also from this angle, you could actually make the shoulder panels as simple slightly-curved triangles, but again, my drawing style gets in the way, and I end up trying a more 3-D approach. ^_~ From there, we can add that chest-plate (I really have no idea what to call this stuff), which is just another triangle-ish shape with curved sides! I also added the antennae at this point. Simple!
 The sleeves are kind-of like t-shirt sleeves (um...sorta.) Actually, that one on the right looks a little like an avocado... I don't know what on Earth I'm talking about right now. >_< Each sleeve is made up of 2 curved lines in a triangular formation. Okay? I'm getting a headache... *takes 2 Tylenol* Okay, now we can add the arms! The arms are just 2 nearly-parallel lines for each arm (I say "nearly" because I like to make them taper towards the elbow) I also made the arm on the right shorter than the left for a reason, so continue to find out why! :)
|
