
undefined
Oval Frame Tutorial
Download Tubes and Graphics for this Tutorial
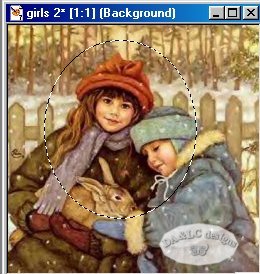
The first step is very time consuming and takes some experience. Because of that in class I will provide the finished graphic but I did want you to learn the process so you may do your own pictures. Open the picture you would like to use and FILE>NEW Image 400 Height 400 Width, any color. If you would like use the "Eye Drop" tool to find a color from your graphic to use on your New Image that would be a good idea. Shrink your new graphic to your desktop to use later. Using Browse bring in the Graphic you will be using. Check in Canvas size to see if you need to make any adjustments to size, then Cancel out of Canvas Size and IMAGE>RESIZE if need be. I did resize the graphic by 20% for this Tutorial. Make active your "SELECTION Tool".
![]()
In your Tool Options Box choose Ellipse.

This is the part of the Tutorial that takes practice but it worth the time. While holding your Left Mouse Button down create an Ellipse on your graphic. You want it slightly smaller than the outside of your Victorian Frame but slightly bigger than the inside.
EDIT>CUT
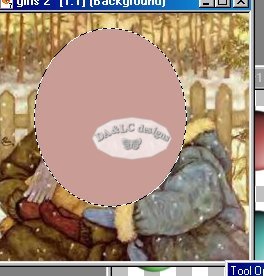
Your Graphic will look like this but don't worry we are done with it so you may close it out and DO NOT save Changes.
Restore from your Desktop the Image you made and PASTE>NEW LAYER

Open the Victorian Frame and make Active. EDIT>COPY, Make Active your Image and EDIT>PASTE as New Layer.
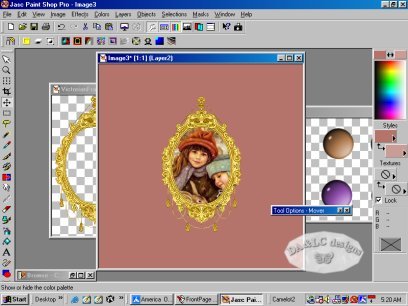
Move your Frame around until you can't see the first graphic on the outside of the Frame. I will not be adding drop shadow to the tutorial but it if you want shadows behind your Frame or glass Balls drop it after each EDIT>PASTE step.
NEXT PAGE
