|
Biggoron Sword Steps - Gold Skulltula Locations This is the Ocarina of Time strategy guide for Kid Link. This is separate from the adult part because if it was one guide it would be really big. Second, I wrote this guide for Kid Link with the use of another strategy guide to refresh my memory on the whole game. You cannot use this on your webpage unless you provide a link to The Zelda Realm on your page. Actions will be taken if this rule is violated.
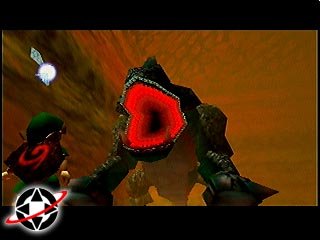
Level One: The Great Deku Tree Once you enter, climb the ladder or the vines up to the path. Follow it around to the treasure chest. Open it to receive the map. Keep walking down the path and go into the door at the end. Use your shield to bounce the Deku Scrub’s seeds at it. After it is hit, run to it, and talk to it. Then walk into the next door. Jump from the platform to the other ledge to reach the treasure chest. If you fall, climb the vines on the sides near the walls. Open the treasure chest to get the FAIRY SLINGSHOT! Fall down and chop the plants. You will get Deku Seeds for your slingshot from these plants. Next, use the slingshot and shoot at the ladder above the entrance where you came in. Once the ladder falls, climb it and exit back to where you found the map. Once you get to the treasure chest that held the map, use your slingshot to shoot down the skulltulas. Climb up the vines once you shoot them down. Once you get up to the path, follow it around until you find a door. Use a Deku Stick to light the unlit torches in the room. This unlocks the door in which you just previously came in. Step on the button on the floor and the pillars in the room will raise. Cross the room to the treasure chest and open for the compass. Now, head back out to the circular path area you had entered after climbing the vines. There are three holes in the spider web. Each one contains a Big Skulltula. Destroy one of the Big Skulltulas. After defeating one of the skulltulas, jump off the edge and land on the spider web. If you don’t hit it, try again. When you land on the spider web, it will break, and you will fall.Go to the ledge with the button. Step on the button to light the torch. Use a Deku Stick to burn the web across the water with the door behind it. Go in the door to face another Deku Scrub. Defeat the Deku Scrub, and he tells you the order in which you have to defeat his brothers: 2 3 1. Use your slingshot and shoot the eye above the door. The iron bars will open, and you can enter the door.....go ahead and enter! In this room there is a floating block with a spiky log just above the water. Under the water to your left when you enter is a switch. Press the switch to cause the water level to lower. Now hop onto the moving block to the other side. The water will raise again, so don’t waste a lot of time. If the water does rise, press the switch again. On the other side of the room is a block. There is also a Big Skulltula, so kill it first. Next, hop up on the block and onto the ledge above. You can move the block first if you would like, but it isn't necessary. Go into the door that is in front of you on the ledge. Inside you must light the torches with a Deku Stick. This opens a new door. Go in the door, and beware the Big Skulltula. Defeat it before you enter (you have to any way). On the floor you will notice a circle. Look up above it. You will notice three eggs that are moving. They only fall to attack if you walk on the circle beneath them. Light a Deku Stick and burn the web to your right from when you came in. Crawl through the tunnel to enter the room you had fallen into a while ago. Push the block into the water. Hop across to the torch, light a Deku Stick, and go back to where the block had been. Light the web on the floor with the Deku Stick by pressing the C button that Deku Sticks are equipped to. Fall down the hole to land in water. Here you will meet the Deku Scrub Brothers. Defeat them in the order 2, 3, 1, or middle, right, left. Then enter the door to battle your first boss, Queen Gohma. The Great Deku Tree Boss: Queen Gohma
Once you enter the room, Queen Gohma will fall to attack. Throw a Deku Nut at her and she will be stunned. Hit her as many times as you can while she is stunned. She will then run up the wall and onto the ceiling. Take out your slingshot and shoot at her eye when it is red. She will fall, stunned, and hit her as many times as you can with your sword. Repeat this process until she is defeated. If you don’t hit her with your slingshot in time and eggs start to fall, destroy them before she falls down.. Once she falls down, throw a Deku Nut at her so that she will be stunned, and you can hit her until she runs away. Once she fades away, a heart container will appear. Grab the heart container and enter the blue portal. You will find that the Deku tree is nearly dead, and he tells you some more information. As he dies, he gives you THE KOKIRI EMERALD! Now that you have it, head back to Kokiri Forest.
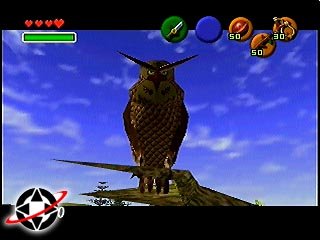
Once you are done talking to him, head right toward Hyrule Market. I suggest that you roll to get there, because if you go too slow, the gate will close and you will be stuck outside for the night. Enter Hyrule Market and head back toward Hyrule Castle. Here you will meet the owl again. Talk to him, and then go back to Hyrule Market, and then back to where the owl was. To your right as you enter, there is a girl. Talk to her and she tells you that her father hasn’t come back from the castle, and tells you to go find him. She then gives you a Weird Egg. Climb up the vines next to her. Walk along the path and jump off at the end. Head to the left but stay at the bottom of the hill, until the guards on the main path are close. Once this happens, run up on the hill and head left. If you do get caught by a guard, you’ll have to start over. Keep running left until you see a wall with stones. Climb it, and fall again, and stay to the left. Jump in the water and swim straight to the corner of this moat. Get out of the water, head left, and you will see a man sleeping. Wake him with the weird egg that has hatched, and talk to him. He will leave, and then you must move the crates off the edge of the ground into the water. Once this is done, climb on top of the crates and jump, and head into the hole where the water is coming out of. You must wait until it is morning, or daytime, to do this. Meeting Princess Zelda Once you are in, you must get past more guards. To get past the guards, walk past them while their backs are toward you, and stay as far away as possible from them. If any of the guards catch you, you will be back by the crates.
Once you get past the guards, you will be in the inner courtyard of the castle. Walk up to the window and talk to Princess Zelda.
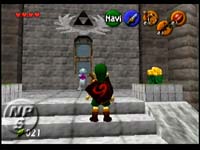
She will talk to you for a while. She will tell you that you must get the other two spiritual stones, and gives you a letter with her signature for later use. She then says that her nanny, Impa, will take you out of the Castle. Impa teaches you your first song on your Ocarina, "ZELDA’S LULLABY"! She tells you to head to Kakariko Village, because that’s where Death Mountain is, and where you get the Goron’s Ruby. I’m giving you a little shortcut though. Before you can get the Goron’s Ruby, or even enter the next level, you must learn Saria’s Song. Instead of heading to Kakariko Village, head to Kokiri Forest first to save time. The Sacred Forest Meadow Enter Kokiri Forest and head to the left. Go up on the ledge, and climb up the vines. Make your way around so you can enter the Lost Woods. Once you are in, listen for music. The louder the music gets, the closer you are to the Sacred Forest Meadow. To get there, head right, left, right, left, straight, left, and right. You will see a gate in front of you. To open it you must fight off a pair of Wolfos. Once you defeat them, the gate opens. To get through the following "maze", use the map at the bottom-right corner of your screen. Use that to get around. Once you get through, you will see Saria sitting on a stump. Go over to her and talk to her. After talking, you will learn "SARIA’S SONG"! Now, head back to Hyrule Field. Once you enter Hyrule Field, head to Kakariko Village. Head right, along the river. Cross at the bridge, and climb up the stairs to get to Kakariko Village. Head to the back of Kakariko Village to the graveyard. Enter in, and go all the way to the back. You will see on the ground a Triforce symbol. Stand on it and play "Zelda’s Lullaby". This causes the big grave in front of you to explode, leaving a hole. Fall in the hole. In this first area that you emerge in are four bats, or in the game, called Keese. Use your slingshot to kill all four, and then go to the back of the room and enter the door. In this new room, there are mummies, or "Re-Dead". Just avoid the Re-dead because they are very slow moving. Go back into the next room and up to the wall. Read the wall, and you will then learn the "SUN’S SONG"! This song changes the night to day, the day to night, and will temporarily freeze the Re-dead. As you exit, you can play the "Sun’s Song" to freeze the Re-dead. Exit this tomb and back into the graveyard. If it is night, then head to the front of the graveyard and look for the grave with the flowers in front of it. If it is day, play the “Sun’s Song”. Pull the grave with the flowers back, and a hole will be there. Drop in, and go to the treasure chest. Inside is the HYLIAN SHIELD! This shield will be needed to go up Death Mountain. First, head back to Kakariko Village. Once you enter Kakariko Village, make it day. Right as you head out of the graveyard you will see a lady standing in front of an empty pen. Talk to her, and she tells you that she needs you to get her eight cuccos. Here are the locations of them: 2. Near the entrance to Kakariko Village 3. On the ledge by the House of Skulltula (Shoot it off with your slingshot) 4. In a wooden crate by the stairs to the left of when you enter Kakariko 5. Near the well 6. Near the entrance to Death Mountain 7. Use another cucco to get this one. Take a cucco, and stand up on the fence by the windmill. Get as close as you can to the red house with the little fence. You must jump and glide to the other side. Once you land on the other fence, hop onto the ground by this door. Toss the cucco that you have right now by the well, to get later. Go down the steps and you will find another cucco. Grab this cucco and repeat what you did with the last one. Go back down and climb up the ladder. You will find here another cucco. Use it to glide back to the other two cuccos. Now grab these cuccos and put them in the pen.
Talk to the guard standing by the gate. Show him the letter from Zelda. He will then open the gate, enabling you to enter Death Mountain. Head up the path, and beware the tektites. They’re not really scary enemies or anything, but I’m just letting you know that they are there. Follow the path, and once you get to the back of the trail, you will see an entrance to somewhere. That somewhere is Goron City. Enter and you will see Goron’s around, but they are sad. It is because they are low on food. Head down to the bottom of Goron City and stand on the carpet. Play "Zelda’s Lullaby" and the door will open. Go in and talk to King Darunia. He won’t tell you anything about the Goron’s Ruby. So now play "Saria’s Song". He will dance, and become happy. He then tells you about the Goron’s Ruby, and tells you that it is in Dodongo’s Cavern. He tells you that he will only give you the Goron’s Ruby if you destroy Dodongo. King Darunia then gives Link the GORON’S BRACELET!, so that now you can pick up the bombs that you see growing around this area! Leave Goron’s City and back to Death Mountain. Head right and you will see a Goron and a bomb flower. You can talk with the Goron if you want. Next, grab the bomb flower and throw it over the edge. You have to throw it next to the large stone so that it will break. It may take a few tries. Once you do, head down there to enter Dodongo’s Cavern. Level Two: Dodongo’s Cavern Enter Dodongo’s Cavern. In this first room you will see bomb flowers and a blocked up door. Use a bomb to open the door. Once you do, walk in to “officially” enter Dodongo’s Cavern. Head in and go down toward the lava. Stay on the edge of the land near the lava, and to safe land. Climb up the ladder. You can also get to this point by jumping across the middle platforms, but this way is quicker. After climbing the ladder, bomb the wall that is in the center. In here you will find a treasure chest which contains the map. Now head to the other side of the room. You can use the middle platforms, or walk around the edge of the lava and climb the ladder. Bomb the wall on the right side to find a new path. Go along the path until you find two statues. Move one of the statues onto the switch. The door here then opens, allowing you to enter. Enter in and kill the two Keese. Enter the next room and kill the two Lizalfos. Use your Deku Shield, because it is better for attacking, and Z targeting. Once they are destroyed head into the next door which was just unlocked. If you are in need of Deku Sticks, use a bomb flower on bomb to your right just as you enter, and there will be a Deku Scrub. He sells Deku Sticks once you defeat him. Now use a Deku Stick and light the three unlit torches in this room.
Once all three are lit, enter the next room. Step on the switch to unlock a door across the room. Head over there and enter the room. Use the lone bomb flower and plant it in the middle of the two sets that are around a large stone. DO NOT go in the other door in this room, because it is VERY hard to get back out. Go in if you want, but it is only for the compass. Once all of the bomb flowers explode, the big stone will become a set of steps climb up them. Follow this path around and go through the next door. Enter here to find statues around a center platform. Move the statue that is blocking the ladder. Climb the ladder, and press the switch. Leave the room and cross the bridge. Don’t have your Deku Shield equipped while you are crossing the bridge, because if a Fire Keese hits you, your shield will burn up. Head into the next room. This room has floor spikes that are moving around, so be careful. At the other end of the room you will see a block below a blocked-up doorway. Pull the block against one of the high pillars across from the doorway. Climb up onto one of the pillars and pick up one of the bombs from a bomb flower. Throw the bomb at the right time so that the bomb will blow up when it hits the blocked-up doorway.
It may take a few tries, and it did for me. Once this is done, climb the ladder and through the doorway. Use the slingshot in the next room and hit the eye above the doorway. Enter this doorway now, and defeat the two Lizalfos. Once they are both defeated, head into the next room and use your slingshot again to hit two eyes. This gets rid of the flames, and now Link can proceed on. In the next room, go to the corner where you see a treasure chest. Open the treasure chest to get THE BOMB BAG! Go through the small passage and step on the switch. This raises a platform in the main part of the cavern. Cross this bridge that you see and stop and the first gap you come to. Drop a bomb down into the eye socket, and repeat this for the other gap on the bridge. Fall down from the bridge and enter the skull head. In the next room, put the block into the center which has a switch. Go in the next doorway. Pick up a bomb and place it in the middle of the room on the rocks. A hole appears. Fall in, and be ready to face King Dodongo. Dodongo’s Cavern Boss: King Dodongo
When King Dodongo opens his mouth to shoot his fire breath, throw a bomb in his mouth. It will stun Dodongo so that you can hit him with your sword. He will then roll around the room. Just stay in the corners/edges of the room to keep from getting hit. When he opens his mouth again to shoot fire, throw another bomb in his mouth. Repeat this process of a total of about four times to defeat him. Once he is defeated, you will be outside the cavern, and King Darunia will give you the GORON’S RUBY! He will then tell you that you should go up Death Mountain to see the Great Fairy. To get to the Great Fairy, head up the path and keep to the left. Go up the ledges, and toss bombs at the rocks to get rid of them. Keep climbing the mountain until you get to a high wall that you can climb. First shoot down the Skulltulas with your slingshot. Now climb up the wall. Once you are at the top, bomb the wall on the right. Walk in and stand on the Triforce symbol. Play “Zelda’s Lullaby”, and a Great Fairy will appear. This Fairy gives you a MAGIC METER! and also teaches you the SPIN ATTACK! Head back down to Kakariko Village. Leave Kakariko Village and head to Hyrule Castle. The Great Fairy had said that another Great Fairy is by Hyrule Castle, so you might as well go now. Enter the Hyrule Castle area and climb the vines. Go straight, all the way back to a sign and a boulder. Destroy the boulder with a bomb. Enter in the passageway, to enter into the next Great Fairy fountain. Stand on the Triforce symbol and play "Zelda’s Lullaby". A Great Fairy will appear, and give you the magic spell, DIN’S FIRE! It’s a cool attack, that makes a big bubble of fire. Try it out, because it’s pretty cool. Now head to Lon Lon Ranch. Exit into Hyrule Field and go into Lon Lon Ranch, right in the middle of Hyrule Field. Once you enter, go into the building on your right. Do not talk to the Talon, the man sitting there, yet. Once you talk to him, you play a game to win a bottle full of Lon Lon Milk. The game is where he tosses the three “Super Cuccos” that he has with him out with the rest of the cuccos, and you must find the three. Before you play, there is a little way to cheat. Grab each cucco and one by one toss them back at the end of the staircase. Now, when Talon tosses the three cuccos out, all you have to do is grab them! Now talk to him, and play the game. Once you win. he gives you another bottle, and it has some Lon Lon Milk. Lon Lon Milk fills up five of your hearts, and one bottle can be used twice. Leave this house and head to your left. Go to the corral and talk to Malon, the girl, (she is only there during the day). Talk to her, and then show her your Ocarina. She then teaches you "EPONA’S SONG"! Play this song and Epona will become fond of you. If you play this song to a cow when you have an empty bottle, you will get free Lon Lon Milk. Okay, it is now time to get that third Spiritual Stone, Zora’s Sapphire.
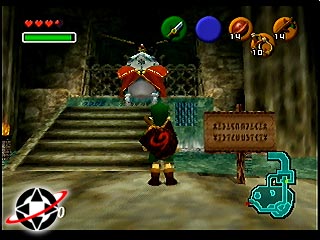
Head up the paths here to find King Zora.
He tells you that Princess Ruto, his daughter, is missing. After talking to him, head left and walk through the little tunnel. Talk to the Zora there. She has you jump off the edge to dive in the water and grab all five rupees to win. You have to play this game, because it’s necessary to get to Princess Ruto. Once you grab all five rupees, go back and talk to the Zora. She will give you the SILVER SCALE! With this, you can dive a little bit farther. Now jump back down into the water. Look for the little entrance under the water. Swim into it and it will bring you to Lake Hylia. Once you are there, look in the water. You will see a bottle. Dive and grab the bottle, and go back to Zora’s Domain. Talk to King Zora, and he gives you a bottle after giving him the letter. Princess Ruto is in Jabu-Jabu, which is in Zora’s Fountain, behind King Zora. He moves so that you can go back there. Go back to the bottom of Zora’s Domain and stand in the shallow water. With one of your bottles, catch a fish. Now go back up and head into Zora’s Fountain. Level Three: Jabu-Jabu’s Belly Go up to Jabu-Jabu, and empty the fish in front of him. He will suck in the fish along with Link. Once you are in, head straight and use your slingshot to hit the little yellow thing, or an “uvula”, to open the door. Keep walking until you find a room with six weird hole-things on the ground. Note the green tentacle for later. Here you will see Princess Ruto. Talk to her, and then she falls down one of the weird hole-things. Drop down that same weird hole-thing, and keep talking to Princess Ruto. Once you talk to here enough she will tell you to carry her. Once you pick her up, you cannot attack. If you need to attack or swim, you must put her down first. Also, if you put her in deep water, she will go back to the last room you picked her up in. Pick her up, and go into the door behind where she had originally been. Go through the tunnel and fall into the water. Now toss Princess Ruto to the other side of the room on the land. Now hit the yellow button on the floor. The water will rise, allowing you to swim over to Princess Ruto. Use your slingshot now to hit a uvula, and go in the next doorway and keep going down the hall. In the next room, you will find an Octorok. Hit it’s rocks back at it to kill it. Once it is killed, go on the moving platform. Hop up onto the ledge and go back into the room where you had originally met Princess Ruto. Go to the other side of the room, and go into the next hallway. Head right, and jump on the switch (with Princess Ruto). Head into the room, and set Princess Ruto down. Use your slingshot and kill all of the Stingers. Once this is done, a treasure chest will appear containing the BOOMERANG! Pick Princess Ruto up and jump on the platforms. This will take you to the upper ledge. Now head down the opposite hall. Put Princess Ruto on the switch, and enter the next room. Use Z Targeting and the Boomerang to destroy the red tentacle. Once it is destroyed, the Map will appear. Now exit and pick up Princess Ruto. If you want, head left into the next room to get the Compass. In this room there will be bubbles which you must defeat in a certain amount of time. If the time runs out, Princess Ruto gets returned to the room with the weird hole-things. After this, destroy the rest of the tentacles. They are all in the rooms around you. Once they have been destroyed, go back to the room with the weird hole-things. Drop down the hole with Princess Ruto that used to have the green tentacle. Now enter the door near you. In here, Princess Ruto will find the Zora’s Sapphire, but then a sub-boss comes in. -Jabu-Jabu’s Belly Sub-Boss: Bigocto- Bigocto only moves around the room trying to hit you. Use you boomerang whenever he is near to stun him. The only way to hurt him is from behind. So when you throw your boomerang, make sure it is at his back. Once this is done, use your sword to hurt him. Repeat this until he is beaten. After you beat him, jump on the platform. Use your boomerang to stop the sponge-things from moving. Head to the next room. Ride up on a ledge move one of the crates onto the button nearby to open the next door. In the next room, climb up the sides to the top. Use your boomerang to hit the Uvula. Now head into the next room to battle the boss. Jabu-Jabu’s Belly Boss: Barinade
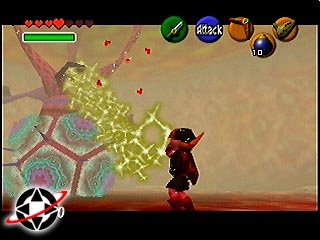
For Barinade, you should stay towards the wall because it’s main activity is spinning. Use Z Targeting and hit Barinade with your sword. Then a lot of jellyfish come out, and spin around it. Z Target onto each of the jellyfish one at a time, and use the boomerang to destroy them. Once the jellyfish are gone, use your boomerang to stun Barinade. Then hit him as much as you can with your sword. Do this about four times to beat him. Grab the heart piece and warp out with the blue portal. You will meet Princess Ruto out in Zora’s Fountain. She gives you ZORA’S SAPPHIRE! Once she gives you it, head over to the land off to the side of the water with the tree. Use a bomb to get rid of the rocks. Go in, and play “Zelda’s Lullaby” on the Triforce symbol. A Great Fairy will appear and give you the spell FAROE’S WIND! Now head back to Hyrule Castle. The Master Sword Once you get near the bridge, it lowers and Zelda rides off with Impa on a horse. She tosses something into the moat by the castle. Then, Ganondorf comes out and talks to Link. Once he disappears, jump in the river to pick up THE OCARINA OF TIME! Zelda then teaches you the "SONG OF TIME"! Now head into Hyrule Market and enter the Temple of Time. Play the "Song of Time" in front of the black Alter. The door will open. Head in and pick up the MASTER SWORD! After this, you will see a little movie.....
2000 Moiph
|
|
Ocarina of
Strategy Guide
Majora's Mask
Strategy Guide
Main |
|||||||||||||||||||||||||||||||||||||||