Jackson Gamers' 18th Century War Game
The Road to Gasthous
Using Rules concepts by Fr. Aelred Glidden, published in MWAN
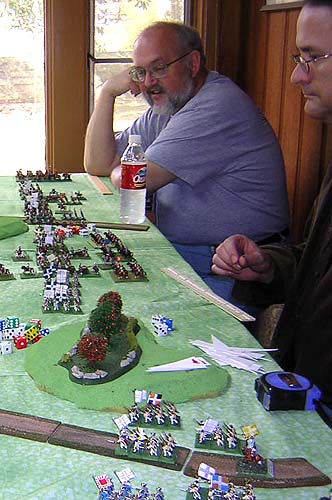
We had intended to play this game at HOBBYTOWN in Flowood Mississippi on January 6, 2007. This game was scheduled to be played at HOBBYTOWN in Flowood MS. However, when we arrived, the gaming area was filled with merchandise being checked in, so we ajourned to Jay Stribling's home in Jackson MS. We were a bit cramped, but battled viciously with our 15mm the British/Hanoverian and French armies.
You can see our version of the rules that we used HERE
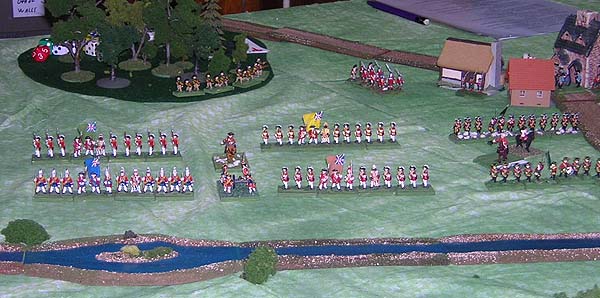
Photo by Ed Sansing
The stream shown in this image flowed from East (Left) to West (Right). Jim Pitts' British battalions are on the Southern bank of the stream. They are attempting to deny the attacking French army the crossing. The French army will advance from the viewpoint of the camera, and cross the river. This shows the setup, before the battle began.
Just to the right of your view, a road crosses the stream on a small bridge, running through the village of Unter Oberdorf shown in the upper right of the photo. This village and the road leading through it, off the edge of the battlefield in the rear is the objective of the French army as they advance on the important town of Gasthous.
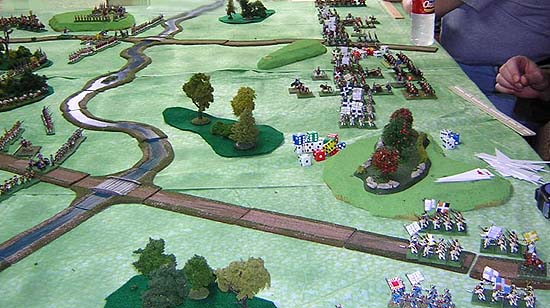
Photo by Ed Sansing
Looking along the French line from East (closest to the camera) to West (center - distant). This is the setup of the French army. The stream is flowing west.
The road crossing the stream closest to your viewpoint passes through Unter Oberdorf (Just off the left edge of the photo) and the area bedtween the two roads shown is the center of the battlefield. Although the French strove manfully, they were never able to maintain forces across the stream here, till it had been crossed at both flanks.
|
| This is the same image as above but cropped differently. Jay Stribling (Blue T-shirt) and Phil Young (at edge of image) commanded the French right and center respectively.
The white triangle markers shown in front of Phil are used to mark units which are being fired at. The players commanding these units under musketry or artillery fire must then test their units' morale. There is no conventional test for fire casualties. Units either shrug off the fire (by passing a morale test) or lose a stand and fall back as a result of the fire (failing the morale test). |
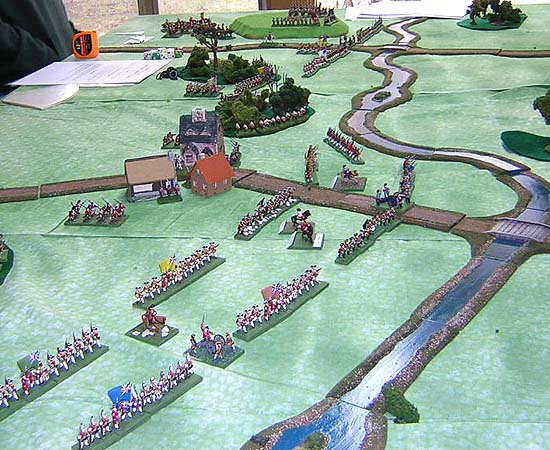
Photo by Ed Sansing
Jim Pitts' British battalions defending behind the stream. This was the right flank of the British/Hanoverian infantry line. Cavalry forces defended the stream to Jim's right (left on the photo).
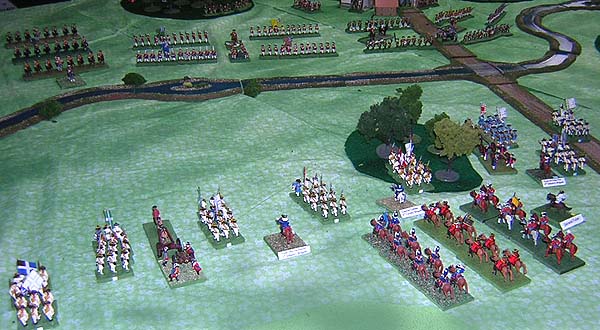
Photo by Ed Sansing
Ed Sansing's command, the French 1st and 6th Infantry brigades and 6th Cavalry brigade. All in column to advance. In this rules set, once the infantry or cavalry move to line, they can never reform into column unless no enemy is within 24".

Photo by Ed Sansing
Per General Sansing: "My 6th brigade, shown ready to advance up the road. The village of Unter Oberdorf and the road exit behind the British were critical to our victory conditions."
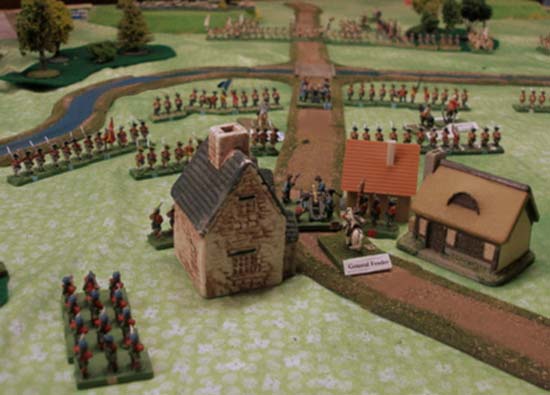
Photo by Jim Pitts
As General Jim Pitts describes it: "A blurry image of the British right flank reserve brigade (three Highland battalions) and a gun. They defend the village of Unter Oberdorf. In the middle ground is a Hanoverian brigade deployed to defend the stream, while in the distance part of the French left flank decide whether to try crossing the stream."
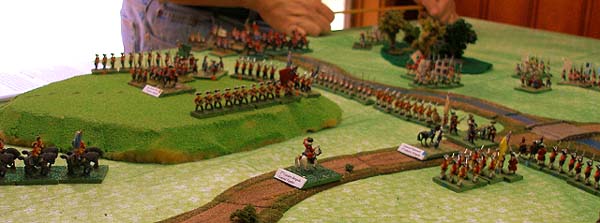
Photo by Jim Pitts
The British left flank, ably commanded by Sean Pitts, watches as the French slowly advance towards them.

Photo by Ed Sansing
In the distance General Stribling's French cavalry is shown in a mass of columns, crossing the stream. Closer to the viewer is Stribling's infantry command of two brigades, ending on the road. Gardes Francais, Garde Suisse and Grenadiers de France made up this command. If it were not for these 6 battalions of elite troops, the stream would not have been forced on the French right.
The loose columns of French infantry with a limbered gun closest to the viewer on the right are commanded by Marshal de France Phil Young. The long lines of infantry on the left, facing the stream and strengthened by two woods and a hill were the British, commanded by the Anglo-Irish general Sean Pitts. They were in lovely true 18th-century lines.
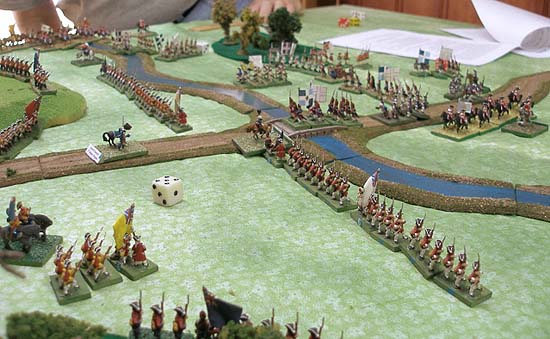
Photo by Jim Pitts
A turn later than the image above French grenadiers force the bridge on the left-center of the British line. French cavalry are in support, but have not yet made the attempt. The British infantry along the stream stoically awaits "Messieur Le Frog."
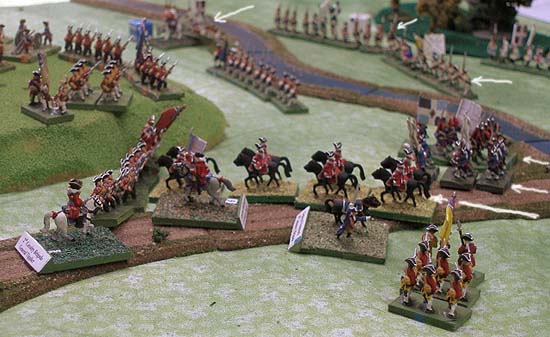
Photo by Jim Pitts
Yet another turn later, French cavalry (Gendarmes of the Maison du Roi) have forced their way over the bridge and, accompanied by grenadiers, assaults the left flank British forces. The French advance in column because the bridge must be crossed that way.
White arrows show the direction of the French attacks. A British battalion hurridly marches up in column awaiting the order to deploy into line and fire into the flank of the French advance.

Photo by Ed Sansing
General Ed Sansing, commanding the French left wrote in his journal; "My cavalry crosses the stream for the 2nd time. The first time it was driven back. An infantry battalion screens the crossing. On the left the 2nd battalion of the regiment Champagne falls back."
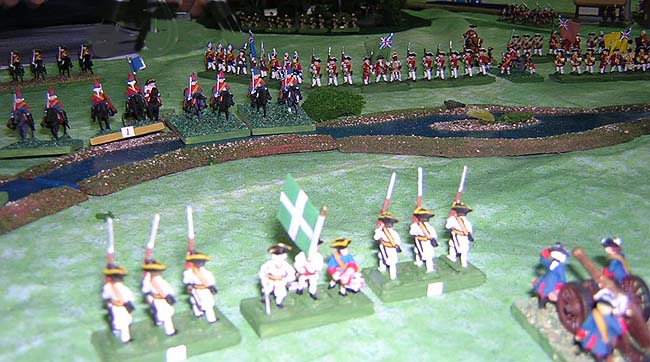
Photo by Ed Sansing
General Sansing continues: "One of my battalions of the regiment Champagne is shown falling back. It had moved forward and was crossing the stream (becoming disordered) when the English cavalry in tall hats (Horse Grenadier Guards) hit it. They stopped at the edge, shouting taunts and jeering. A turn later my French cavalry fell on their flank. They did not jeer then!"
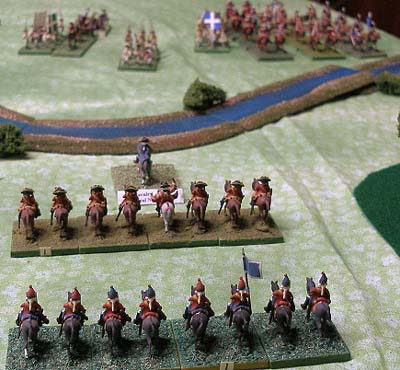
Photo by Jim Pitts
This and the next two photos represent the British point of view on their right flank. From the British General Pitts' Memoirs: "Two regiments of the 1st British cavalry brigade on the right flank of the British line calmly await the French advance."
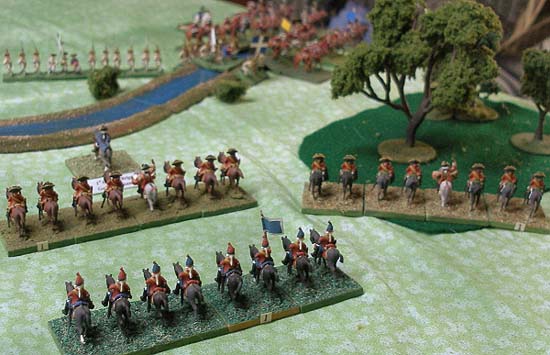
Photo by Jim Pitts
"Meanwhile, on the right flank, the British cavalry brigade commander directs one of his regiments into the woods to surprise the French cavalry after it crosses the stream. Unfortunately the woods were very thick and the regiment was entangled for some time."
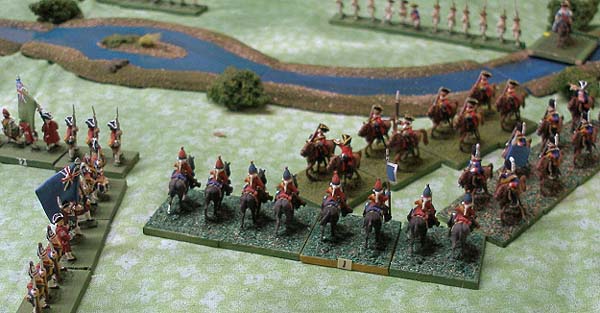
Photo by Jim Pitts
"Once across, the left flank French cavalry finally attacks the front British regiment. In the ensuing melee, the British were temporarily forced back, only to return and defeat the French cavalry"
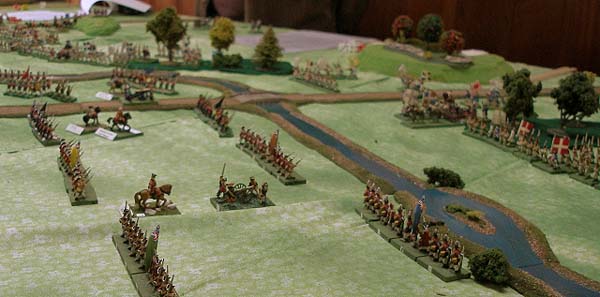
Photo by Jim Pitts
We return to the center of the line and General Pitts continues:"In the near ground, the right flank British brigade moves forward to the stream bank to engage the creeping advance of the French. In the far ground the Hanoverian brigade also awaits the French attack. The French left flank forces can be seen to the right of the image and in the far distance is the French center."
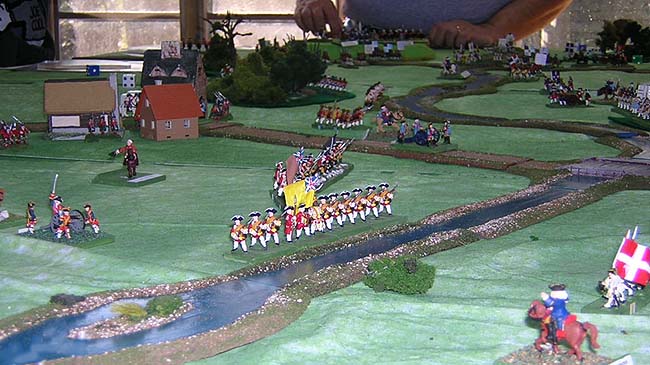
Photo by Ed Sansing
Again we quote from the memoirs of the French General Sansing; "The English re-establish their line in the center, but there is a noticeable lack of support behind the forward units. On both flanks the French cavalry caused much damage. The Brave French regiment Picardy shows it's red flag to the left."
The British general in the center, waving his hat, was the commander-in-chief played by Jim Pitts. General Sansing on horseback may be seen to the right front, in his blue coat.
Why did you fight this Battle?
Set in "The Age of Reason" and using our Quick Tricorne rules set, we project a 3-game campaign. This battle was the first of the three.
The French army, slightly superior in numbers, is on its way to the important city and magazine of Gasthous, somewhere in Western Germany. The British/Hanoverian force will attempt to stop them short of the city.
Right now, we do not plan to fight either the seige or the storm (it it comes to that) of Gasthous.
Both sides freely spent their soldiers' blood in the first battle - like a drunken sailor buying beer for his fellow crew members. If they do not find a way to fight more moderately, the third and last battle may be fought by a corporal's guard on each side.
Who Won this Battle?
The French did. Their army was larger. They had 9 brigades to the defenders' 8 brigades. Two of the French Brigades were quite large, containing 6 battalions each of infantry, while most of the British/Hanoverian brigades had 4 battalions, or even three.
The stream dividing the armies was fordable everywhere, but with a turn of delay involved. About half-way through the game, the French Generals' enthusiasm begin to falter as everything they had managed to get across the sream seemed to fail morale and fell back over the water. Only the fact that the British dice-rolling was as bad as the French and the Frogs' greater numbers enabled the attackers to get the majority of the army across the stream and into action.
Perhaps more photos yet to come!
Return to the Master Index of Photos and Games
Return to the Jackson Gamers' Homepage
Angelfire - Free Home Pages
Free Web Building Help
Angelfire HTML Library
htmlGEAR - free polls, guestbooks, and more!
Thank you for visiting The Jackson Gamers' pages at Angelfire. Please come back and visit again!