Jackson Gamers' Colonial Game
A Matter of Honor!
We played this game at HOBBYTOWN in Flowood Mississippi on January 20, 2007. Fred Diamond was the Game-Master and the 25mm forces used were mainly Ral Partha "true 25" sized colonials, leavened by a few Minifigs and Hinchliffe soldiers.
In actuality there were two wars by the Boers against the British, the first in 1882 and the second at the start of the 20th century. This battle is set in the completely fictional 1-1/2 British/Boer War of 1890. The British are in Khaki, but the Maxim gun has not yet arrived.

Photo by Jim Pitts
The British garrison: two platoons of Highlanders, two platoons of infantry, one gun, and a heliograph team. The British were aware of the upcoming attack, but did not know the direction from which the Boers would come. They set up for all-round defense at the game's start.
Note the "White hunter" with this double-barreled 500 Nitro Express weapon, in the front of the infantry unit on the left flank. A "man among men" he proved a tower of strength to the British.
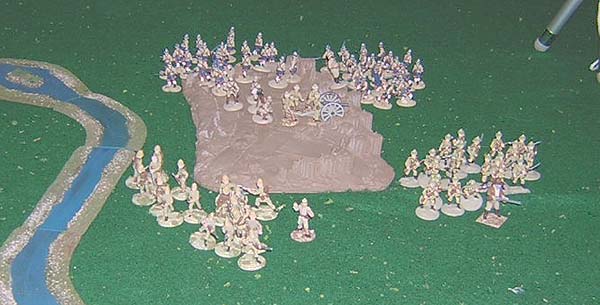
Photo by Ed Sansing
Another view of the British deployment at the start of the game. The "Fort" was a resin ACW defensive work purchased at HOBBYTOWN on the day of the game.

Photo by Ed Sansing
A view from behind the Boers looking into the British positon. Note that there are already a few Boers down.
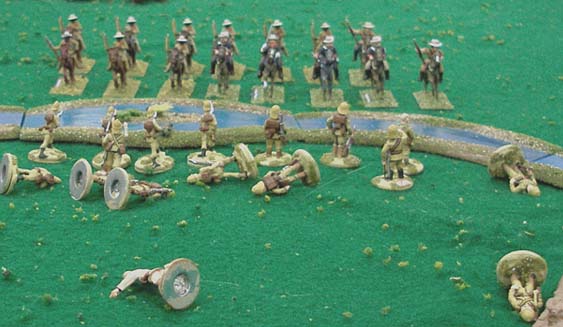
Photo by Jim Pitts
A Boer commando attacks a British platoon defending the stream line. After some fierce shooting at each other, the Boers fell back with heavy casualties. The Boers never managed to cross the stream, being blasted every time that they tried.
What they fought for (Victory conditions for this game)
BOERS - "Take the fort! Kill or drive of "The English."
BRITISH - "Hold the fort! Drive off or capture the Boers. Kill the Boer leader."
You can see that the rude earthwork had a great importance, being the single tangible objective for both forces. "Posession is 9/10s of the law" - and the British had the law on their side. The Boers had to take the fort and they could not even get close to it.
Killing the Boer leader would have been completely at the mercy of the card deck when a hit was obtained. The British forces had no idea of which figure that he was.
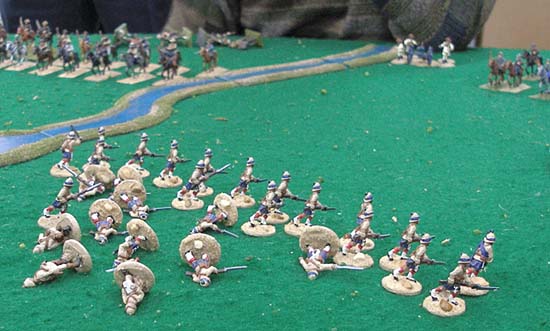
Photo by Jim Pitts
One of the Highland platoons moves out to engage a Boer commando. The Boer pompom is responsible for most of the casualties suffered by the Highlanders, along with some expert marksmanship from the mounted Boers. They soon become sorely pressed by the Boer commando and the pompom.
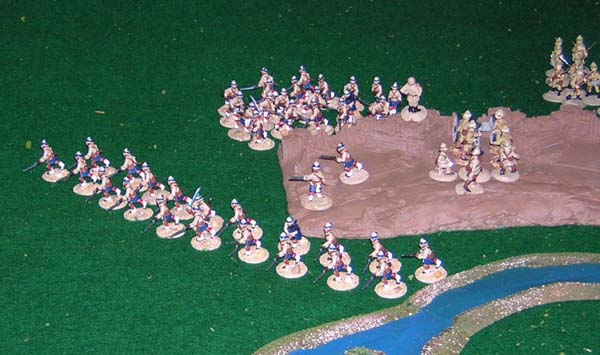
Photo by Ed Sansing
Another view of the Second Highland platoon moving out. This unit replaced the First Highland platoon which suffered a number of casualties while shooting at the Boers. The First Highland platoon can be seen with their casualties at the rear of the fort.
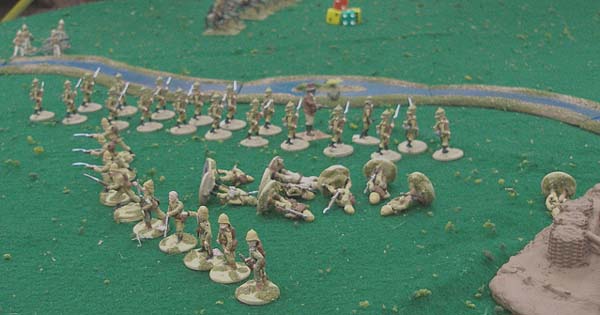
Photo by Jim Pitts
As the British Hussars and another gun arrive across the stream, a fresh infantry platoon moves along the streambed to support their advance.

Photo by Ed Sansing
A veiw of the reinforcing British Hussars and the new cannon can be seen dimly behind them.

Photo by Jim Pitts
Sometime later, the previously shot-up platoon enters the fort to assist in holding it against several freshly arrived Boer commandos. The Hussars continue their sweep into the flank of the Boer advance. Expert Boer marksmanship has reduced the fort's gun crew to one gunner but Colonel Campbell has jumped into the breach (so to speak) to ensure the gun continues to rain shell upon the upstart Boers.
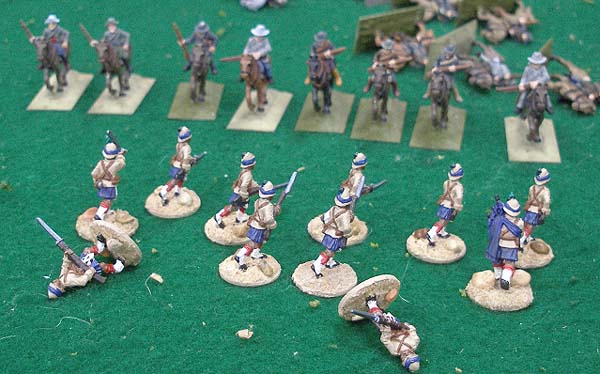
Photo by Jim Pitts
Phil Young's Highlanders have arrived to succor their compatriots and face the reduced strength Boer commando. Although they have suffered casualties, they have also administered a number of casualties on the Boers.
Special Rules
Each side had several advantages unknown to the enemy at the start of the game. In addition to reinforcements which could be expected, the following were in place.
BOERS - They could designate a certain number of British units that had received bad ammunition. They chose the Highland units and the British cannon. Each turn the game-master diced to see if the scotsmen and the artillerists could fire at normal effect, reduced effect, or could not fire at all.
BRITISH - The British knew of the impeding Boer offensive long enough to place primitive mines (Pumpkin mines, after a native trap, used to safeguard vegetable fields) in several locations. These were noted on a map. Whenever the Boers blundered into one of these (they did hit the mines twice during the game) the unit that discovered these unhappy vegetables, received a D6 of casualties. The unit was shaken and that minefield was then assumed to be no longer dangerous.
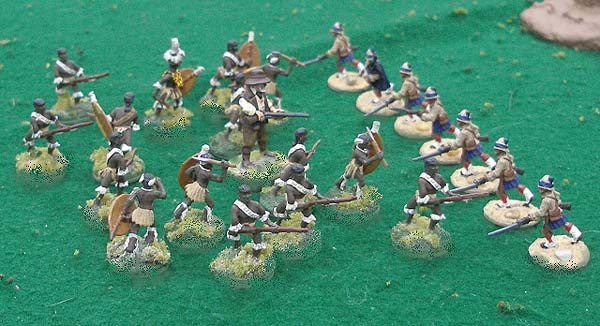
Photo by Jim Pitts
Suddenly seen emerging from the tall grass behind the fort on turn 6, the Great White Hunter Halfmain and his Zulu retainers are investigated by the remnants of a Highland platoon. "What do ye come here for?" asks the sergeant. "I must see your Not-So-Great "white hunter," said Halfmain. "It is a matter of honour!"
The two weeks of rains before the battle had made the veldt green and covered with tall grass. Halfmain and his retainers had been creeping up at 1 D6 per turn for most of the game. When he "surfaced' with his demand to see the "white hunter" aiding the British, Col. Campbell refused. "We are in the midst of a battle - now is not the time." he shouted.
Halfmain did not reply but he and his men moved over to the left of the fort, and with terrible accuracy, his elephant gun dispatched the "white hunter" aiding the British. Then, before the British could react or fire, he and his Zulu retainers dropped back into the grass and were never seen again.
Later, it was rumored that Halfmain was avenging the death of his son who had never returned from an expedition with the "white hunter." Perhaps some day, the Jackson Gamers will play this out, in a "Darkest Africa" game.

Photo by Jim Pitts
The British Hussars ride down a small remnant of a Boer commando. Later the hussars are in turn assaulted in close comat by additional Boers. The Hussars eventually defeat the Boers, inflicting severe casualties - enough to encourage the entire Boer force to ride off into the veldt.
Editor's note: It is unusual to see the Boers trying to close into melee with the British. This historically did not work well, and it did not work here.
A few notes
Fred Diamond had been doing a lot of reading in this period. He anticipated the Boers shooting the British down from long range. It did not happen that way.
We are constrained in the size of table that we have at Hobbytown. Previously we had a 6' x 8' table. Nowadays, we have a 5' x 6'. The Boers just could not get out of range.
Who Won this Battle?
The British did. They had fewer units, but they had artillery and used it effectively.
There was not much terrain and the Boers could have used some rocky ground upon which they could have dismounted and sniped at the "English" at long range.
Perhaps more photos yet to come!
Return to the Master Index of Photos and Games
Return to the Jackson Gamers' Homepage
Angelfire - Free Home Pages
Free Web Building Help
Angelfire HTML Library
htmlGEAR - free polls, guestbooks, and more!
Thank you for visiting The Jackson Gamers' pages at Angelfire. Please come back and visit again!