
Continuing the Attack
Our 15mm WWII game using A modification of the SQUAD LEADER IN MINIATURE rules
Played at HOBBYTOWN in Flowood Mississippi, September 2, 2006
I have wanted to play a miniatures version of Avalon Hill's SQUAD LEADER boardgame for years. Sane people do this with 6mm (1/295th scale) miniatures on a mildly enlarged hex grid. Naturally I did this with a grossly enlarged grid sheet with each hex being 4" across, and 2.25 inches on the hex faces. The troops are in 15mm scale. Our game table which is 6' x 8' is about 1.5 times the width of a scaled-up Avalon Hill game board, but only about .8 of the length of what a game board would be with 4" hexes.
Naturally we overloaded the game with too many units and ran this with little advance training for the players. Never the less, they all admitted enjoying the game (these admissions were made under Duress).
Jay Stribling - Game-master for "Continuing the Attack."
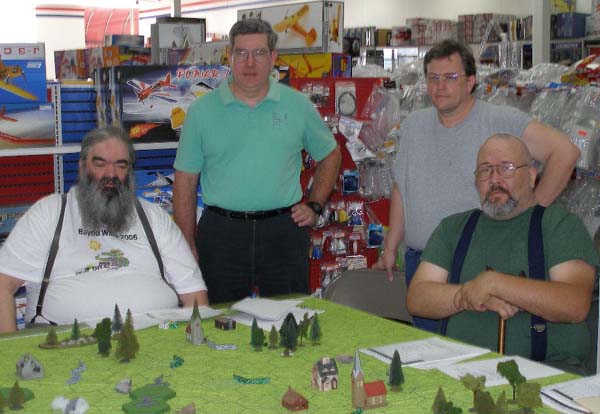
Photo by Jim Pitts
The American Players. In rear: Ed Sansing (standing on left) and Tim Latham (standing on right). Ed was the American commander. His orders were to "continue the previous day's attack." The objective was to take two FLAK guns abandoned by the Germans. The real objective for all the players was to learn to play the game.
Seated players: Robert Whitfield (on left)and Fred Diamond (on right).

Photo by Jim Pitts
Jim Pitts, as the German armor leader is advancing on the extreme German Left flank. Note the combined arms. Jim had the three Panthers. Sean Pitts commanded the two StugIII assault guns in the background. The American Shermans could destroy the assault guns frontally but not the Panthers. Their success against the PzV tanks came only from the flank or rear.

Photo by Jim Pitts
At the end of the game, Fred Diamond, the American armor leader tired of fighting at long range and advancing quickly, his Shermans over-ran many Germans on the American left, taking the two FLAK guns that were the American objective.
This photo shows many of the "unit types" in the game. The Base with 3 German infantry is a Squad. The single figure standing with the Red and White label on his base is an officer of Company A which is composed of 9 squads with various supporting weapons, operated by the Squads, in addition to their integral rifles. The prone figure with the "50mm" label is a marker showing the position of a weapon - in this case a 50mm mortar. This has no integral crew, it is operated by the squad.
The Tank is an AFV which is over-running all of the German units in this hex. The Germans had to retreat very quickly to a new hex. They were broken and dropped the 50mm mortar which was destroyed by the tank.

Photo by Jim Pitts
A continuing melee on the German left-center resulted in this hex being in close combat for two turns with no clear winner. Both sides fed in reinforcements every time they could. Note that the grid is hand-drawn by the Game-master and is not perfect. It was free however, costing only about 5 hours of work.
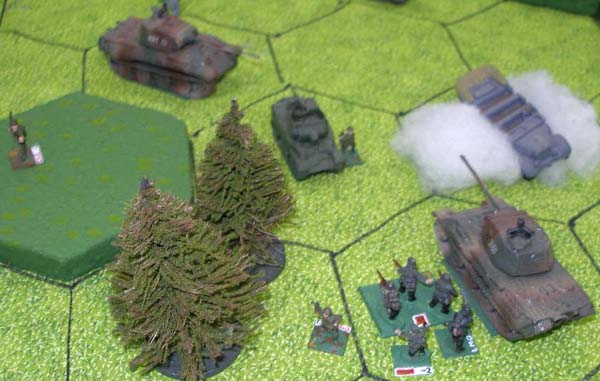
Photo by Jim Pitts
Pitts' Panzers box in a luckless American M8 self-propelled howitzer. In the next turn, the M8 was a barbecue grill for it's crew. A "Ronson" as the Germans called most American armor.
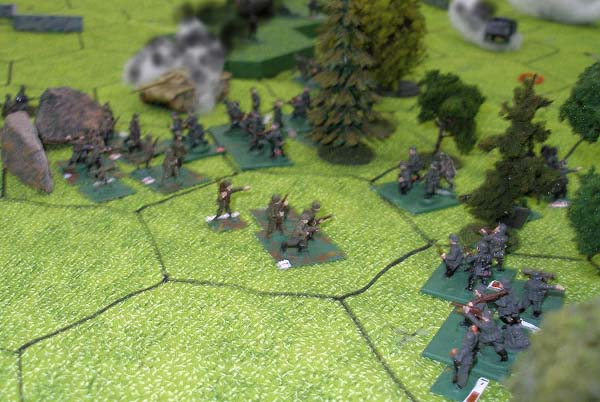
Photo by Jim Pitts
A fuzzy shot of German Infantry advancing into a close combat on their left flank.
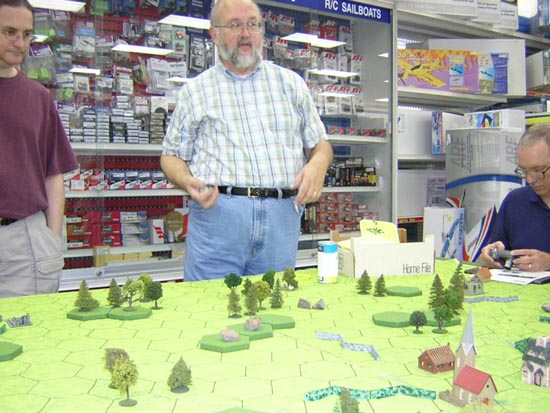
Photo by Ed Sansing
The game master - Jay Stribling - at center, is trying to explain the rules before we begin the game.

Photo by Ed Sansing
Das Deutch Commanders. (GM Note: This exhausts my converstional German)

Photo and comments by Ed Sansing
"My starting position. Robert Whitfield is to my right."
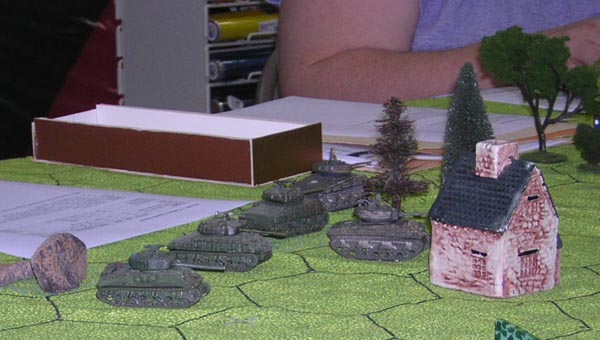
Photo and comments by Ed Sansing
"The American armor. Fred's unit was between Robert Whitfield and Tim Latham."

Photo and comments by Ed Sansing
"My infantry advances toward the objective and get flanked by Panthers."

Photo and comments by Ed Sansing
"The close assault between Phil and I. One of Phil's Stug IIIs burns. Fred Diamond's Sherman was able to kill it before it could get into the close combat. Everything after that was a blur."
Ed continues: "When the Panthers came around my flank I kind of got caught up in the moment. In the immortal words of Ginger for "Chicken Run" - Me life flashed before me eyes; it was boring..
We gamed for almost 6 hours (not counting a 45-minute lunch break). This time also included a tutorial at the start of the game and some time researching the artillery firing rules, and the vehicle movement rules during the game. During this time we completed 3 complete turns. Each turn consists of a complicated phase something like this:
Sequence of action (somewhat simplified)
RALLY Phase
PREP FIRE Phase
MOVEMENT Phase
DEFENSIVE FIRE Phase
ADVANCING FIRE Phase
ROUT Phase
ADVANCE Phase
CLOSE COMBAT Phase
After all of the above is complete, the other player becomes the attacker and all of the above is repeated. After the second player has done all of the above, the turn is over. It all then begins again with the second turn.
Who was the victor in this game?
Actually both sides fulfilled their victory conditions. The Germans were to regain the two 88mm AA guns that the Allies had over-run "the previous day." They succeeded.
The Allies victory condition was to attack and take two additional 88mm guns that were abandoned as a result of the American attack on "the previous day." They werr able to do this.
Yet to come - Our Squad Leader With Miniature rules.
Go to our Squad Leader with Miniatures Page
Return to the Master list of Photos and Games
Return to the Jackson Gamers' homepage
Angelfire - Free Home Pages
Free Web Building Help
Angelfire HTML Library
htmlGEAR - free polls, guestbooks, and more!
Thank you for visiting The Jackson Gamers' pages at Angelfire. Please come back and visit again!