Site hosted by Angelfire.com: Build your free website today!


How do you make your animations related to your mind game*?


1. Introduction


How do you make those rather simple-looking images that are seem very complex? The answer to this is simple: all videos are huge in file size, and I mean huge! For only 641 frames at 320x240 pixels for screen size, that's a whopping 140 megabytes needed to store that video [let alone the file size of the compressed versions when unzipping it]! Have you ever noticed the download size? It's only 112 KB, about that of a very small program or a very large HTML document. The very low quality video is as it is for these two main reasons:

  1. [primary] Compression. Typical compression is 1000 to 1 where 1 MB becomes 1 KB.
  2. Time needed to make the video. Though it's not that strong of time needed, if I were to double the quality by adding some extra textures, the time needed will increase by a small factor, but the compression will weaken a lot! Instead of a decent 112 KB, it could be about 200KB for even minor textures being added!


The reason for the complexity and accuracy is because complex math is involved. There are a lot of complex formulas involved in calculating all this to make each frame accordingly. Spreadsheet documents are the best. This process explains the step-by-step procedure on making one of these animations:

Some basic understanding


At the start is always that thought. Getting that thought into an actual animation is actually easier than you think, but it's very time-consuming. Making the animation itself is very easy, almost without difficulties [my memory is my main obstacle: I forget something within even 10 seconds and constantly!] There are many features I need to consider while preparing.

2. Background scaling

Scaling is were you set the required distance for the "camera" to move before something in the distance moves one unit. This principal gives more of a 3D look and greatly enhanced realism with almost no cost to compression [sometimes, there's a gain, others, there's a loss, gains are what you want]. Backgrounds with a lot of scalings involved take a very long time to move them accordingly. Often, you might here me say something like "600-scale". This means that for every 600 units of movement you make, the background moves 1 unit. In other words, if you move 600 inches to the left on the screen, the background will move 1 inch total to the right. That's actually pretty close. Something at 10 feet away is more of a 40-scale, I think.

Coming soon [hopefully]: a video demonstration that allows you to set scales of background scenery along with the speeds. It may resemble something like this:


Here, you'll just enter some numbers into the text fields to correspond to the scalings of each part of the background.

3. Object movement and acceleration


This is the main reason why so much complicated math is involved. In "The long fall", acceleration is what it's about. I originally made a plan to make it so that the character accelerated to about 1200 mph, or something greater than 999 to illustrate the concept of the speed-O-meter maxing out at this value. 1200 sounded easy because I can use miles per second without the need to convert miles per hour to feet per second. By the first 3 seconds in "The Long Fall", you see a sign saying "Highest point in the world 52,800 feet high". How did I come up with that value and how accurate is it? Consider how I did the math:

When something accelerates at a very constant pace, your average speed is half that of what you end with assuming you start from zero [the formula above is the better method]. Given the average speed, how long did it take to reach the full speed? Acceleration, truly, is about 32.185 feet per second per second, or 21.944 mph per second. Working with these complex numbers is quite difficult. Instead, just as it is in my mind game, it's exactly 20 mph per second. To reach 1200 mph accelerating at this constant rate, it takes 60 seconds do so. 1200 mph is 1/3 of a mile per second. The average speed you have is 600 mph, 1/6 of a mile per second. At 60 seconds going 1/6 miles per second, you'd travel 60÷6, or 10 miles. 10 miles is 52,800 feet.

The formula used for this is:


In this formula, ESPD stands for "ending speed", the speed in which you end with, 1200 in this case, SSPD is the start speed, 0 for the vertical, though it may not seem like it, ACL is the acceleration rate, which, by default, is 20 mph per second. Note, in order for full effectiveness, you need to convert everything into feet per second by multiplying by 22/15. Otherwise, your answers may get confusing. It'll work best if the units of time are in seconds. Distance units don't make much of a difference. If you want it in feet, use feet, meters, use meters. This also includes the acceleration. 20 mph per second is the same as 29 1/3 feet per second per second. One video, the fall glide, uses 5 mph per second acceleration when coming down, 7 1/3 feet per second. This formula is used for the raw change in position from start to where you end. Remove the absolute value bars and you'll get your net change only with the direction you are going in.

4. Planning


The planning phase is, perhaps, the most complex part as I have to work out exactly how I want the video. First, I have to plan the frame rate. Typically, because 10 frames per second uses a nice step between time [a tenth of a second], I usually prefer this. Because acceleration is 20 mph per second, and doing 10 frames per second, between frames, you acclerate at 2 mph per frame, which is why you see the speed-O-meter counting by twos. Because the measurement of feet is needed, I have to convert mph into feet per second, which is a very simple formula:


After doing that, I made a column in the spreadsheet document called "height in feet". To find the coordinates, I added the averaged speeds from the previous frame's to the current frame. A two-frame jump, as seen twice before the big flash, from 10 mph to 6 mph gives a change of 16 pixels for height. If you were to jump that full height, it'd be 9+7+5+3+1, or 25.

Perhaps the toughest challenge was the clouds. I needed them to be levelled out so that the predicted mountains, knowing their scaling, wouldn't peak above the clouds. After trying to figure out the height of the mountains from the bottom to the highest one's peak, I needed to add something to make sure the clouds were above the mountain's peak. After finding out what to do for this, I then started the scalings of all possible new areas. The clouds would be the toughest to figure out, but once they were finally finished after going through 4 glitches in my formula, I was ready to start framing.

5. Pre-framing


Framing is where I make the individual frames that make up the animation. This is the easiest part of the animation, but the most time-consuming. Pre-framing consists of many subcategories as follows:

Character and screen data


I wanted to have the character being displayed on the screen as well, which was only a minor challenge. This is where I had to make another bitmap image showing all the character's positions. The main ones are jump-ball [the main one you see], stand, stopping [including the "puffs" that follow behind], and float-running. Float-running occurs when the running speed peaks above 70 mph most easily obtained by using the flash attack, which is the bright flash you see.

Using stitch marks


Though it has a funny name, stitch-marking is a form of measuring. It's best used for pixel counts of 5 or fewer pixels. Using the select tool in MSPaint is far better, more accurate, and far faster than using the ol' stitch marks. Up close, even at double-size, these markings look like stitch marks, and that's how I got the name, stitch-marking. This image below shows you stitch-marking up to 400 pixels being measured. Note the special 10, 20, 50, 100 and 200 markers to provide quick counting. The image directly below it is the magnified version at twice the size so you can see these stitch marks more closely [especially those who are running at high resolution with a small monitor. The third image is the magnified version of some mountains with the stitch markings shown and the actual distances used with them at four times the zoom.


To make sure the stitch marks don't appear on the actual video, I have even 3 MSPaints running at once. I have the main image, which is the main frame, which those files are saved in a special directory, a second one containing the background image without the character and screen data, and the third one is for the screen data like the speed-O-meter and the character's position and looks. Sometimes, when the character's position is changing a lot, I have a fourth MSPaint running. This one has all the positions that the character is in [the float-running, standing, etc. positions]. To make sure the character is centered, I select the character position that is right for that frame, copy it, then paste it on the MSPaint with the screen data [if there was a character already there, it'd be deleted prior to copying and pasting]. Using the stitch markings made, I then center the character on the screen to an accuracy down to the pixel. From here, on this screendata Paint, I then remove the stitch marks by clearing them on this Paint screen. After doing that, and changing the speed-O-meter's value if needed, I copy the background image into the main frame then copy the screen data image into the main frame, save it then do the next frame.

6. Layering


Often, especially in the newer videos, layering plays a key role. Layering is where I draw and do the frames for one image or part of the video, then when that's finished, I then do the next part. After that part is done, I copy and paste the frontmost object on the background image, giving a far more realistic 3D look. My video, called "The fastest mountain climb", very much illustrates this layering concept. After the guy gets up on the mountain a ways, you'll soon see some more clouds hidden behind the mountain peaks. First, I did the frames for the mountains you see. Next, I worked on getting the cloud heights correct, which was the hardest part and called for a lot of tests. Then finally, the foreground image in which the character runs on at 200 mph! There's an indefinite number of layers you can have, but the more, the longer the video will take to make.

A simple demonstration on what layering looks like is this unusual math sentence:


The first image is the background. The second image is the object closer, or more of a foreground. This is just a simple representation on what layering is. If needed, I could add the Sun [which would be a stationary object], some land someone runs along, a set of mountains way off in the distance [at a 4000 scale], and some screen data to make six layered objects!

7. Main framing


Framing is the easiest part, especially right away in this video. Because the only cloud deck that you can see is practically motionless because of the high scaling, many frames are nearly identical. I only need to change the speed for each frame until the math in MSWorks says that there is a movement. When this occurs, before I change the speed, I move the clouds up by using the line tool. After that, I check the speeds to see if they match, in case I accidentally change the speed, and if they match, I save it. Files are saved in a counting sequence. The first frame, if the planned video has from 10 to 99 frames is called "01.bmp". If it has from 100 to 999 frames, it is called "001.bmp". From 1000 to 9999, it is called "0001.bmp". Doing 9999 frames would mean a sixteen-minute video, and at that length, you're looking into downloading a megabyte or two let alone having a 3 GB full video size!

A ways into the video, when a new cloud layer is about to come into view, I have to think about the overall image. From being completely off the screen to being in the center is exactly 120 pixels. In the chart, if the value falls below 120, then I know that that new cloud layer will appear. Usually I do scaling in factors of two, thus when a new cloud layer comes in, it'll be moving twice as fast as the next closest. Of course, scaling doesn't have to be powers of two, they can be anything, even 1.00000000001. Upon my favorite cloud layer at about 700 mph speed [50 short of the speed of sound], another cloud deck comes in only with a bit more of a tint of blue. This cloud layer is my favorite because of how it's movement goes. It's based on video games, particually 2D video games like Bubsy, Bubsy II, and most other classics for the Genesis. Because video games play at 60 frames per second, and this video plays at 10 frames per second, I have to divide the speed by 6. Because this cloud layer moves once every frame, if this was played at 60 frames per second, I'd call it "moving by 1's". Because this video plays at 10 fps, it's, in a sense, "moving by sixths" as it takes 6 video game frames to move the background at the speed. Close to about 800, you'll suddenly see the cloud deck move by 2 pixels. Though going 700 mph is fast, you're still accelerating, but by this point, acceleration is hard to tell.

As the fourth layer comes in, it's moving twice that of what the third one is going, but it becomes more bluer [however, in actuality, clouds get more white as you get closer to them when you're above them]. When the fifth layer comes and then the sixth approaches, I've noticed that in my charts I created, I still had lots of room before the guy falls into the clouds and below them. I had to add in layers six, seven, eight, and nine! Though there could've been a layer 10, I noticed that the file size was starting to increase because of all those colors. I know so because of testing. Testing is explained a bit later. By the time the fifth layers to the point in which you just fall into the clouds, it took a very long time to do each frame as there were so many parts to the image that had to be move, let alone changing the speed-O-meter by 2. When there were 7 cloud layers visible, outside a lot of forgetting, it took nearly 4 minutes to do one frame.

Upon the final frame when above the clouds and going into them, I thought of having the whole screen flash that color on a much lighter scale. Upon falling beneath the clouds by around 53 seconds into the video, moving the layers of clouds was much easier. Because the first frame under the clouds was an exact math to the last frame above the clouds, I just flipped the image over and changed the color of the sky accordingly while moving the speed-O-meter. I didn't have to move the character as it was already centered exactly, thus flipping in any way doesn't affect it's position. After some further frames, the mountains appear. Though, in my mind game, they actually move six times faster that what you're seeing. They're "moving by thirds" in my mind game, while "moving by five-thirds" here. At 999 mph exactly, the mountains would be "moving by 5/3", so they should've been "moving by tens" in this video, but if I did that, the mountains wouldn't be much of mountains. My mind game's resolution is incredibly high, about that of 2048 by 1536 at my fullest potential. At 999 mph, it would be nearly 15 seconds and about 22 extra frames [15 1/3 seconds] at 60 frames per second from the point in which they first appear to the point in which you're level with their bottoms, even though they're "moving by 5/3". This assumes a constant rate, not an accelerative one.

The ending part had nearly 12 options on what I'd like to have especially with all that speed! Here's some of those 12 I thought of and some details:

  1. The impact causes a huge crator [though 4 pounds going 1200 mph might not seem like much for crator-making, so I kind o' questioned it].
  2. The impact sends out a shockwave spreading out a ways. [This would be quite tough to do let alone adding another 30 to 40 frames on top of it.
  3. The impact hits a curved surface and throws the character forward at 1200 mph [this means another 120 frames just to stop! That'll increase the file size by nearly 25 to 30% on top of the 112KB it is. However, it would be quite easy to do]
  4. The character would come crashing through some trees and stuff, however, this would be very tough to do, majorly would increase the file size, and yet, to come to a full stop like this, you'd fall another 8,000 feet plus!
  5. The character lands in quicksand. [This option is about right as it would be easy enough to do, however, with all that speed, you'd literally be stuck as you'd be glued in really good!]
  6. The character lands in mud. [This option is the same as the previous, only it'd be far easier to get out of.]
  7. A city would come into the background and the character would crash onto a road, but this wouldn't make any sense at all. Yet, it would be quite a bit tougher to add all those buildings, redo the speadsheet to add those extra items, and yet, it would really use up a lot more disk space, about 20% more than what you have it as.
  8. There's certainly more than this, but most highly disadvantageous in many ways.


That's quite a few! My top priority with videos is simplicity and file size. I judge it on 90% file size and only 10% simplicity. Strange as it is, a great focus on file size is also quite directly related to simplicity as well. When a video gets more than 60 MB estimated from the plans, 90% increases to 95% to as high as 97%. This video was based on 96%.

Just to give you an idea on just what goes into an animation, just about any animation, let's consider an example. This animated GIF about a guy on a rocket jumping off, landing, and stopping as a part of a stunt is what we'll consider.


Even an expert couldn't tell what flaws, if any, there were in the physics. Constant acceleration in the background, speeds set so realistically to scale, it just couldn't be beat without considering what happens behind the scenes. Let's consider the first 9 frames of this animation just to give you an idea on what causes this superior accuracy. This animation actually has 150 frames [some identical to the previous one]. Here is what I see in MSWorks when I process an animation, including the long drop one.

Rocket jump-out stunt math notes
Speed of rocket: 550 mph
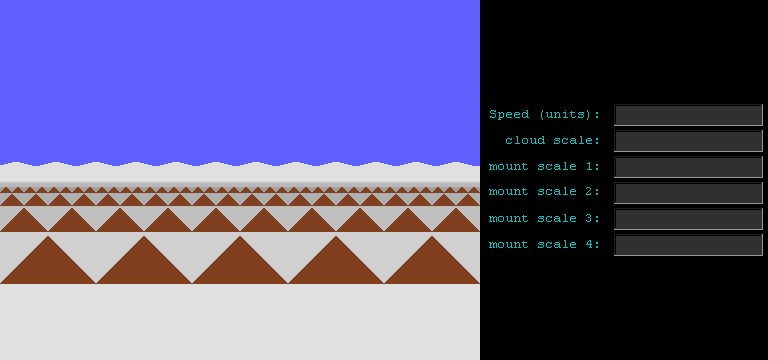
cloudsmntnshillsflags**horizverticverticcloudsmntnshillsdisp SPDnotes/actions
1600*800200speedframespeedposition1600800200notes/actions
0***0***0***x55010028.5††35††50††550‡†
0.350.68752.75x55020028.53550550
0.71.3755.5x55030028.53550550
1.052.06258.25x55040028.53550550
1.42.7511x55050028.53550552.2680509jumps; becomes a ball†‡
1.753.437513.75x5506494928.53062535.0612550.245552.0905723
2.14.12516.55507479628.5635.1250.48551.9202841
2.454.812519.2555084514128.58812535.1762550.705551.757193
2.85.52255094318428.61535.2350.92 551.6013053


Table footnotes:
* This number indicates the scaling of this part of the background scenery. This means that every 1600 units of measure, the background moves 1 unit making it seem very distant. The same goes for the 800 and 200. See section 2 in this report above for details on scaling.
** Flags are my indication that I've completed that frame. A small little x goes here. If you're seeing what I'd normally see, this means that I've left off on frame 7, meaning that frame 7 is the next frame I process.
*** These numbers in these three columns indicate how far the background scenery has moved. The formula for this is the units travelled divided by the scaling of the scenery this column deals with.
This column tells me what the character's average speed is, in mph. Note how, after some nonvertical movement, that it jumps to 49 then decreases by 2 each frame? This is part of the 20 mph per second acceleration downward method. See why I use 20 mph per second instead of 21.9, the far more accurate version?
This column is only used to help me know when the rocket will reappear after the jump and falling. It's like a coordinate. Note how it directly relates to the vertical speed? It's supposedly a temporary area.
†† This column tells you the position of the background scenery, very much like that of footnote ***. These start on different values for one main reason. It tells you what the coordinate value is of the lowest portion of that part of the background scenery. It enhances realism and is used as a check to ensure I'm doing it right. If the numbers didn't match, I'd go back and check the values until I find the point in which I made a mistake and fix it from there.
‡† This column lets me know what the display speed is, what is shown on the screen. Ever notice frame 5's value? Somehow it doesn't match. The reason is because the character is going 50 mph and that's based on the moment the frame should actually appear, not the average speed.
†‡ Just like my scripts, this indicates any special note or action. In this case, the character just starts to jump and the character becomes a ball. Semicolons denote the end of an action or statement when more than one item is present. It supposedly avoids the excessive use of the word "and" and helps distinguish between lists and ends of actions or statements.

That's a lot of information given for just nine frames! This is why the animations appear so flawless and physically realistic. This senseless mess of numbers has much more meaning than what it may seem. If you were to watch the animation in very slow motion, you'll see this in high detail very easily. Because I can't have a fraction of a pixel without involving averaging and dithering effects [increasing the file size a lot], for coordinates, I round down, ignoring what's past the decimal point. The displayed speed value, however, is rounded to the nearest. It uses the Pythagorean Theorum to get this value [with some adjustments made with the average speeds indicated]. If you'd think that doing nine frames is rough [well 8], try 150 frames! Yet, this isn't all of the numbers. To get the puff movements correctly, I had to do some more calculations. Just to the right of this table is more numbers, those used for the movements of those little puffs I seem to like.

To give a demonstration on what I need to move given the situation above, first, I consider the flags. Every time I complete a frame, I mark an "x". At the point in which there was no "x", that's where I left off. It can also be indicated by the file name. If the last file saved was 006.bmp, that means that frame 7 was next, a backup method in case I forget to mark a flag.

To find out what objects move and how much, if any, I look at the previous frame's data and the current in-progress frame's data. Here, I look at the integer values as anything after the decimal is ignored. First, the closest objects are moved first. I look on the left side [in relation to the frame number column] and the first item, the hills. The value changes from 13.75 to 16.5, or 13 to 16. This is a change of 3. I then check the cooresponding part of the vertical movement. The numbers change from 50.245 to 50.48, or 50 to 50. This indicates no change vertically, meaning only horizontal movement. In MSPaint, I highlight the hills, copy it to the clipboard, and move them three pixels to the left as the character is moving to the right. That part is done. Next, I paste the hills and align them to remove the white part on the right side of the image.

Then, I reference the spreadsheet document again and look at the next column to the left. It changes from 3.4375 to 4.125, or from 3 to 4, a change of 1. The vertical part changes from 35.06125 to 35.12, 35 to 35, or no change. In MSPaint, I repeat the process as I did with the hills, only with the mountains and that only one pixel of movement is involved.

Finally, the same process is repeated for the clouds. A change of 1 unit horizontally and nothing vertically. The change is made in MSPaint and I save the file as 007.bmp. Next, frame 8.

As you can see, it seems like a very complicated process, it's actually quite easy, but time-consuming. Imagine repeating this same process: check the numbers, move the item(s), save the file, check the next numbers, move the item(s), save the file,... for the full 150 frames this animation composes of. Now try it with 641 frames as "The Long Fall" has.

8. Testing


Testing, very vital to catching mistakes. Without it, one mistake back on frame 50 when fully finished could mean that I'd have to redo frames 50 to 641! I base testing check points on many factors:

  1. [primary] Amount of work done. This is based on the total number of steps done, typically about 500 or so, though often as high as 800 [risky] and as low as 300 [less risky, but can take a bit more time]. Examples of different steps include:

    • moving each layer individually [for 4 layers, that's 4 steps]
    • checking to make sure everything is right [1 step per layer or objects moved]
    • changing the speed-O-meter and checking it [2 steps total]
    • saving the document [1 step].
    • copying and pasting the images over between the different paints running [3 or 4 steps, equal to the number of paints running and that have been used [thus, if I have three paints running and copy from one and paste into another, it counts as two steps, not three]].


  2. Errors and forgetting. Each error I notice counts as ten steps per error. Forgetting counts as an extra check or two and two steps per check. Forgetting to save the file and not knowing if I did or not counts as 15 steps, plus an extra step to repeat the process for that frame.
  3. Fatal errors. When I notice something is really bad or wrong, and after I go back and fix it, I immediately test it thus counting as a full 300 steps. This is very rare with all that checking I do. The forgetting part is the biggest hazard that causes this. In "The Long Fall", I've had 2 fatal errors making me have to redo about 40 frames, but redoing them was fairly simple. They were more considered as errors each frame, but 40×10 is 400, an automatic test.


Upon viewing a test video, I often make an edit to play it at a much slower frame rate. Sometimes, I stop it and play it frame by frame if I catch something that looks suspicious. If it looks suspicious, I open up two new MSPaints [or use existing ones if possible, though adding new ones is rare] and view the two frames in question [the previous one and the one after where the suspicious point is] on each. I magnify them by typically 4 times the swap between these two Paints. If there's a difference, I change it accordingly. Though there is an error, it doesn't count as ten steps if it's very minor. If it's significant enough, then it will count as the ten steps. If it's fatal making me have to redo all frames done after this point, then these frames are often deleted and redone from scratch causing a big set back and another test at that same point with extra checking involved. If there's no difference at all and that they truely match, then I continue until the next suspicious point, if any. If all is clear, then the step value starts at zero again and I continue on normally as if I didn't test it or as if the frame I was starting was the first one. After another 300 steps goes by, another check will come about. By the time I got close to the clouds where there were 7 or more cloud layers, almost 40 steps went by per frame meaning a test came about in about 7 frames! Just to finish the entire video, I estimate that I've gone through nearly 4500 steps in all! Though there were only 14 tests, the beginning part didn't really have that much of a challenge to it.

To demonstrate the steps, let's look at the example of the table where the animated GIF was focused on. Let's look at the step count just to give you an idea on how this works:

1 - checking the numbers in the spreadsheet to find out how much the hills move
1 - selecting the hills and copying them to the clipboard
1 - moving the hills three pixels to the left
1 - pasting the hills and aligning them
1 - checking the numbers for the mountains
1 - selecting the mountains and copying them to the clipboard
2 - moving and pasting the mountains
1 - checking the numbers for the clouds
3 - selecting, copying, moving, pasting and aligning
1 - saving the file
- - - - - - - - - - - - - - - - - - - - - - - - - - - - - - - - - - - - - -
13 steps for this frame.

This process doesn't include possible forgetting and stuff. If going well, I'd usually do a test after about 40 frames, though, typically, it's around 35 or so, often 30.

9. The final test


The final test is always the exciting part when it comes to making these long videos. The final test is where I do that of a basic test, but instead of starting from where the tests left off [sometimes I do this, but most of the time I go through the entire video], I go through the whole thing. The final test is also where I watch every aspect of the video possible, the speed-O-meter's changing, the background movements and how they should match the scaling, and the view in general.

Upon doing any test, I always compress it as if I was going to upload it. This let's me know of predicted file size that you'll be downloading. By the time the speed-O-meter maxed out at 999, my predictions were showing 93KB [applying the proportions and solving for x, the unknown]. I didn't consider the mountains. Single-compressed, frames typically take about 600 to 800 bytes at this size. With the mountains on the screen, this increased to over 1200 bytes, thus really throwing off my estimate. Because of this sudden rise, I had to go back about 6 frames and change some coloring to reduce this size per frame by about 5 bytes. Though it ain't much, compression was already 1300:1, almost 120 times that of some standard MP3s [assuming 11:1 compression]! By the time the mountains were on the view, the video was a whopping 117.5 MB! Then, when the mountains were fully on the view and the main land was to show, I had to pick a color that would compress extremely well. Indeed, doing some tests before I continued, I saved another 7 bytes per frame. Still, that isn't much of anything, but 7 on 1200 is quite significant. Doing this saved nearly 900 bytes off the file size, though it isn't that significant, it does make a difference.

After the final test is done and is cleared, I dual-compressed it from it's 140 MB full size to a puny 112 KB in size. This is a huge difference, a compression of about 1280:1. Still, this is about 115 times better than that of MP3.

Sound in these videos is not existant for two obvious reasons: making the near-exact sounds is very difficult and that it'll add another 64 KB to the file size if I was using MP3 at it's lowest quality [8 Kbps] I can use. For 64.1 seconds, that 64.1 KB added to 112 KB making it about 176 KB total, a huge difference.

Upon finally dual-compressing it, I then upload it, and make the necessary edit to the page which it is listed on. Then, the final step toward completion is to update the index page and add the shortcuts necessary as from version 3.

10. My animation future


Once I get extremely good at making videos, in the near future, by even one year, I'm about at the level in which I can start making actual 7-minute cartoons. I've heard that a cartoon lasting 23 minutes takes 9-months to make and that's with a group. I'm doing it entirely solo, and I believe I could do one full cartoon in one month, three times faster by size and time put together. Simplicity plays a big role on the comparative edge. Though my animations are quite simple in design, a real cartoon usually has a much better look than what I've got, which asnwers the time issue.

My near-future, however, has two plans for actual cartoons. One is worth waiting for. It features a race and how complicated controls can be when you're going two-thirds the speed of sound [from stopped to 500 mph in a very few milliseconds]. A simpler version is of a court case where teams battle each other with evidence. This is currently in it's planning phase and stuch because I'm out of ideas.

Quite a ways into the future, I'll be having some videos in complex 3D! Though I've found the way to make an animation with the realistic growing and shrinking of objects, it's not what you think it is. Just to have a rectangle where the center is not the real center of the image or viewpoint, I need sixteen columns of numbers [!!!] just to get the positioning of it! That's just for one object. Now consider a lake with, say, about 25 points. I'd need an amazing 50 columns of numbers just to do one frame of the acceleration!

The far future is... programmed. Though I know the very fundamentals of computer programming [or some of it], I'm likely to write a program that does this very repeated process a million times faster than what I could. I could do six thousand frames in less than even 15 minutes [most of the time is spent writing to the hard disk]. I can sort of visualize the code on the program, but I'm not too experienced with it yet to really start. Once I do this, I'll be happy to lend the program. All you'll need to do is give the instructions in the same spreadsheet format, a start image, plus extra items that can be added. Given this, your animation's done in just minutes instead of hours and days, and can be error free [unless the program had a bug].

Footnotes:
* My mind game is a very complex video-game-like "adventure simulator". To learn the full details, go here.