Preparation
[Introduction] [Parts Selection] [Parts List] [Specifications] [Preparation] [Assembly] [Installation] [Results] [Updates] [FAQ's]Block
After a long search for a suitable low cost core for a stroker build-up, my friend Samir (a.k.a. JU member Watershower) found a '00 Cherokee 4.0 short block for me but some parts were missing. At 147USD it was too good a deal to pass up, especially when the specialist Jeep mechanic who was selling it had additional engine parts that he'd give to me in exchange for parts from the short block that I wouldn't reuse. Thanks to Samir, my stroker project was born!
As soon as I took it home I began to tear it down. The original crank, rods, and camshaft were in perfect condition. Since these weren't going to be reused, I traded them for other parts that I needed. The main/rod/cam bearings also looked like new but I didn't reuse those either. Four of the original pistons were in perfect condition (I traded them for other parts) but two were badly damaged by overheating and had scored the top 1/2" of the no.2 and no.5 cylinders. The cylinders needed to be rebored but fortunately the damage wasn't too bad and my local engine shop assured me that a 0.020" overbore would clean them up. This meant that the bore diameter would be increased to 3.895". Since the stroker crankshaft (AMC 258) that I'm going to use also has a stroke of 3.895", the engine will be "square".
The block went to the engine shop where the cylinders were bored +0.020" & honed. After I collected it, I carefully removed all the old gasket material from the oil pan/timing cover/water pump mating surfaces and block deck, sanding them down to an even finish. I also prised out the old rear main seal so that a new one could be installed.
The next task was to thoroughly clean the block inside and outside. I sprayed it with oven cleaner and left it to penetrate for about an hour before rinsing it off with water from a garden hose. Since the block was only lightly coated in oil and dirt, one treatment was enough to get it looking spiff. I left it outside under the hot summer sun, blasted it with compressed air to dry, and quickly coated the cylinder bores, lifter bores, and bearing surfaces with clean engine oil to prevent surface rust from forming.
The block then went back to the engine shop to have the old cam bearings removed and new ones pressed in. The old steel freeze plugs were also replaced with new Pioneer brass plugs that won't corrode. Finally, the pistons were pressed onto the connecting rods. With the block prep now completed, I could start assembling the short block.
Cylinder Head
During the time that I was waiting for various parts to arrive from the USA, I set about porting my spare '92 cylinder head. I repeated the same procedure that I had performed when I ported the head on my old 4.0 engine last year except this time I was more aggressive. I opened up the ports more than last time since this head was going onto a stroker engine so it needed to flow more air. The final port dimensions were as follows:
Intake port entries (rectangular): 44.0mm x 36.0mm (C/S area = 85.7% of valve head area)
Exhaust port exits (oval): 37.0mm x 34.0mm (C/S area = 86.7% of valve head area)
Intake port throat diameter: 43.0mm (88.6% of valve head diameter)
Exhaust port throat diameter: 33.0mm (86.6% of valve head diameter)
Intake port volume = 114cc (stock is 112cc)
Exhaust port volume = 80cc (stock is 73cc)
I also cc'ed the combustion chambers after the porting work was completed and the combustion chamber volume came to 57.0cc. The head then went to the engine shop where the valve seats were reground and the valves lapped. Since the valves and the seats were in excellent condition, only a mild clean up with grinding paste was necessary. After I collected it, I washed it thoroughly with gasoline and blasted it with compressed air to remove any remaining dust so that it was clean and ready for assembly. To finish off the head prep work, I sprayed it with matt black heat resistant paint and pressed in a new 2" diameter brass freeze plug at the rear.
The valve cover needed a good spiffing so it was acid dipped at the engine shop to remove the old paint and washed. I then sprayed it with the same matt black heat resistant paint to give it new factory look.
All the parts that are either going to be reused, or came free with the short block in exchange for non-reused parts, have been thoroughly cleaned and are ready for service. As hotrod engine builders would say, cleanliness is next to godliness!

Block viewed from above. Block deck is as clean as a whistle. It checked out to be perfectly flat and didn't need to be milled.

Block viewed from the front. Same standard of cleanliness also applies to the timing cover and water pump mating surfaces.
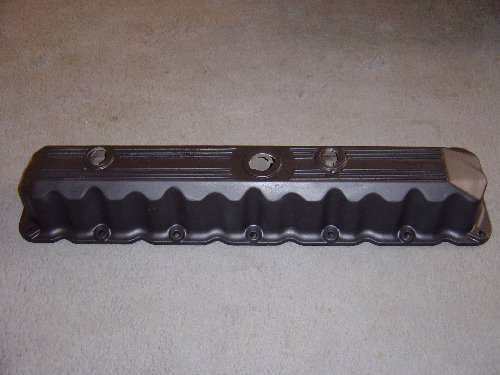
Valve cover acid dipped to remove old paint, and resprayed with matt black heat resistant paint.