
.
.
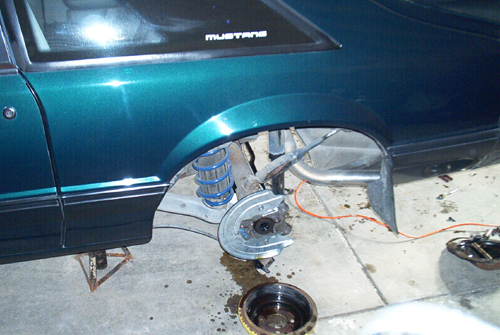
I don't have many pictures of the rear brake conversion however I will take a few more and post them soon. The rear is pretty easy to do. First off, pull the tires and then remove the drums from the brake shoe assembly. You will see that you can't access the bolts that hold the brake assembly to the axle housing because the axles are obstructing them. This requires that you remove you differential cover. Loosen the bolts and use a screw driver to pry the cover off of the differential. Be careful not to mar the gasket surface as this will make it more difficult to get a good seal on reassembly. Looking into the open rear end you will see the carrier and the spider gears. Between the spider gears is a thick metal rod. This is the retaining rod and it is held in place by a small bolt on the passenger side of the carrier. Take out the bolt and slide the rod out. Now you can push on the axles towards the center of the car. This will reveal the C-clips on the ends of each axle. Use some needle nose pliers to pull the C-clips out. Now you can slide the axles out from the housing. Carefully and slowly slide the axles out making sure not to nick the bearings on the way out. This migh tbe a good time to change the bearings and the seals at the end of the housing. At this point you have to locate four (4) bolts that hold the whole drun braking assembly onto the housing. Remove the bolts and their accompanying nuts and take off the drum brake assembly. Disconnect the brake lines from the back of the drum assembly as well. Now you are set to install the new backing plates for the disc brakes. They go on the same way the old assembly came off; via the 4 bolts and nuts.
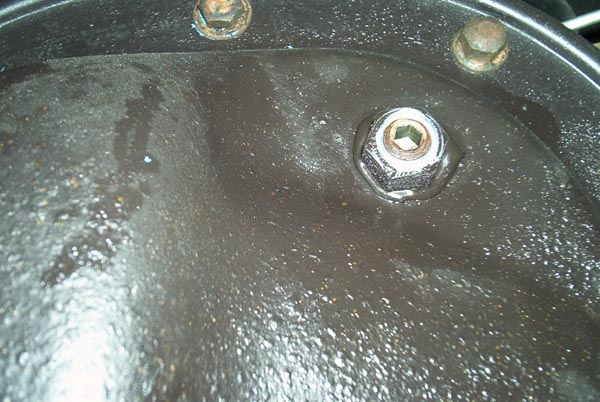
Next you can install your new axles. Simply slide them into the housing and reinstall the C-clips. Drop the rod back into the carrier and put the bolt back into the rod to keep it from sliding out. Make sure the rear end cover is totally clean before putting it back on the car. Scrape off any RTV silicone that may be still hanging around and clean the surface of the cover and the rearend with some brake cleaner. Many people forgoe the paper gasket that goes between the cover and the rear end. I am one of them. I simply laid a bead of Blue RTV long the edge of the cover, spread it out evenly and reinstalled it to the rearend. Do not over tighten. Then you need to refill the pumpkin with new gear lube. There is a small plug on the front side of the differential near the point that the drive shaft connects to the rear end. You can take a wrench and short 3/8" extension and stick the extension into the square hole in the plug. In my case this was no an option because the square hole was now round. Instead I removed the rear cover again and drilled a hole towards the top of it. I cleaned up the hole and made sure it was free of dirt and oil. Then I bought a nut and hex plug or the same size from the local hardware store. While there I also picked up some JB Weld. I put JB on the nut and put it on the outside of the diff. cover lining up the hole in the cover with the hole in the nut. Be sure not to obstruct the hole with the JB Weld as it will harden quickly and will be nearly impossible to remove. Once the JB was dried I put the cover back on the rear end. You can then fill the differential with gear lube which is much easier now that the hole in in the back. I then took the hex plug and put a small amount of low strength thread locker on it to keep it from rattling into the rear gears while driving (bad news).
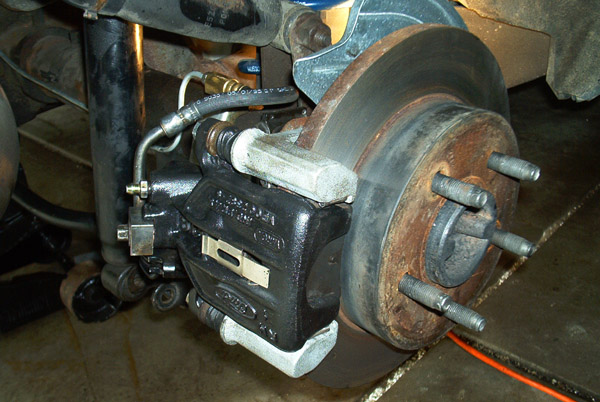
Now you can go about putting the rotors on the new axles. Next thing to do is install the anti-moan brackets. These have a U bolt built into them which wraps around the axle housing. Make sure you have right bracket on the right side of the car and vise versa. Line up the two larger holes in the anti-moan braket with the holes in the backing plate.
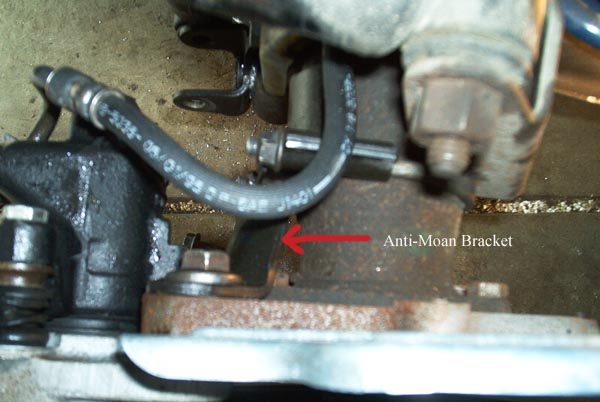
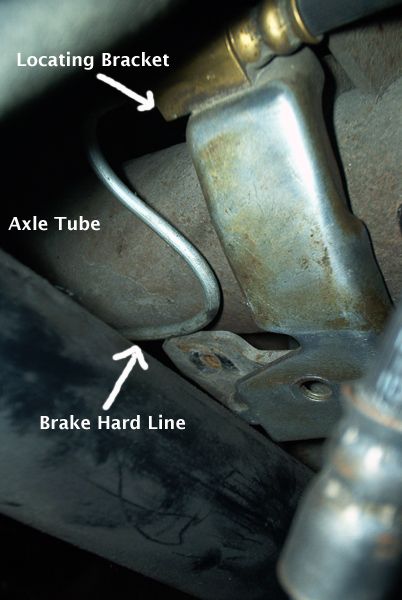
These holes are where the calipers attach. Tighten down the anti-moan brakets and move on to the calipers. The calipers will go on the outside of the backing plate. Meaning the backing plate is sandwiched between the anti-moan bracket and the caliper. Put the bolts though the anti-moan bracket, through the backing plate and thread into the caliper. Make sure you have good pads on the rear calipers. Work your way to the top of the pumpkin of the rear end. There is a distribution block where the two hard brake lines are attached. Disconnect those lines and install the new hard lines in the same manner. Connect the hard lines to the soft lines of the calipers and screw the soft line locating arm into place. You may have to drill 2 holes in the shock mount plate on the axle housing to accomodate the soft line locating arm. One hole for the locating tang and the other for a screw into the hole of the locating arm.
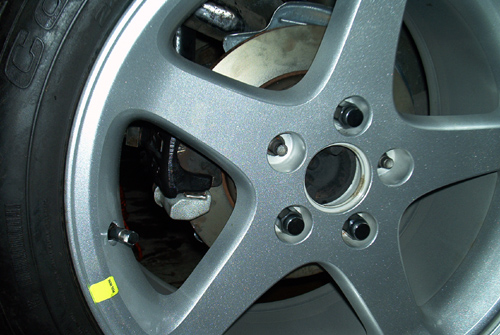
You can now test fit your new rims and tires and see if you have any clearance issues. Depending on whether your car is lowered or not, the width of your rims, the width of your tires, etc. you may have some issues with tire rub and some fender rolling may be in order.
There the rear brakes are finished.
That wasn't so bad.
