Freehand Tool Hands-On Exercise pp. 62-66
The Freehand Tool offers three selection types:
- Freehand
- Point to Point
- Smart Edge
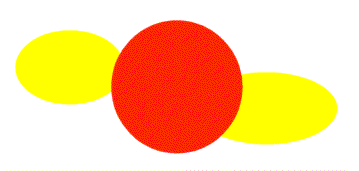
Create an image as shown below for practice:

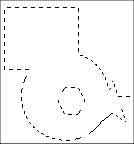
When the Freehand Tool is set to the Freehand Type, you can easily draw any irregular shaped selection area that you wish. Give it a try.
When the Freehand Tool is set to the Point to Point Type, you click at each vertex (corner) of the desired selection area. Double-click when you are finished. Give it a try.
When the Freehand Tool is set to the Smart Edge Type, you can click near an object on the canvas and the selection marquee will conform to the edge of the shape. Give it a try!
Magic Wand Tool Hands-On Exercise pp. 66-68
The Magic Wand Tool permits you to select various colored areas.
- Select the Magic Wand tool (and set its tolerance to 10)
- Click an area of an image
- You should see a marquee appear along the edge of the shape
Selections Menu pp. 67-68
The Selections Menu offers:
- Select All (Ctrl + A)
- Select None (Ctrl +D)
- From Mask (Shift + Ctrl + S) [Chapter 11]
- Invert (Shift + Ctrl + I)
- Float - Creates a duplicate that can be moved
- See page 68 for 10 more options
Editing Your Selections in Paint Shop Pro pp. 69-73
Hands-On Exercise for Adding to a Selection pp. 69-70
To add to a selection that has already been made, all that one must do is press the Shift key as another selection gets created with the mouse. Try this on the canvas in Paint Shop Pro.
Hands-On Exercise for Subtracting from a Selection pp. 70-71
To subtract from a selection that has already been made, all that one must do is press the Ctrl key as another selection gets created with the mouse.. Try this on the canvas in Paint Shop Pro.
Hands-On Exercise for Expanding and Contracting a Selection pp. 71-72
Sometimes one might want to expand or contract a selection by a cretain number of pixels. To do this use Paint Shop Pro's menu:
- Click Selections/Modify/Expand & Set the Number of Pixels.
- Click Selections/Modify/Contract & Set the Number of Pixels.
Hands-On Exercise for Growing a Selection p.72
Often one may want to select more areas that have pixels that are colored similarly to those already chosen. Rather than resetting the Magic Wand's tolerance, one may want to:
- Click Selections/Modify/Grow Selection
Hands-On Exercise for Selecting Similar Areas p. 72
Also, sometimes you may want to select noncongruent (noncontiguous) areas of the same color. If so, then:
- Click Selections/Modify/Select Similar

Hands-On Exercise for Saving & Loading Selections pp. 72-73
The selections (marquees) that you make can be saved and reloaded into another file.
- Click Selections/Save to Disk
- Click Selections/Save to Alpha Channel
- Click Selections/Load from Disk
- Click Selections/Load from Alpha Channel
Note: An alpha channel is a storage area for items that your image is not currently using such as:
- Selection Shapes
- Masks
Copyright © 2001, RGPatterson, all rights reserved; last revised: 9/5/01

