There are other settings that you can make when you use the Draw Tool:
- width
- aliased or antialiased
- tracking (the degree to which the curve follows the mouse)
- cap (the appearance of the line's endpoint)
- miter (how lines are joined)
- miter limit (length of the miter)
- whether the line is stroked (outlined), filled, or both
- whether the line has a gradient, pattern, or texture
Creating a Bull's Eye Using Paint Shop Pro pp. 93-96

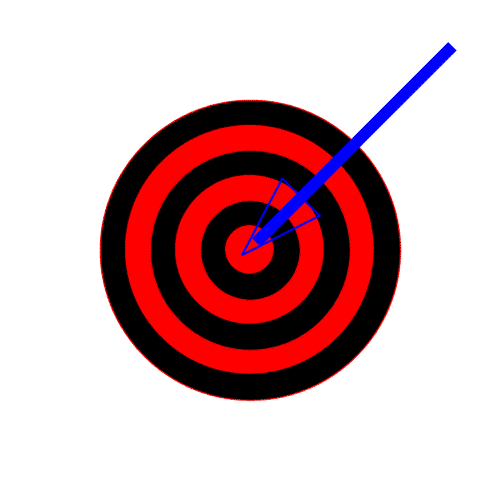
- Open a new file, 500 px x 500 px x 72 dpi, White background, 16.7 Million Colors
- Set the background color (fill) to Black
- Set the foreground color (stroke) to Red
- Set the Foreground and Background Styles to Solid
- Select the Preset Shapes Tool
- Set the shape to Ellipse
- Choose Antialias
- Do NOT choose As Vector
- Click View/Grid
- Click File/Preferences/General Program Preferences/Ruler & Units Tab
- Possible Better Alternative: Click View/Change Grid And Guide Properties
- Set Vertical and Horizontal Spacing to 50 px each
- Add a Layer
- Move the Mouse Pointer to 100, 100
- Shift-drag to create a 300 px diameter circle
- Switch the foreground and background colors
- -------------------------------------------------------
- Move the Mouse Pointer to 124, 124
- Shift-drag to create a 250 px diameter circle
- Switch the foreground and background colors
- -------------------------------------------------------
- Move the Mouse Pointer to 150, 150
- Shift-drag to create a 200 px diameter circle
- Switch the foreground and background colors
- -------------------------------------------------------
- Move the Mouse Pointer to 174, 174
- Shift-drag to create a 150 px diameter circle
- Switch the foreground and background colors
- -------------------------------------------------------
- Move the Mouse Pointer to 200, 200
- Shift-drag to create a 100 px diameter circle
- Switch the foreground and background colors
- -------------------------------------------------------
- Move the Mouse Pointer to 224, 224
- Shift-drag to create a 50 px diameter circle
- There's a Bull's Eye!
- Save as bullseye.psp
Creating an Arrow for Your Bull's Eye pp. 97-100
- Resave bullseye.psp as bullseye2.psp (now you'll have a backup)
- Create a new layer for an arrow
- Set the forecolor (stroke) to blue
- Select the Draw Tool
- Set the Line Type to Single Line
- Set the Width to 12
- Choose Antialias
- Do NOT choose Create as Vector
- Move the mouse pointer close to the bull's eye's center
- Draw a line to the upper right outside the outermost ring
- Set the Width to 2
- Draw a perpendicular line as shown
- Consider using the Zoom Tool
- Draw 2 more line segments as shown
- Select the Flood Fill Tool
- Set the background color to blue also
- Set Fill Style to Solid
- Set Match Mode to RGB
- Set the Tolerance to 10 and Opacity to 100
- Click inside the arrowhead to finish it
- Antialias may prevent some pixels from changing color
- You may need to magnify to color some of the pixels with the Flood Fill Tool
- T. Michael Clark suggests using a brush to fill in the remaining pixels - whatever method you prefer, go ahead!


Learn How to Use Bezier Curves pp. 100-103
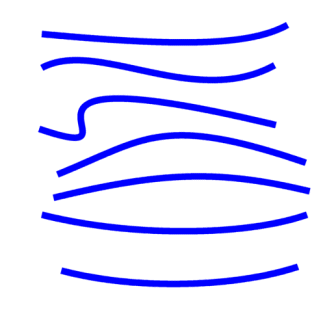
Bezier curves are tricky to learn at first, but the time spent now may pay off later. Many other graphics programs also use them.

- Open a new file, 500 px x 500 px x 72 dpi, White background, 16.7 Million Colors
- Select the Draw Tool
- Set the Line Type to Bezier Curve
- Set the Width to 10
- Choose Antialias
- Do not choose Create As Vector or Close Path
- Set the Stroke style to Solid
- Set the Fill style to None
- Decide whether or not to display the grid
- Create a horizontal line with the mouse pointer by dragging
- Click below or above the segment; perhaps drag some
- Again click below or above the segment; perhaps drag some
- Practice making a series of Bezier curves
Copyright © 2001, RGPatterson, all rights reserved; last revised: 9/5/01

