
BABailey's Rebel 250 Project #3b
Highway Pegs Replacement

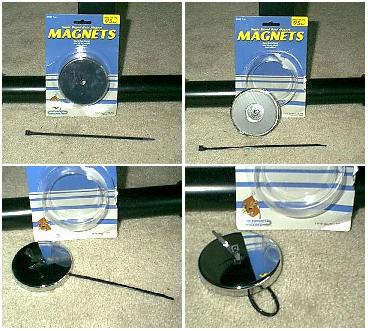
The bike came from the dealer with abbreviated basic highway pegs on angled brackets ... the right one was bent in slightly when i got it - apparently was dropped by the previous owner - i bent it back straight ... but then after several months i pushed a little too hard while shifting my weight on the seat and the right bracket snapped loose (the bolt hole slot part for mounting it to the frame has a crack in the lower slot section ... the upshot is the right highway peg bracket is loose and not suitable for riding use ... after ignoring it for a month or two i decided i used the pegs enough in my riding to make it worth replacing ... since dad already had two harley pegs in the garage parts box i went to the shop and inquired about the clamps for mounting pegs to the engine guard bars ... clamps were $8 each - got two - took them home and mounted the HD pegs to them (black rubber = 'new' HD pegs ... silver = old pegs) ... i left the old peg mounting brackets (including the cracked right one) in place as they make an excellant heat guard to prevent me from melting my bootheels on the mufflers ... and i also took a trick tip i read about for those traffic light sensor loops and stuck a 75#lbs pull shallow pot magnet to the right side of the engine guard mounting 'T' to help trip the sensor loop ...


Click on this icon logo to RETURN to BAILEY Motorcycle MAINpage


Please contact BABailey at MillenniumRebel@yahoo.com about information on this page