The ads below were placed on my site by Anglefire. I know nothing about them.

undefined
undefined
PEREGRINE CAMO SYSTEM
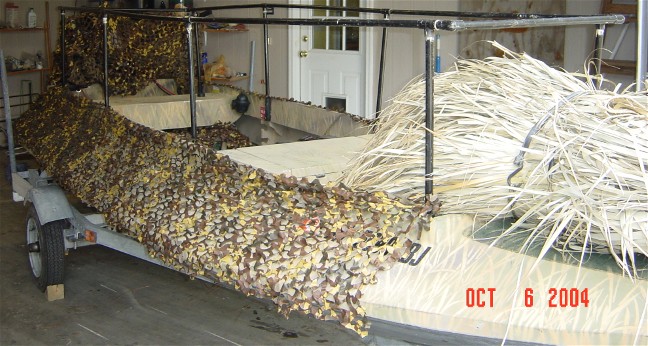
I designed a low grass blind for my duckboat, the Peregrine. The blind is just 36" high when measured from the waterline. We
hunt sitting on the bench seats in the boat. The grass comes up to eye level.

This blind is totally removeable from the boat. It takes me 13 minutes to erect it by myself, and 10 minutes to tear it down.
The reason I made it totally removeable, is that the boat is dual purpose, for fishing and hunting. The blind takes
longer to assemble that a scissors style blind, but can be gotten totally out of the way for fishing.
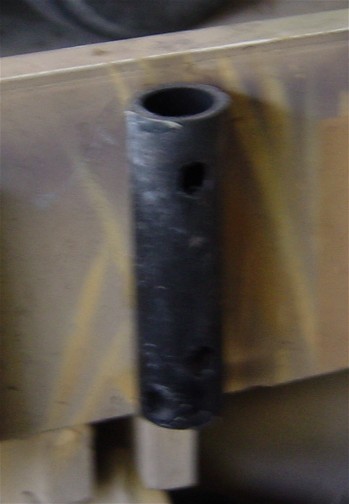
We start with two simple components, a frame support tube cut from 1" black drain pipe. Something needs to be put across the
bottom of the pipe to keep the vertical frame tubes from sliding through. You could just use a stainless steel bolt. I
drilled a 5/8" hole across the bottom of each tube, and inserted and glued a section of 1/2" CPVC pipe across the bottom of each
tube, and sanded it smooth. It didn't take too long, and it won't ever rust. These support tubes are screwed into the sides
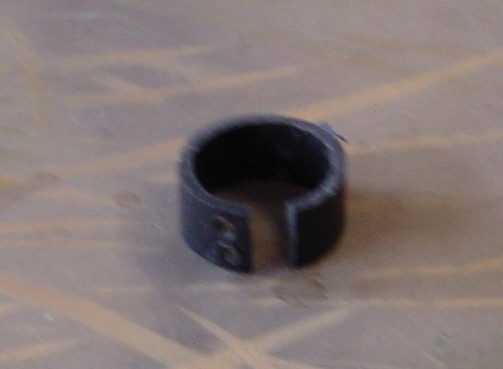
of the combing with stainless steel screws and sealed in place with marine sealer or bedding compound. The rings are cut
from 1 1/2" black drain pipe. I used a dremel tool cutoff wheel to cut the channel, which is a little smaller than the external
diameter of 3/4" CPVC pipe. I cut the channel, then drilled multiple holes along one edge of the channel, then cut the pipe
into short sections, each with two holes drilled so I could attach it to the grass camo panels with black cable ties. I'll later slip these rings over
the CPVC pipe frame.
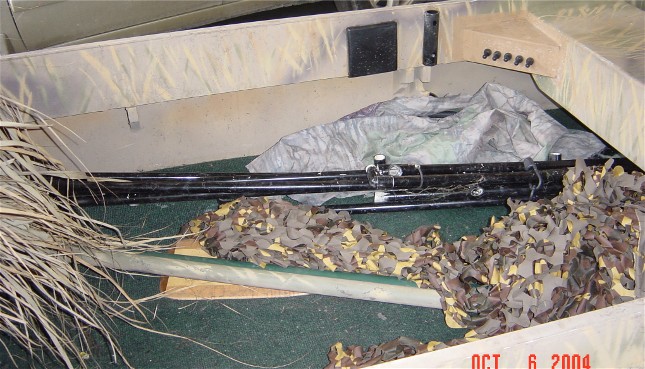
You can see how the folded up blind frame fits under the rear seat of the boat when not in use.
Here, the verticle frame tubes, which are 3/4" CPVC pipe, painted black (don't paint the very end. YOu'll later have to sand
off the paint as I did if you do. The frame connectors fit the pipe very snuggly and there's no room for paint.) I just lay some
cerex type camo, I think this is called "deaduck" or something like that, cheap, light, available at Cabela's, and run the tubes
through holes in the cerex and into the frame support tubes.
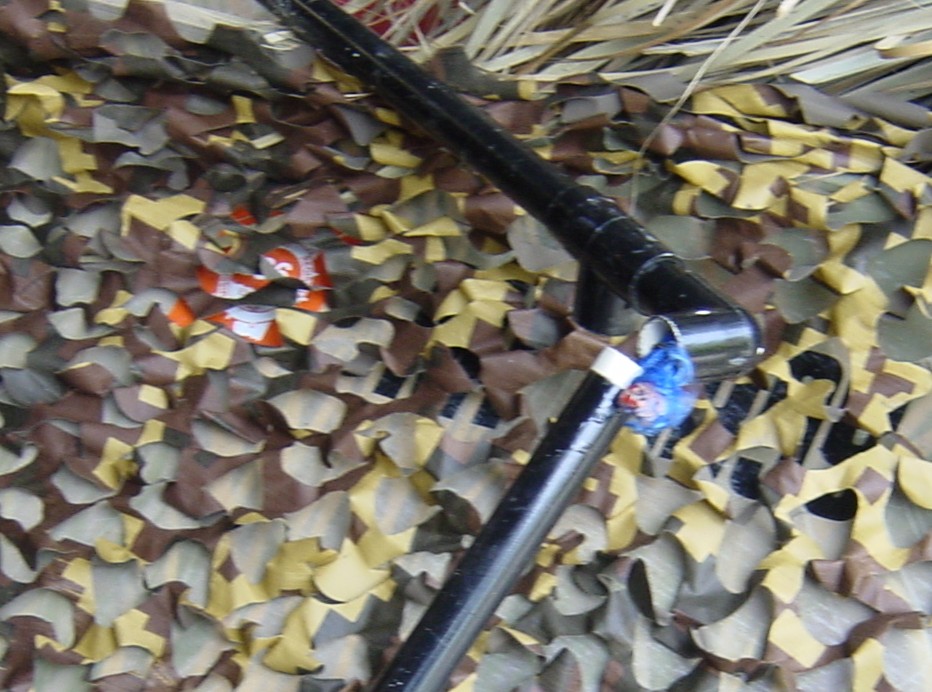
Here you see the bungee cord running through the horizontal frame.
Here's the horizontal frame set up. What I did to build this the first
time, and it didn't take long, is to take sections of 3/4" CPVC pipe, along with T piece connectors and 90 degree connectors
and just built it on top of the verticle tubes. No pipe cement is used to hold this together. Once built, I drilled a hole across
the end piece of the frame, and ran some decoy line inside this piece, and tied it through the holes in the end. I ran the line
through the whole inside of the frame, and tied several sections of bungee into the line. The line is finally tied into the
last section of the frame. The first and last sections in the circuit are NOT tied together. This way, the frame is all tied
together just way it needs to be to assemble it quickly. The tension from the bungee holds it together. You see how the grass
panel bundle is tied up neatly in the front deck of the boat. It stays there until the frame is set up.
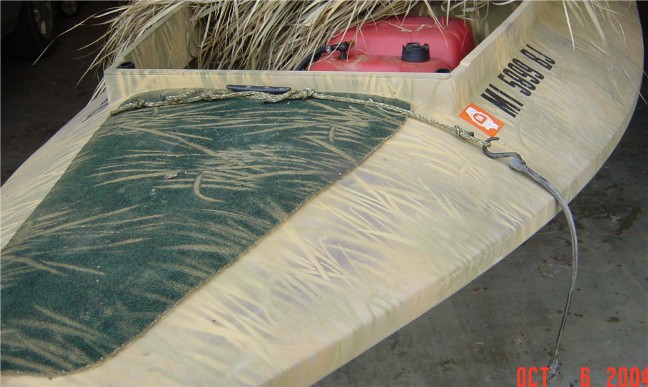
This is the grass strap that holds the bundles on the foredeck. It's just two pieces of rope, with a loop tied
on both ends and a bungee. The loops slide over a cleat on the deck.

You see how the panels go on and attach to each other. All the panels are made the same so they are interchangeable
These are made by cutting Avery Real grass panels in half horizontally. Four 4x4 panels (actually, the Avery panels are about 5' high) cut into eight 4x2 panels are needed to make the blind. This will set
you back about $50. You have to be carefull cutting the panels, so
you cut only the weave holding the panels together in the back, and not the grass itself. On the vertical edges of the panels,
1/2" irrigation hose lengths are tied on one side, and a ring is tied on the opposite side. Again, the same side for each
panel.
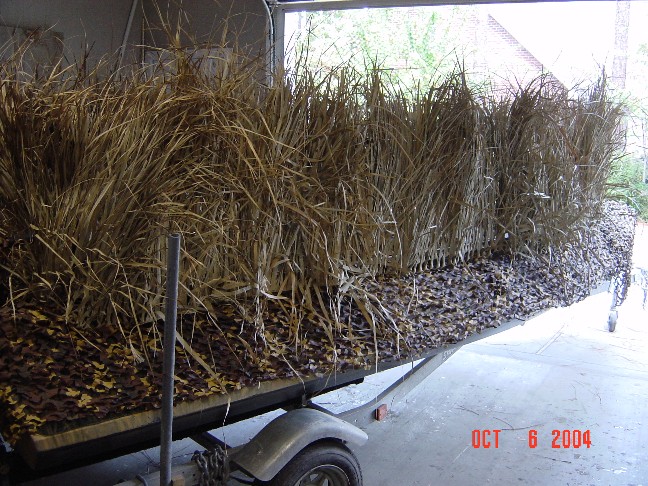
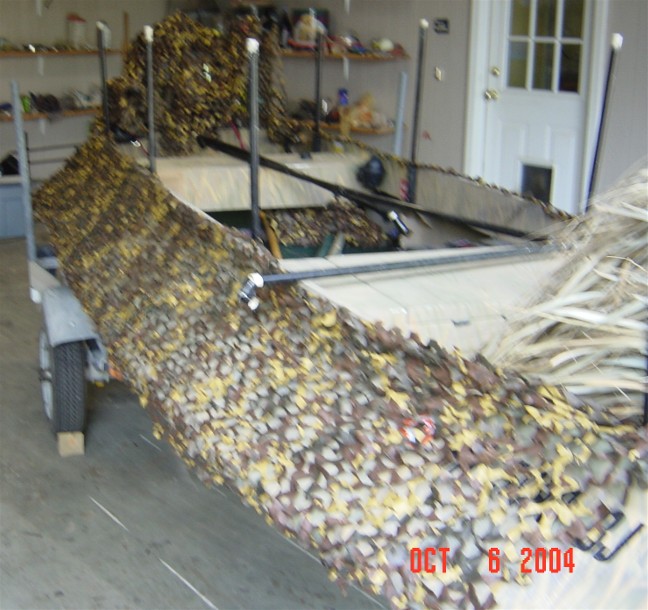
Here's what it looks like when you're finished.
EMAIL