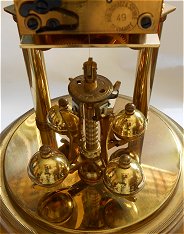
Three Schatz Clocks
Schatz 49 Anniversary Clock.
Schatz Royal Mariner Clock (1975).
Schatz Ship's Bell Clock (1980).
Click on the image below to view tips for setting up an anniversary clock.
 |
This page offers tips for servicing an anniversary clock. The gears are cleaned in clock cleaning solution, but the plates are cleaned by hand. Care is taken not to damage the clear lacquer coating on the plates. The mainspring is removed from the barrel using a mainspring winder. The mainspring is cleaned using trichloroethane (brake cleaner). It is often necessary to use steel wool (medium or coarse) to remove the hard "varnish" on the surface of the mainspring. Then you must inspect the mainspring very carefully to make sure no amount of steel wool is left on the mainspring. Cleaning the mainspring is one of the most important steps in servicing an anniversary clock and one of the most frequently overlooked! The mainspring should be inspected thoroughly for irregularities, such as uneven curvature or any hairline cracks along the edges. Any irregularities found should result in the replacement of the mainspring. Once it is cleaned and inspected, it is lubricated with moly-graphite grease along its entire length and reinstalled into the barrel using the mainspring winder.
 |
Place the back plate over the parts and insert the lower screws first. Insert the pivots into the bushing holes, one by one, working your way from the bottom up, using a pivot locator (see my page about clock tools on this website). Press down lightly on the back plate as you guide each pivot into place. If you press down hard, you could easily damage one or more of the smaller pivots.
 |
Here are front and rear views of the mechanism after assembly.
  |
You need to check the escapement. This particular clock has adjustable pallets, which is a major advantage. The lock on both sides should be the same. The drop on both sides should be the same. Anniversary clocks require more lock than a clock with an ordinary pendulum, such as a grandfather clock, so the lock should certainly not be adjusted to a minimum here. Check the lock and drop with each and every tooth of the escape wheel. Any irregularity means that the escape wheel should be replaced. I have seen several anniversary clocks with escape wheels that were not true. Do not attempt adjustments to the escapement if you do not know how to do this!
 |
The replacement of a damaged or twisted suspension spring is made much easier with the “400 day clock repair guide,” by Charles Terwilleger, a highly recommended book. It shows full-scale drawings of the suspension units, so that you can simply lay the parts on the page and assemble them to match the drawing designed for your particular clock. When the suspension unit is mounted, the pallet pin goes inside the suspension fork. The gap between the fork must be slightly more than the diameter of the pin, in order to allow for the movement of the pin from side to side (to prevent binding).
 |
The beat is adjusted with a beat adjustment tool, like the one below. You want the overswing to be equal on both sides. The overswing is the angle the pendulum turns after the pallet releases the escape tooth. You need to look at the escapement and the pendulum at the same time to see this.
 |
 |
If you repair many anniversary clocks, you will find that not all the drawings in the book are perfect. It may be necessary to adjust the height of the suspension fork, which affects the amplitude of oscillation of the pendulum. The amplitude for a full-size Schatz 49, like this one, should be a little less than 270º, or a little less than three quarters of a turn. Some of the miniature anniversary clocks have much greater amplitude, but some of the full-size clocks have less. If the fork is too high, the clock will run for a while and eventually stop. If the fork is too low, the escapement may occasionally flutter unexpectedly, causing the clock to gain time suddenly. It should be obvious by now that, despite the apparent simplicity of the anniversary clock, repairing one correctly actually requires a lot of practice!
 |
The bushings of the barrel and the first two gears should be lubricated with grease (before assembly). The bushings for the upper gears and the escapement should be lubricated with a light oil (after assembly).
Clock Repair Main Page
Escapements in Motion
Links Page
Tributes Page