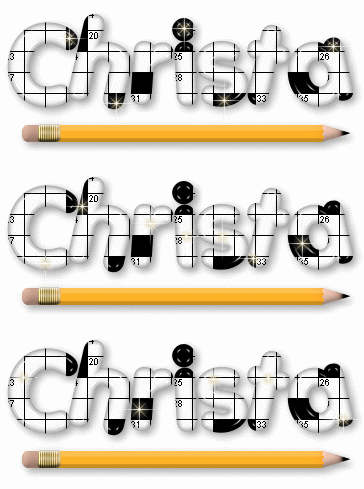
The Files you will need are found here:
Crossword Fill
Yellow Pencil
Sparkle
The Photo Shop Styles are found here Crossword Style
and need to be downloaded to the preset styles folder in Photo Shop 7. ***See bottom of page how to do this in Photo Shop 7***
1. Start with a new transparent canvas 400 X 400.
[*****Note: see below for outlined Crossword text.. I would suggest doing it both ways so that you learn the long way & the short way using already made materials]
2. Select Font / size 108 / B(old) and 3D Round selected. (example is Porky's which you can get here: www.fontseek.com )

3. Go to Fill Gallery in the EZ pallette and choose "background texture" >(right click of mouse) "Add Fill Thumbnail".

4. Select File (Crossword.psd file saved).
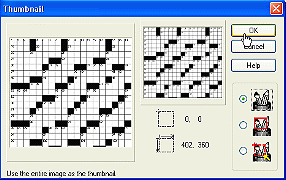
5. It then brings another window up. This is to add it to your EZ pallette.

Before clicking "Okay", Go to "sample name" and change the file name to just the extention "crossword.psd" by just using your mouse going to the name & the area right before Crossword clicking with the left button of the mouse & going to the left. Hit enter. the name should now just be crossword.psd. The gallery should be "my Gallery" and the tab group is your group under the custome group name. I have my tab as "Backgrounds". Now hit "okay".
6. Go to your EZ Pallette & choose your Background that you just made. Click on it & Voila! It has now filled your letters.

7. Go to your EZ pallette & locate your pencil. Place the pencil under the name. (resize pencil using transform tool with lock on.
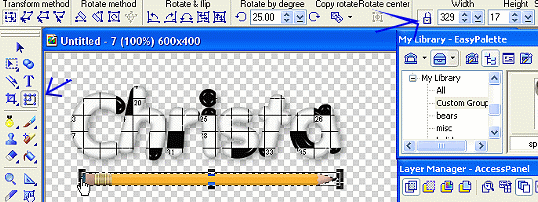
8. After resizing pencil, shadow it by going to OBJECT on your tool pallete & select Shadow. Make your selections as noted here:

9. Now crop image using the crop tool. (to the left of the transform tool).
10. Go to Edit > Duplicate (Base Image with Object) (do this twice so you now have 3).
11. Using a sparkle stamp (size 35) on each frame place sparkle on black or lines of crossword in different areas on each. (similar to this)

11. On Each frame (after sparkles are placed), "Merge all". Then save each one as a .ufo file. (ie: crosswordname1.ufo, crosswordname2.ufo, crosswordname3.ufo).
--------------------------------------------
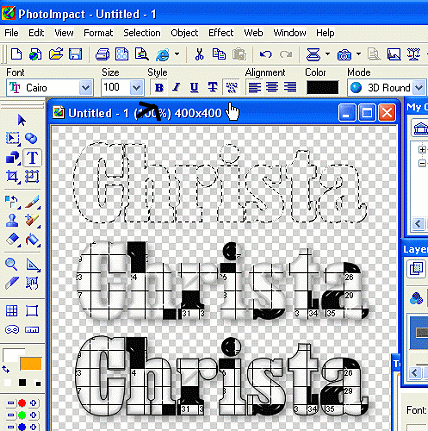
*****Note: if you want a black border to crossword text you need to do another layer using the speckled T on the text...This would be done in the beginning step 2 (skipping steps 2-6): [PI Crossword presets that I have made you can get here: christapicrosswords Just import them to your Material Gallery ]
2a. Choose your font... using the "speckled T" that is up on the top, also click on the "B" that will bold the text. choose the size & color as BLACK and 3D Round.
Type the name... that should give you the outside.
3a. Click on the Text tool (the one on the left) to do the name again. Now, make sure you unclick the "speckled T". (leave the "B" selected) Retype the name, and choose the material fill in your custom gallery from the EZ Pallete that you loaded the presets in. (the SMP gallery included)
4a. Now in your layer pallette, move the outline on top of the crossword filled name.
5a. Merge the two together, and then continue with step 7. See screenprint below for example)
--------------------------------------
On to the Animation:
12. Select SWITCH which is on the upper right of your screen (under the X button).
13. Choose ULEAD GIF ANIMATOR
14. This should bring up the "Startup Wizard" click on Animation Wizard. (otherwise go to File > Animation Wizard). Follow Wizard.. canvas size 400 X 400, select your files (crosswordname1.ufo, crosswordname2.ufo and crosswordname3.ufo) Speed set to 15.
15. Once it opens to the animation, go to Edit > Crop Canvas.
16. Go to View > Play Animation. If you like the speed it is at, then go to View >Stop Animation & then go to File >Save as a .gif You are done!

--------------------------------------------
Here is what it looks like in Photo Shop 7.
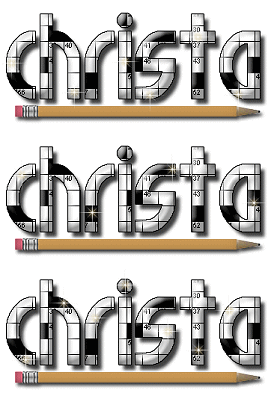
For Photo Shop I have developed styles for the crossword fill... Basically it is real easy... after loading styles, open up a new canvas 400 X 400 transparency. Choose Font. Type Name. Select Crossword Style. Next open the Yellow Pencil & place underneath. Go to edit free transform and scale to size. Merge. Crop to size wanted. Save as a .png file. Duplicate that frame twice & add sparkles. Merge & Resave each one as a .png file. For the animation I use an outside animation program as I am still in process of learning how to use the Photo Shop animation. The Photo Shop Styles are found here Crossword Style
and need to be downloaded to the preset styles folder in Photo Shop.
*******Tutorial is written & owned by ChristaFile79. It cannot be copied & posted under ANY circumstances. A link to this tutorial is acceptable & appreciated. *******