

The Files you will need are found here:
sandollar psd
scallop psd
starfish1 psd
Sparkle white psd
Beach Picture
1. Start with a transparent blank canvas 500 X 500.
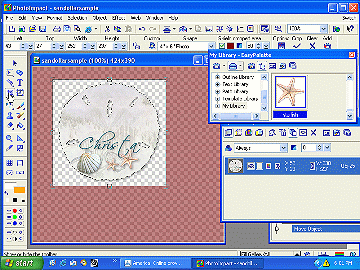
2. Select the Sandollar object, and place in center of the blank canvas.
3. With the shift key, do shift & D at the same time so that you will have an additional layer of the sandollar.. repeat so in your layer manager you have 3 sandollars.
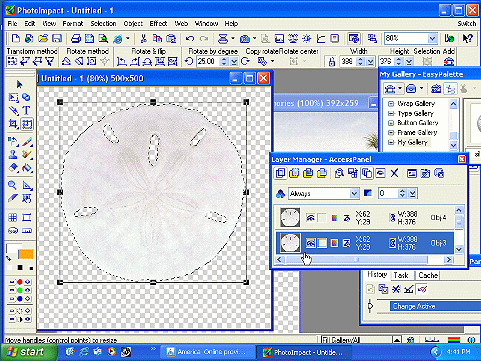
4. In your layer manager highlight the middle sandollar layer, click on sandollar.
5. With ants marching, while still on the middle sandollar layer of your canvas.. go to File>Open, choose a picture from your hardrive. (Any .jpg will do.)
You should now have two windows open.. the tag you are working on & the opened picture.
6. Go to the opened picture & Edit>Copy
7. Now go to the working canvas & go to Edit>Paste >Fit into selection.

Note: You can close the picture... we won't be needing it again.
8. Highlight the top layer in your layer manager (Sandollar only). Click on the arrow selector on the left. At the top of the screen should now be the transparency tool. Make the transparency 36.
9. Highlight the middle layer in your layer manager.. (the one with your picture in it). Again, Click on the arrow selector on the left. At the top of the screen use the transparency tool again. This time, make the transparency 31.

10. Go to Layers> Merge all visable.

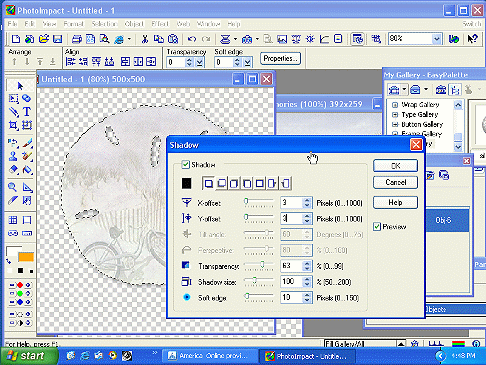
11. Go to Objects>Shadow.Color=black, Set as X offset = 3 ,Y offset =3, Transparency = 63, Shadow Size 100, Soft = 10
12. Using the font tool (A) choose font (sample is Scriptina), size = 60 select B (bold), 3D Round & color. Type name or text.
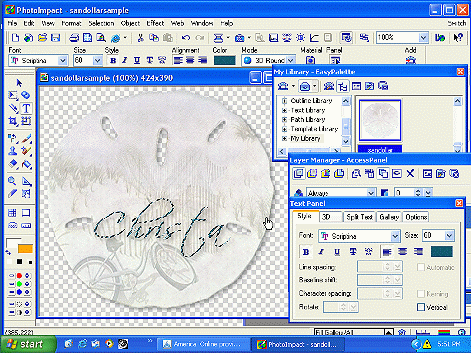
13. Shadow name using same settings as before. Using the Selector (arrow on the left) Place text where you want it.
14. Go to your EZ pallette selecting the Scallop object. Resize using the Transform tool (under the "T" on the left) to a size you like...

15. Using the selector (arrow) mover tool, place the scallop where you want it.. rotate it using the transformer tool .. I angled mine about 30 degrees to the right), note: if you rotate it you may want to sharpen it by going to Format > Focus choosing the upper right one.
16. Go to Objects>Shadow.(same settings as before)Color=black, Set as X offset = 3 ,Y offset =3, Transparency = 63, Shadow Size 100, Soft = 10
17. Go to your EZ pallette selecting the Starfish object. Resize using the Transform tool (under the "T" on the left) to a size you like...
18. Go to Objects>Shadow.(same settings as before)Color=black, Set as X offset = 3 ,Y offset =3, Transparency = 63, Shadow Size 100, Soft = 10
19. Using the selector (arrow) mover tool, place the starfish where you want it.
20. Go to Edit >Copy starfish. Then Edit paste as object...using transform tool, make 2nd starfish slightly smaller... again shadow as before & using the selector & move smaller starfish where you want that placed.
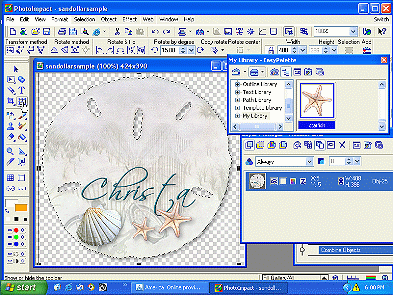
21. Go to Objects > Select all > Merge as a single object.
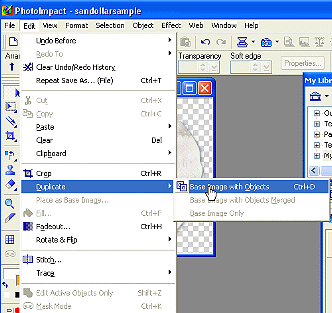
22. Crop to the size you want using the Crop tool which is to the left of the transform tool.
23. Once it is cropped, go to Edit >Duplicate >Base Objects. Do this twice so you now have 3.
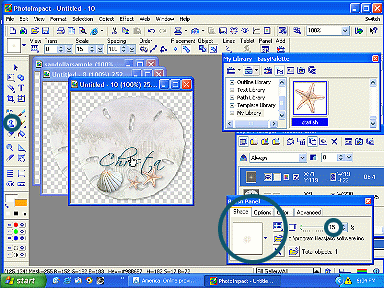
24. Using Sparkle Stamp - size 15-20 (or if it is an object you will need to resize sparkle to small)On each of the windows, place sparkles in different places on your name.
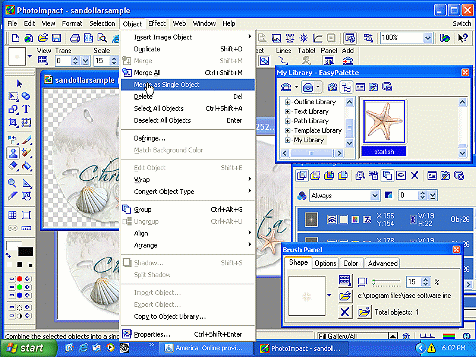
25. Once all sparkles are placed, on each of the frames, go to Object > Merge as a single object, then merge all.
Name/save each frame as a .ufo file on your hardrive.(ie :sandollar1.ufo, sandollar2.ufo, sandollar3.ufo)
On to Animation
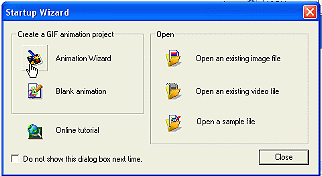
26. At the top Right of the screen is the word "SWITCH" Click on that & then select Ulead Gif Animator.

27. This should open the Animation Wizard. (If not, once in the gif animator, go to File>Animation Wizard)
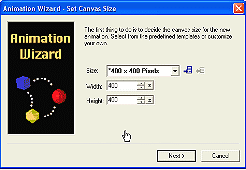
28. Follow the Wizard: Set Canvas Size 400 X 400 Click on Next
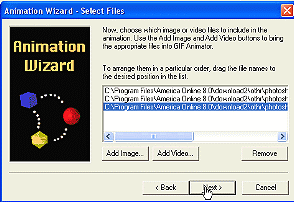
29. Add files from the hard drive (ie: sandollar1.ufo, add sandollar2.ufo, add sandollar3.ufo)
30. Set Speed at 20. Next
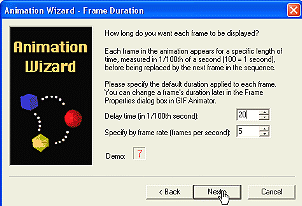
31. Next.. complete the wizard. This then opens in the frames in GIF Animator.
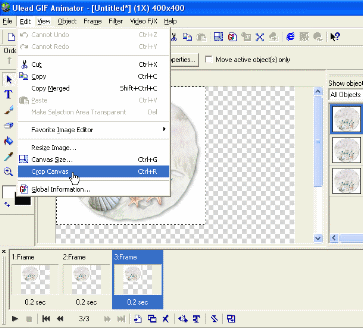
32. Go to Edit >Crop Canvas
33. Go to View > Play Animation
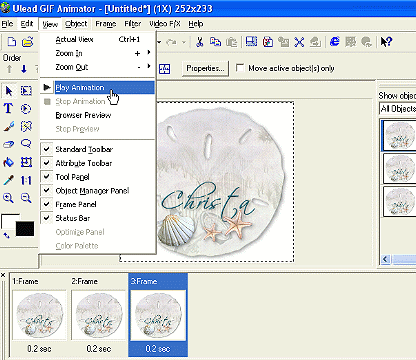
34. If it going at the speed you want it, Go to View >Stop Animation.
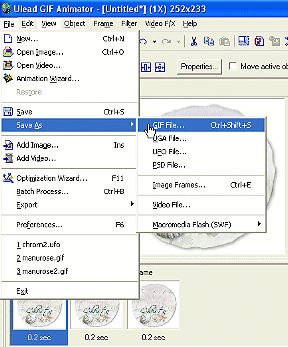
35.File > Save as Gif
Voila!!!
Resave file as .gif
------------------------------------ Tutorial for PSP 7/8 on "Back":
*******Tutorial is written & owned by ChristaFile79. It cannot be copied & posted under ANY circumstances. A link to this tutorial is acceptable & appreciated. *******
