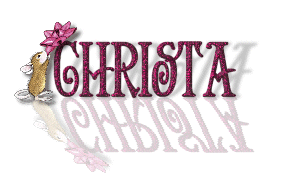
EZ Reflective tutorial with slanted shadow (By CFile)
1. Start with new blank canvas 400X400
2. Select Font tool (A) and click on center of blank canvas.
3. Select font style & write your text.
4. Use blade pro, effects etc to color the text the way you want it.
5. Click on layer icon, duplicate layer.
6. Add raster layer & add tube. Move tube to where you want it placed.
7. Move this layer with tube down one on layer pallete so it sits on layer 1. (X "copy of layer 1" so as not to include this when merging). Merge all visable layers (layer 1 & tube layer 2). X the merged layer in layer pallete so this will not be included.
8. Un "X" copy of layer 1. on slider where it says "normal" in layer pallette click, on dropdown arrow. select "dodge" this should turn text black.
9. Use slider & slide to 22 or 30 depending how dark you want "shadow".
10. Go to Effects>Geometric>skew. Horizontal set at 25, Vertical at 0.
11. (Optional) at this point if you wish you can go to effects > Blur > Blur more.. I opted not to do this.
12. Using Deformation tool (tool under magnifyer) move from center up a little & then over to the right. Lining up the slant to the way you want it.
13. Un "x" merged layer on layer pallette. make sure your shadow layer is lined up properly.
14. If it is how you want it you can save here as a gif or if you want to add the additional reflection down, then duplicate merge layer & flip. Line up upside down layer to rightside up layer.
15. On the upsidedown image layer, use slider on layer pallette & slide to 22 or 30 depending how dark you want "flipped reflection".
16. Go to Effects>Geometric>skew. Horizontal set at -25, Vertical at 0.
17. Merge all visable layers. crop /resize if you want & save as gif.
--------------------
*******Tutorial is written & owned by ChristaFile79. It cannot be copied & posted under ANY circumstances. A link to this tutorial is acceptable & appreciated. *******