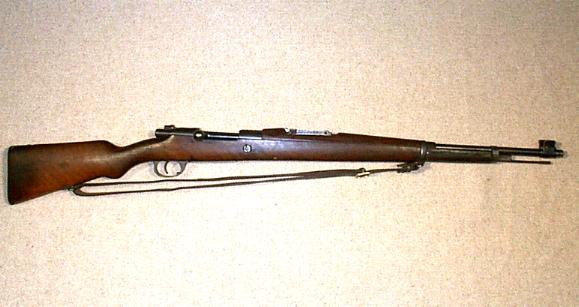
Site hosted by Angelfire.com: Build your free website today!

MAUSER VERGUEIRO MODEL 1904/39
CAL. 8x57 mm .


Caliber: 8x57 mm
System of operation: Bolt action
Length overall: inches
Barrel length: 23.5 inches
Feed device: Internal box magazine
Sight:Front: Blade with protecting ears
Sight:Rear: Tangent-Leaf sight
Weight: lb
Muzzle velocity: f.p.s.


Close-up of the 1904/39 action.


Close-up of the split bridge receiver on the 1904/39 action.


Close-up the the rearsight.


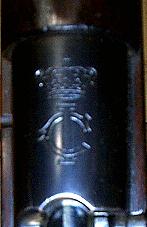
Markings on the 1904/39 receiver.


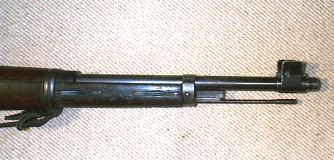
The barrel, cleaning rod and forestock of the 1904/39 rifle.


Bolt Disassembly:


1) Take the bolt out of the rifle with the safety in the OFF position. (You cannot take it out with the safety in the ON position like a Mauser). The slotted lugs ---one on the bolt body and one on the bolt head--- are aligned with each other.
2. Hook your trigger finger around the safety to control forward movement under HEAVY spring pressure, and rotate the bolt knob 90 degrees to the left to UNCOCK it.It will move forward about 3/8 in./10mm. The bolt head will rotate 90 degrees with it, and the bolt head stops pointing AWAY from the bolt handle.
3. Rotate the bolt head 90 deg. MORE, lining the slotted lug up with the unslotted lug on the bolt body. That movement disconnects the firing pin from the bolt knob. Pull the bolt knob off. The safety comes with it, is loose, and can be easily removed --- or fall off and be lost. Be careful!
4. Prepare to hold the bolt head IN against the strong spring pressure. Rotate it BACK 180 deg. to align the two slotted lugs again. Then rotate it BACK a FURTHER 90 deg. As the slotted lug comes to the position where it lines up with the bolt handle, the bolt head will come out --- bringing the firing pin and the firing pin spring with it--- at high speed, if you are not ready for it!
5. Pull the bolt head off the firing pin, and the firing pin and its spring out of the bolt body. Note the ''key'' on the firing pin flat --- it will only mate with the bolt head in ONE way. Remove the spring from the firing pin. Bolt disassembly is now complete.

Bolt Reassembly:


1. Insert the firing pin into the firing pin spring, and into the bolt head. The firing pin will only go into the bolt head one way, so no error is possible.
2. Insert the assembly into the bolt body, and line up the slotted lug with the bolt handle. Compress the spring to insert the bolt head all the way into the bolt body.
3. Rotate the bolt head 90 deg. to line up the bolt head and the bolt body slotted lugs, then rotate it a FURTHER 180 deg. to line up with the UNSLOTTED lug. 4. Rotate the safety to the OFF position, and push the bolt knob back onto the rear end of the bolt, and hold it in that position.
5. Rotate the bolt head 90 deg. so its slotted lug is pointing AWAY from the bolt handle. Now comes the tricky bit!
6.Grasp the bolt head in your LEFT hand, and the bolt knob in your RIGHT hand, with the bolt handle pointing DOWN.
7. Go to the table and move your WRTISTS so that the bolt handle is sticking out to your FRONT. Hook the bolt knob on the edge of the table.
8. In this step the bolt knob will be sliding up a steep ramp toward becoming cocked, so considerable force is required. PREVENTING the bolt body from rotating by holding the bolt knob in its position on the table, rotate BOTH the bolt head and bolt knob 90 deg. by moving your wrists toward the table. SNAP!
9. The bolt is now cocked ---with the slotted lugs lined up with each other--- and ready to reinsert into the rifle.

Back to mainpage.


This page hosted by Get your own Free Home Page