A set of 15mm Ancient Galley game rules
RAMMING SPEED!
Sequence of Play
1.0 The game uses written orders and all operations are conducted simultaneously by all players. To help regulate play each turn is broken down into a series of phases. Each phase must be completed by all players before any player moves on to the next phase.
1.1 Sequence of events.
Writing Orders
2.0 Orders are used to regulate movement. A sample order sheet is included in appendix B. Depending on speed, a ship may have as many as 24 moves in a single turn (one move for each inch of movement). The captain of the ship needs to record the action of the ship for each move and keep a running total of energy used during the turn.
2.1 Three orders are allowed; right (R), left (L) and straight (S). A fresh ship moving at cruising speed might have an order such as: SSSSSSSSRRRRSSS. This would indicate the ship is to move the first 8" of the turn straight, then turn 4" (along the circumference of the appropriate turning circle) to the right, and then finish up the turn by travelling 3 more inches straight along the new heading.
Sailing
3.0 Ancient war galleys were not sailing ships in the true sense of the word and in battle their sailing gear was often left ashore, or at least stowed away. Nevertheless sails can be used in an action for conserving oarsmen's strength or allowing crippled ships to break off action.
3.1 At the beginning of the game, randomly determine wind direction and strength. Using a D6 wind speed will be: 1 = calm; 2, 3, or 4 = light breeze, and 5 or 6 = breeze. Throw the D6 every fifth turn thereafter. A roll of a 5 will indicate that wind speed has changed. A roll of 6 will indicate that wind speed and direction have changed. Reroll then for wind speed and/or direction.
3.2 With the wind behind the galley and within 45 degrees of the center line of a ship, that ship may move 18" in a breeze and 12" in a light breeze. With the wind between 45 degrees and 90 degrees of a ship's center line, that galley may move 12" in a breeze and 8" in a light breeze. Under no conditions may a galley go closer than 90 degrees to the wind with its sail up.
3.3 The actual speed of a ship under sail will also be affected by damage to the hull, but this is dealt with under ramming (section 9).
3.4 The sail may be raised or lowered in two moves by two men, one of whom must be a sailor. If no sailor is available to take charge of the operation two other men can muddle through in three moves. The sail has no effect until it is fully hoisted and its effect does not cease until it is completely lowered and stowed away.
Example: A player orders his sail lowered on turn 5. The order takes effect during the maintenance phase of that turn. During the maintenance phase of turn 7 the sail is finally lowered. The ship has moved its full distance under sail during both tums 6 and 7.
3.5 If a ship rams or is rammed while its sail is up, the sail and mast will come crashing down on it's deck, permanently destroying the sail and holing the ship, causing it to take one load of water immediately and one load every turn thereafter until the hole is plugged.
Movement under oars
4.0 Although it was usual for oarsmen aboard galleys in pre-Roman times to be freemen, for game purposes we will declare all rowing crews to be slaves, shackled and manacled. This means that the opinions and loyalties of the oarsmen can be conveniently ignored when prizes are taken; our boarding actions are thus saved the complications of rowers springing to the defense of the ship.
Energy
5.0 Movement at greater than slow speed requires the expenditure of energy by the rowers. At the beginning of the battle determine how fresh the crews are. Fresh crew - 12 energy points Tired crew - 8 points Fatigued crew - 4 points Exhausted crew - 0 points
5.1 Energy points are deducted for every movement phase in which a galley moves at more than slow speed. It costs one energy point per turn to move at cruising speed and two energy points per turn to move at ramming speed.
5.2 When a crew's energy is exhausted the ship can move no faster than slow speed for the remainder of the game.
Speed
6.0 Speed may only change by one 'speed band' per movement phase, except, of course, when the galley is brought to a sudden and violent halt by ramming or being rammed. Speed bands are: Backing water (at slow speed - required to remove a ram from a ship) Hove-to (i.e., stationary) Slow speed Cruising speed Ramming speed Example: Ifa vessel has just backed water, perhaps to withdraw its ram from a foe, and now wishes to move forward at cruising speed the sequence will be: next move stationary, second move slow speed forward, third move cruising speed forward.
6.1 The maximum distance which a galley can move in each speed band will be reduced as oar sections are lost through archery fire, oar raking or exhaustion. The number of oar sections to count, if the complement is not complete, is the number on the side with the least oars.
6.2 Oars can be redistributed from one side of a ship to the other during the maintenance phase of each turn. Oars cannot be exchanged between ships during a battle.
6.3 Speed table
| Movement: | ||||||||||
| Speed | 5 | 4 | 3 | 2 | 1 | |||||
| Slow/Back water | 9" | 6" | 3" | -- | -- | |||||
| Cruising | 15" | 9" | 6" | 3" | -- | |||||
| Ramming | 24" | 15" | 9" | 6" | 3" | |||||
You MUST move full speed for each "speed band" which you are in
Turning
7.0 Galleys moving at slow speed, or backing water, are assumed to be coordinating the oars with the rudder and so may turn on circle A. At cruising speed the galleys turn on circle B, and at ramming speed they turn on circle C.
7.1 All this assumes a sailor is at the helm, but if for any reason someone else has taken the helm the turn will be one grade larger. If both rudders are destroyed and turning is by oars alone a circle two grades larger will be used. A vessel under sail will turn on circle D.
Phased moves
8.0 When one galley is being moved up to ram or board another galley, it is usual to have the two ships move by phases. All this means is that instead of moving those two vessels their full distance at one go, they are moved alternately at the rate of a third, or a sixth, of their move until contact is made or the whole move is used up.
Oar raking
9.0 Oar raking takes place when one galley attacks another at a shallow angle so that the attacker's bow scrapes along the other ship's side, smashing its oars. When the two ships come into contact they are moved, by phases, the whole distance of the move. The attacker smashes all those oars with which his bow has come into contact within a half inch of their rowlocks� If contact occurs more than a half inch from the rowlocks the oars are assumed to give without breaking.
9.1 As there is no easy way to tell the difference between a shallow angle ram and an oar rake, a player must announce at the beginning of the turn if he is going to attempt an oar rake. If he contacts the side of an enemy ship between 0 degrees and 30 degrees, an oar rake is assumed to have taken place instead of a ram.
Ramming
10.0 To be successful, ramming attacks should be made at a more nearly perpendicular angle to the victim's broadside. The attacker and the victim are phase moved until the ram strikes.
10.1 If the ram hits amongst the oars, one section is destroyed, whatever other damage is done. If it hits in the rear, the rudder on that side is destroyed.
10.2 When a ram has occurred the angle of attack and the speed of the rammer are noted and then two average dice are thrown to determine the effect:
11 The victim is cut in half and sinks instantly
10 Victim holed and ships four loads of water
9 Victim holed and ships three loads of water
8 Victim holed and ships two loads of water
6-7 Victim holed and ships one load of water
1-5 No effect
Ramming modifiers
10�3 Add one if the rammer is moving at ramming speed Subtract one if the rammer is moving at slow speed � Subtract one if the attack is made between 60 and 30 degrees Subtract two if the attack is made between 0 and 30 degrees
10.4 When a galley has been rammed it will ship the listed loads of water immediately.
10.5 During the maintenance phase of each turn the crew can attempt to plug the hole. If a sailor is available to make the attempt, the hole will be plugged on a roll of 5 or 6 on a D6. Anyone else attempting to plug the hole will succeed only on a roll of 6. Only one attempt to plug the hole per turn is permitted.
10.6 A holed ship will continue to take one load of water at the end of each maintenance phase until the hole is plugged or the ship takes a total of five loads of water, at which point it will sink. Example: A ship is rammed and takes two loads of water� During the maintenance phase the crew successfully plugs the hole so the ship takes no more water� If the crew had failed to plug the hole the ship would begin the next turn with three loads of water.
10.7 A holed and waterlogged ship will lose a quarter of its move for every load of water that it has aboard, whether under oars or sail. Therefore a galley which has plugged its hole in the nick of time but has four loads of water in it will remain dead in the water.
Supporting a sinking ship
11.0 Two ships, one on either side, grappled to a sinking ship can support it indefinitely. One sound ship grappled to one that is holed will give support until the damaged ship has taken seven loads of water at which point it will go under and drag the other ship with it.
11.1 The crew of the supporting ship will have one last opportunity to try to cut ALL the grappling lines connecting the ships before the healthy ship is dragged under.
Abandoning ship
12.0 Although a galley is sinking there is still a chance of saving the crew. For each man in the water throw a D6 to see what happens to him: 4, 5 or 6, they can swim; 1,2 or 3, they drown.
12.1 Swimmers can move at 2 inches per turn for 12 turns during which time they can save themselves by. reaching shore or reaching a friendly ship which must be stopped in order to pick them up.
12.2 Swimmers are naturally assumed to have abandoned their weapons and armor and so may not fight after being rescued, but they may, after recovering for one turn, assist in steering, plugging holes, handling sails and so on.
Moving aboard ship
13.0 During the maintenance phase men may be freely placed anywhere on their ship.
13.1 Men may also move from one area of the ship to an adjacent area in each of the two melee rounds per turn. For instance a man in the rear would be able to move to the center in one melee round, and then to the bow in the second round. Men can engage in combat on the round they arrive. It takes one melee round to enter or leave a tower.
13.2 Each of the three areas of the ship (front, middle and rear) can hold no more than five figures each. Towem do not affect this rule. If the tower is in the middle, for instance, you can have two men in the tower and then no more than three on that section of deck. This rule does not apply to combat. During boarding you could have as many as five men from each side in one section of the ship.
Grappling
14.0 When any ship comes within 2 inches of another, any man, (except captains and admirals) not otherwise engaged, may throw a grappling line a maximum distance of 2 inches. For each line throw a D6: 3, 4, 5 or 6 means the hook has caught; I or 2 means that it has not held.
14.1 Two lines are needed to hold a ship; if only one line connects the ships it will snap if either of the ships is moving. Grappled ships will draw together and boarding may take place.
14.2 During the maintenance phase unengaged men aboard the grappled ship may attempt to cut the lines. Throw a D6: a roll of 4, 5 or 6 means the line is cut; 1,2 or 3 means the attempt failed. Once the two ships have been drawn together all lines must be cut to free the ship.
14.3 Throwing grapples and cutting grapples takes no time. Therefore if there are four men in the front of a ship who throw grapples all four can then take part in boarding if enough grapples hold.
14.4 Cutting grapples is automatic if your crew controls both sides of the grapple (that is to say, you are on both ships). You cannot even attempt to cut the grapples if you can't reach them (for instance your ship was grappled in the rear. An ongoing melee is in progress and the rear of the ship is still contested). If a player is trying to cut the grapples supporting a sinking ship it is assumed that the other ship is already sinking and that player no longer controls both ships.
14.5 A corvus, when dropped on to an enemy's deck, automatically locks the two ships together and boarding can take place.
Boarding
15.0 The side successfully grappling the enemy ship has the first option to board. If the player chooses not to board then the other player has the option to attempt boarding.
15.1 Captains, marines, archers and admirals may take part in boarding operations. Sailore must remain on their own ships unless the intention is to abandon the galley.
Hand to hand fighting
16.0 All hand to hand fighting is carried out, as far as possible, as a number of duels between men of equal rank and number. Naturally, the numbers taking part or the circumstances of the fight, will not always allow opponents to be paired off so neatly. Greater numbers or unequal match-ups are in such cases allowed. It should always be ensured, in two-to-one fights, that the second man can actually come to grips with the opponent; there will be circumstances, say when defending a tower or the central gangway, when the narrowness of the approach prevents more than ene attacker from taking part.
16.1 In a normal duel, that is, one man against one similarly equipped man, roll one D6 for each man; if one side gets a two-point advantage (e.g., 5 to 3) or greater, he kills his opponent; a one-point advantage or less means that the fight is a draw for this round.
16.2 When a duel takes place between two men of unequal equipment or rank, the superior man adds 1 to his die roll, but he adds only 1 however many degrees of superiority he has over his opponent.
16.3 For combat purposes use the following rank list to determine superiority: Admirals, captains, marines, archers, artillery men, sailors.
16.4 Where a fight consists of one man fighting two or more, add 1 to the die roll of the side with the greatest number.
16.5 The combat die roll can never be modified by more than 1. Examples: an archer fighting a sailor will add 1 to his die; a marine fighting an archer will add I to his die, but so will an admiral only add I to his die if he condescends to fight a sailor. If two marines fight one marine they add I to their die roll. If two marines fight one sailor they still will only add I even though this is the same advantage one marine would have. If two archers, say, attack a captain they will add I for being two against one, but the captain will add I for being of higher rank, so the battle will be even. An admiral, who is assisted, fighting another admiral will add 1, even if his assistance is only from a lowly sailor.
16.6 In duels of two or more against one the loser gets to choose which figure is removed.
16.7 Combat is limited to three men abreast in the bow and stern and one man abreast in the middle. If there are more than three men in the contested area each player puts forward the three hewants to fight, regardless of whether a man Was engaged last round or not. Combat match-ups should be by mutual consent. If consent cannot be worked out then the boarding force determines the match-ups (as long as they do not violate 16.0)
16.8 Men defending from a tower are automatically at a plus 1 in combat no matter who or how many men are attacking them. Men in a tower can be (and usually are) ignored and bypassed by boarders.
16.7 Two melee rounds of hand-to-hand fighting will take place each turn until the ship is captured or the boardere retreat to their own ship. Between rounds men may be moved about the ship to attack new men or reinforce melees (see 13.1)
Repelling boarders and surrendering the ship
17.0 During the first turn (two melee rounds) the hand-to-hand fighting is assumed to be so intense that neither side is giving any thought to defeat. At the end of the second and all subsequent turns the combatants begin to examine the circumstances under which they are fighting and may decide either to give up the ship or abandon the. boarding enterprise.
17.1 To determine the state of the troops' morale, count the number of men and the inspiration and leadership of the officers. Count each man aboard the fought-over ship as one point, except captains, who count as two points, and admirals, who count as three points. The boardere will retreat to their own ship if they are outnumbered by three to two if an officer is with them. If no officer is leading them they will retreat if outnumbered by any amount. The defenders will surrender the ship if they are outnumbered by two to one. Example: Five Roman marines and their captain are battling away aboard the Greek flagship which is defended by two marines, two archers, two sailors, the captain and the admiral. The Roman force is arguably more likely to win a fight to the death, but if we count the point value we will see that the determined leadershipof Greek officers is paramount. The Romans have five men worth one point each and a captain worth two points; the Greeks have six men worth one point each, a captain worth two points and an admiral worth three points. 7 points against 11, the Romans must retreat.
17.2 Men who abandon a boarding attempt return to their own ship immediately regardless of how many deck sections they must cross to do so.
Archery
18.0 All archers may fire once per turn during the Range Fire phase. All range fire is simultaneous, so even if an archer is hit and killed during a turn, he still gets his shot for that turn.
18.1 The maximum range of a bow is 18 inches measured from the head of the archer to the closest part of the enemy ship. Up to 6 inches is short range and above that is long range. Throw one D6 per man shooting; 6 is a hit at long range and a 5 or 6 is a hit at short range.
18.2 At long range it is assumed that the archer has simply aimed at the galley and fired and the arrow may hit anyone aboard. Throw a D6 for every long range hit; 1 or 2 means a hit on the bow section, 3 or 4 amidships, and 5 or 6 stern. Having decided where the hit was scored, number each man in that section and throw another die to determine which one was hit. When hits are made amidships two additional numbers are included to represent the port and starboard oarsmen.
18.3 At short range arch'ers, provided they are firing at the more or less broadside of a ship, may select the area to fire on. If the target is presented end-on archers at deck height must fire at the nearest part of the ship. Archers in towers may still choose the part of the ship they fire at.
18.4 Archers in towers may, at short.range, pick out the particular man they wish to kill, e.g., the admiral, or the helmsman, but a 6 is needed on the die to hit.
18.5 All archers are assumed to be great shots and they can fire into ongoing melees and they will only hit enemy troops. (Just as an aside, while you cannot shoot your own men you can ram your own ship by accident.)
18.6 That a man has been hit does not necessarily mean that he is killed. Bows were weak in those days and armor and shields common. For each man hit throw a D6; 1,2, 3 or 4 and the man is dead; 5 or 6, he is wounded. Men wearing armor subtract one from the die roll and are therefore wounded on a roll of 4, 5 or 6. Marines, captains and admirals are assumed to be wearing armor.
18.7 Wounded men are out of action for one full turn and are assumed to be fully recovered at the end of the maintenance phase on the turn after the one during wihich they were shot. While they are wounded, men can take no action of any kind and are assumed to be automatically killed or captured if the enemy ever gains total control of the section of the ship they are in. Wounded men who are hit by bow fire again are automatically killed.
18.8 If an oar section is hit, roll a D6 to determine the results; 1 or 2, men dead, remove one oar; 3 or 4, half the men dead, remove one section if that side of the ship is hit a second time; 5 or 6, no effect.
Bolt-throwing engines
19.0 These engines, or ballista, were like giant crossbows. Treat them like archers except they only fire once every othermove if operated by a normal two-man crew, or every third turn if operated by one man.
19.1 Maximum range for ballista is 24 inches measured from the center of the engine to the nearest point of the target. Short range is 0 inches to 8 inches requiring a D6 roll of 4, 5 or 6 to hit; medium range is 8 inches to 16 inches and requires a 5 or 6 to hit, and long range is over 16 inches and requires a 6 to hit.
19.2 Ballista bolts are far more formidable than an ordinary arrow and all hits are automatic kills. Armor provides no protection from ballista fire. Oar section hits are treated the same as if hit by archers, though.
19.3 Ballista, catapults, boarding bridges, etc. are "nailed" to the deck and cannot be moved from one ship to another.
Stone-throwing engines
20.0 Maximum range for a catapult is 18 inches. Up to 9 inches is short range requiring a D6 roll of 5 or 6 to hit; over 9 inches is long range requiring a 6 to hit.
20.1 For each hit roll a D6:1 or 2, no effect; 3, one man killed aft; 4, one man killed forward; 5 one oar section destroyed, and 6, galley holed and has taken one load of water (treat as if rammed and attempt to plug the hole during maintenance).
20.2 Stone throwers may fire once in three moves with a normal two-man crew, or once in four moves with one man.
Boarding Bridges
21.0 To compensate for their, lack of seamanship the Romans developed the corvus, or boarding bridge, which was a long bridge, usually secured upright along the mast with a massive iron spike in its tip. When the enemy was within range the corvus would be dropped onto the enemy ship with the spike smashing through the deck, locking the two ships together. Marines would then pour across the bridge to capture the enemy ship.
21.1 During the grapling phase ships equippped with corvii can drop them onto neighboring ships within 2 inches. The attack is automatically successful and boarding can commence.
21.2 Corvii cannot be cut like grappling lines. The two ships will remain locked together until one side controls both ships. At this point the player can remove the corvus by announcing his intention to do so during the maintenance phase. The bridge is removed during the following turn's maintenance phase and is considered destroyed in the process.
Morale
22.0 When the captain of a galley is killed it is likely to affect the morale of the crew; he was, after all, not only the virtual owner of the ship but also the employer and paymaster of the crew. When he is killed roll a D6: 1, galley withdraws from action; 2, 3 or 4, galley carries on; 5 or 6, new captain is elected.
22.1 When a new captain is elected it means that the second in command is sufficiently authoritative to step into the dead man's shoes. Nominate one of the remaining men as the new captain.
22.2 If the crew elects a new captain, that man becomes a captain in all respects --combat effectiveness, leadership bonus, etc.; but he loses all his old skills (for instance he is no longer an archer or a sailor if that was his old rank.)
22.3 Admirals outrank captains. If the captain of the admiral's flagship is killed you do not make any morale checks on the crew of that ship and you do not elect a new captain. If the admiral is killed and the captain is still alive, he takes command of the ship. If the captain has been killed, roll to see how the ship will react (22.0). If a new captain is elected the man becomes a captain, not a new admiral.
22.4 The result of 'galley carries on' means the galley continues fighting until its complement of men is reduced to half, at which time it will withdraw.
22.5 When a galley withdraws from action it will return in the direction from which it came, or out to sea, by the shortest or easiest route. It may not ram or board an enemy while retiring, but it may fire range weapons and defend itself if attacked.
22.6 If the admiral is killed it is likely that the fleet would not get to know of this until after the battle, but if his flagship is sunk or captured the effect of this on the rest of the ships could be disastrous. Throw a D6 for the ship nearest the sunken or captured flagship: 1 or 2, withdraw; 3 or 4, Ships with captains (original or elected) carry on fighting, others withdraw; 5 or 6, carry on fighting.
22.7 Repeat this process for all the other ships in the fleet moving out from the flagship but add 1 to the die if the previous ship's die throw allowed it to stay.
Accidental Ramming
23.0 When a ship is sunk it is removed from the game and replaced by a 'wreckage' marker occupying approximately half the area occupied by the sunken ship. This represents the still floating hull of the ship and the assorted wreckage such as oars, masts, etc.
23.1 Any ship that contacts the wreckage is treated as if it were rammed. Roll two averaging dice and subtract two from the number, then consult the ramming chart and apply any required damage.
23.2 Apply the same procedure if a ship accidentally contacts the shoreline.
23.3 If you accidentally ram one of your own ships follow normal ramming procedures.
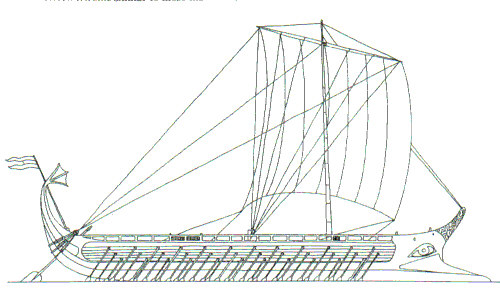
The Greek trireme above is similar to those that might have fought at the Battle of Salamis in 480 B.C. The Greek admiral Themistocles commanded 380 such ships at this decisive battle against the Persians for control of the Mediterranean.
go to Playsheet for Ramming Speed
go to Log Sheet for Ramming Speed
Return to the Jackson Gamers' Home Rules
Return to the Jackson Gamers' Homepage
Angelfire - Free Home Pages
Free Web Building Help
Angelfire HTML Library
htmlGEAR - free polls, guestbooks, and more!
Thank you for visiting The Jackson Gamers' pages at Angelfire. Please come back and visit again!